Okay, full disclosure time, friends. The very first time I tried baking bread all by myself? Disaster. Capital D. I think it might still be holding a door open somewhere. Seriously, it was dense. But even that spectacular fail couldn’t shake the dream: pulling a gorgeous, warm, actually edible loaf of bread out of my own oven. That dream turned into a bit of a quest, you could say. I became obsessed with finding the perfect, easy-peasy brown bread recipe. Lots of testing happened (bless my family for eating all the experiments!), lots of flour dusting, and finally… this recipe. It’s just right – hearty, a tiny bit sweet, super comforting, and honestly? Pretty hard to mess up. The smell alone when it’s baking? Pure magic. Forget fancy bakeries, this is the brown bread recipe that makes me feel like a baking rockstar, and I really think you’re gonna love it too.
What You’ll Need: Let’s Raid the Pantry!
Alright, let’s get our ducks in a row for this yummy brown bread recipe. I always feel like a proper baker when I line everything up first! Grab these things:
- Warm Water: About 1 ½ cups (360ml). Needs to be cozy warm, like testing a baby bottle on your wrist (around 105-115°F / 40-45°C). Too hot kills the yeast, too cold makes ’em sluggish! Can I swap? Sure, warm milk makes it a bit richer, but water is honestly perfect.
- Active Dry Yeast: One little packet (that’s 2 ¼ tsp or 7g). These guys are the magic! Check the date – old yeast = sad, flat bread.
- Molasses: ¼ cup (60ml). This is the secret to that classic brown bread colour and deep, caramelly taste. What if I don’t have it? Honey or maple syrup can step in, but the flavour will be different. Skip the corn syrup if you can.
- Melted Butter: 2 tablespoons (30g). For flavour and a tender crumb. Any subs? Yep, melted coconut oil or a plain veggie oil works just fine.
- Salt: 1 ½ teaspoons (9g). Super important! It’s not just for flavour; it helps control the yeast so it doesn’t go wild. Don’t leave it out!
- Whole Wheat Flour: 2 ½ cups (around 300g). The heart and soul of our brown bread recipe! Gives it that lovely nutty taste and texture. Stone-ground is fab if you see it!
- All-Purpose Flour (or Bread Flour): 1 to 1 ½ cups (roughly 120g-180g), plus extra for dusting. This lightens things up so it’s not too heavy. Bread flour gives it more chew. Start with 1 cup; you can always add a smidge more if your dough is super sticky later.
- (Totally Optional) Rolled Oats or Seeds: A little sprinkle on top before baking looks pretty and adds a nice crunch. Oats, sunflower, pumpkin seeds – go wild!
How Long Does This Take? (Spoiler: Mostly Waiting Time!)
Okay, let’s talk timing for this brown bread recipe. Don’t let the total time scare you – most of it is just letting the dough do its thing while you chill!
- Mixing & Kneading: 15-20 minutes tops. This is where you get your hands dirty (or let the mixer do the work). Crank up some tunes!
- First Rise: 60-90 minutes. Time for the yeasties to party and puff up the dough. Find a cozy, non-drafty spot. Perfect time to grab a coffee, answer some emails, or, you know, stare lovingly at the rising dough. It should get about twice as big.
- Shaping & Second Rise: About 10 mins for shaping (weirdly fun punching it down!) + 30-45 minutes for the second rise. Get it in the pan, let it get puffy again.
- Baking: 30-40 minutes. Prepare for your kitchen to smell like actual heaven.
- Cooling: At least 30 mins, but an hour is better. THIS IS CRUCIAL! I know, it’s torture waiting, but slicing hot bread makes it gummy. Trust me.
The Grand Total: You’re looking at around 2.5 to 3.5 hours from start to sniffing that cool loaf. But the actual work? Maybe 30 minutes! Way faster than you’d think for amazing homemade bread, right? Definitely quicker than some fancy sourdough adventures!
Okay, Let’s Bake! Your Step-by-Step Guide to Brown Bread Glory
Ready to transform that pile of ingredients into an amazing loaf? Let’s do this! Just follow along, it’s gonna be great. This brown bread recipe is super forgiving.
Step 1: Get the Yeast Going
Grab a big bowl (or your stand mixer bowl). Pour in the warm water, then sprinkle the yeast over top. Give it a tiny stir. Now, leave it alone for 5-10 minutes. You’re looking for it to get foamy or creamy-looking. That foam means “Woohoo, the yeast is alive!” No foam? Uh oh. Your yeast might be dead, or the water was too hot/cold. Best bet is to toss it and start again with fresh yeast. Bummer, but better than a flat loaf!
Step 2: Mix in the Good Stuff
Once your yeast looks happy and bubbly, stir in the molasses, melted butter, and salt. Mix it up until that molasses isn’t just sitting in blobs. Mmm, smells good already, right?
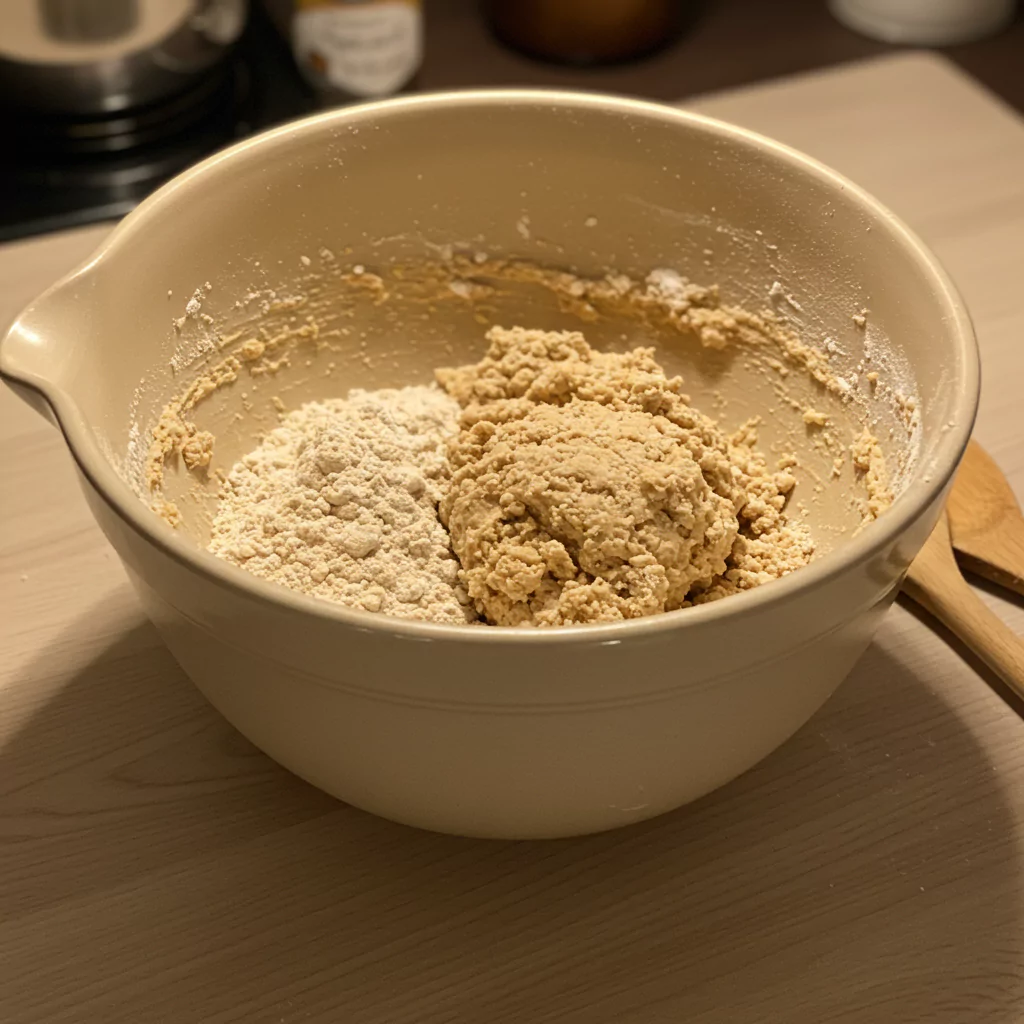
Step 3: Flour Power!
Dump in the 2 ½ cups of whole wheat flour and just 1 cup of the all-purpose/bread flour for now. Use a sturdy spoon (or the dough hook on low) to mix everything until it comes together into a shaggy, kinda messy ball. Totally normal!
Step 4: Knead It ‘Til You Make It!
Flour your counter lightly. Plop the dough onto it. Now, get kneading! Push the dough away with the heel of your hand, fold it over, give it a quarter turn, and repeat. Do this for about 8-10 minutes. If you’re using a mixer, let the dough hook do the work on medium-low for 6-8 minutes. You want the dough to go from sticky and messy to smooth and elastic – like a nice, pliable stress ball. If it’s sticking to your hands like crazy, add just a tiny bit more all-purpose flour (like a tablespoon at a time). Don’t go overboard, or your bread will be tough! Kneading builds up gluten – that’s the network that gives your brown bread recipe its awesome structure.
Step 5: Let It Rise (The First Time)
Wipe out the bowl you used, give it a quick swipe of oil, or grab a clean oiled bowl. Put your lovely smooth dough ball in there, and flip it over once so the top gets lightly oiled too (stops it drying out). Cover the bowl tightly – plastic wrap works great, or a clean tea towel. Find a warm-ish spot away from drafts (like inside your turned-off oven with the light on!) and let it hang out for 60-90 minutes. Go do something fun! It should puff up to about double its original size.
Step 6: Punch & Shape
Okay, satisfying part! Once it’s doubled, gently punch down the middle of the dough. Deflates like a balloon! Turn it out onto your very lightly floured counter. Pat it gently into a sort of rectangle. Now, roll it up fairly tightly, like a sleeping bag, starting from one of the shorter ends. Pinch the seam where the edge meets the roll to seal it shut. Tuck the ends under a little bit. Boom – loaf shape!
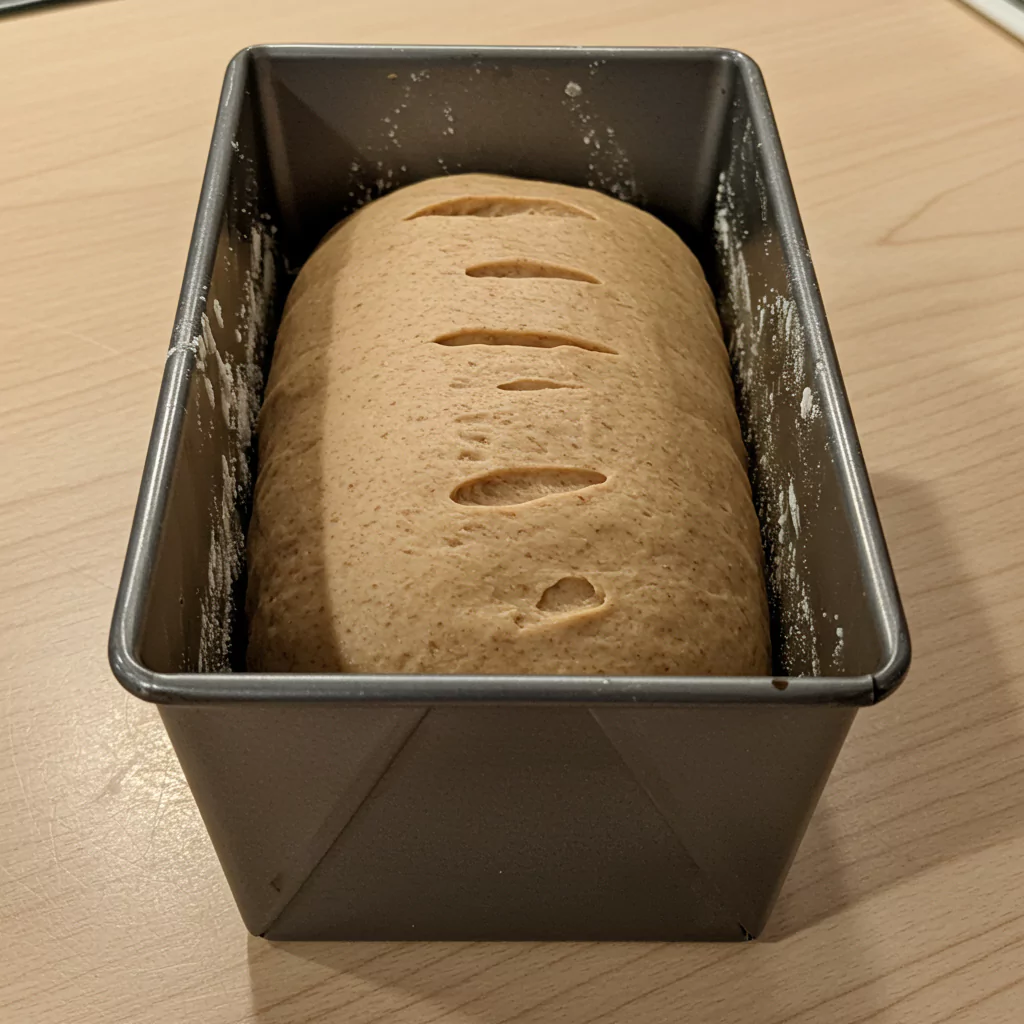
Step 7: Rise Again (Nearly There!)
Grease a standard 9×5 inch loaf pan. Carefully place your shaped loaf into the pan, seam-side down. Cover it loosely again (oiled plastic wrap or a tea towel) and let it rise in that warm spot for another 30-45 minutes. It should look noticeably puffier and nearly reach the top of the pan. Careful: Don’t let it get too huge now, or it might collapse in the oven. While it’s doing its final rise, get your oven preheating to 375°F (190°C).
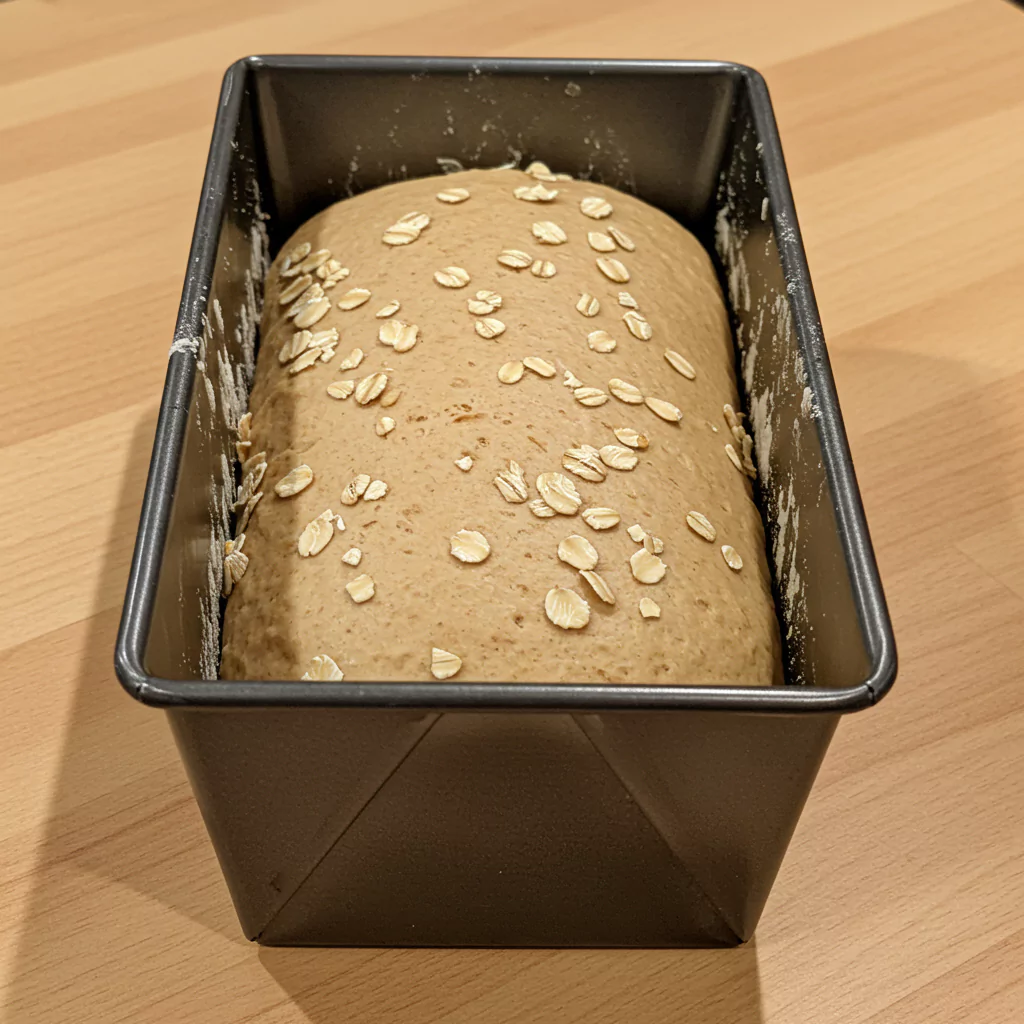
Step 8: Bake Time!
Optional fancy touch: brush the top lightly with water or milk and sprinkle on those oats or seeds if you’re using them. Now, into the hot oven it goes! Bake for 30-40 minutes. Your brown bread recipe loaf should be a beautiful deep golden brown. The ultimate test? Carefully tip it out of the pan (use oven mitts!) and give the bottom a tap. It should sound hollow. Techy tip: An instant-read thermometer stuck in the middle should read about 200-210°F (93-99°C).
Step 9: Cool Your Jets (Seriously, Wait!)
Get that gorgeous loaf out of the pan immediately and onto a wire rack. This lets air circulate so the bottom doesn’t get soggy. Now comes the hardest part: WAITING. You absolutely must let it cool for at least 30 minutes, but an hour is even better, before you slice into it. I know, the smell is torture! But cutting it too soon messes up the texture inside, making it gummy. Patience, grasshopper!
Recipes You May Like
How to Eat This Amazing Bread You Just Made
You did it! You baked this incredible loaf using this brown bread recipe! High five! Now, the best part – eating it!
- Pure & Simple: A warm slice (okay, maybe slightly warm after cooling!) with a generous smear of real butter. Maybe a tiny sprinkle of flaky sea salt? Perfection.
- Toast Time: This bread makes THE BEST toast. Try it with:
- Mashed avocado, salt, pepper, maybe some red pepper flakes if you’re feisty.
- Cream cheese and a sprinkle of everything bagel spice (game changer!).
- Good old peanut butter and banana. Can’t beat it.
- Your fave jam. Classic.
- Soup Dipper: Mandatory! You need this bread for dunking into a steaming bowl of lentil soup, chili, or pretty much any cozy stew.
- Sandwich Hero: Builds fantastic sandwiches because it’s sturdy! Pile on turkey, cheese, veggies, hummus – whatever floats your boat.
- Weekend French Toast: Got a slice or two left that’s slightly dry? It makes ridiculously good French toast, thanks to that hint of molasses. Drown it in maple syrup!
- Cheese Board Star: Slice it thin, toast ’til crisp, and serve with your favourite cheeses and maybe some fig jam. Fancy!
My absolute go-to? Toasted thick, topped with melty sharp cheddar. Simple, satisfying, perfection.
Keep Your Loaf Happy: Storing Tips
You worked hard on this brown bread recipe, let’s make sure it stays delicious! Homemade bread is best fresh, but here’s how to keep it happy:
- On the Counter (Good for 2-3 days): Once it’s totally cool (really, wait!), pop it in a paper bag (keeps the crust nicer) or a bread box. A plastic bag works too but might make the crust soft. Don’t put it in the fridge – that makes bread go stale super fast, weirdly enough!
- In the Freezer (For Weeks! Up to 3 months): This is the best way to keep it long-term. Let it cool completely. Pro Tip: Slice the whole loaf before freezing. Then you can just grab slices as needed! Put the slices in a freezer bag, squish out the air, and seal tight. Or, wrap the whole loaf tightly in plastic wrap, then aluminum foil.
- Bringing it Back: Frozen slices toast up perfectly! No need to thaw. If your counter loaf feels a bit dry after a day or two, toasting is the perfect fix.
Storing your brown bread recipe masterpiece right means less waste and more yummy moments!
Okay, Why Am I SO Obsessed With This Recipe?
Honestly, why do I keep raving about this specific brown bread recipe? It’s simple:
- That Smell. Ohmigosh. Seriously, if they could bottle the scent of this bread baking, I’d buy it by the gallon. It makes your entire house feel like a warm hug.
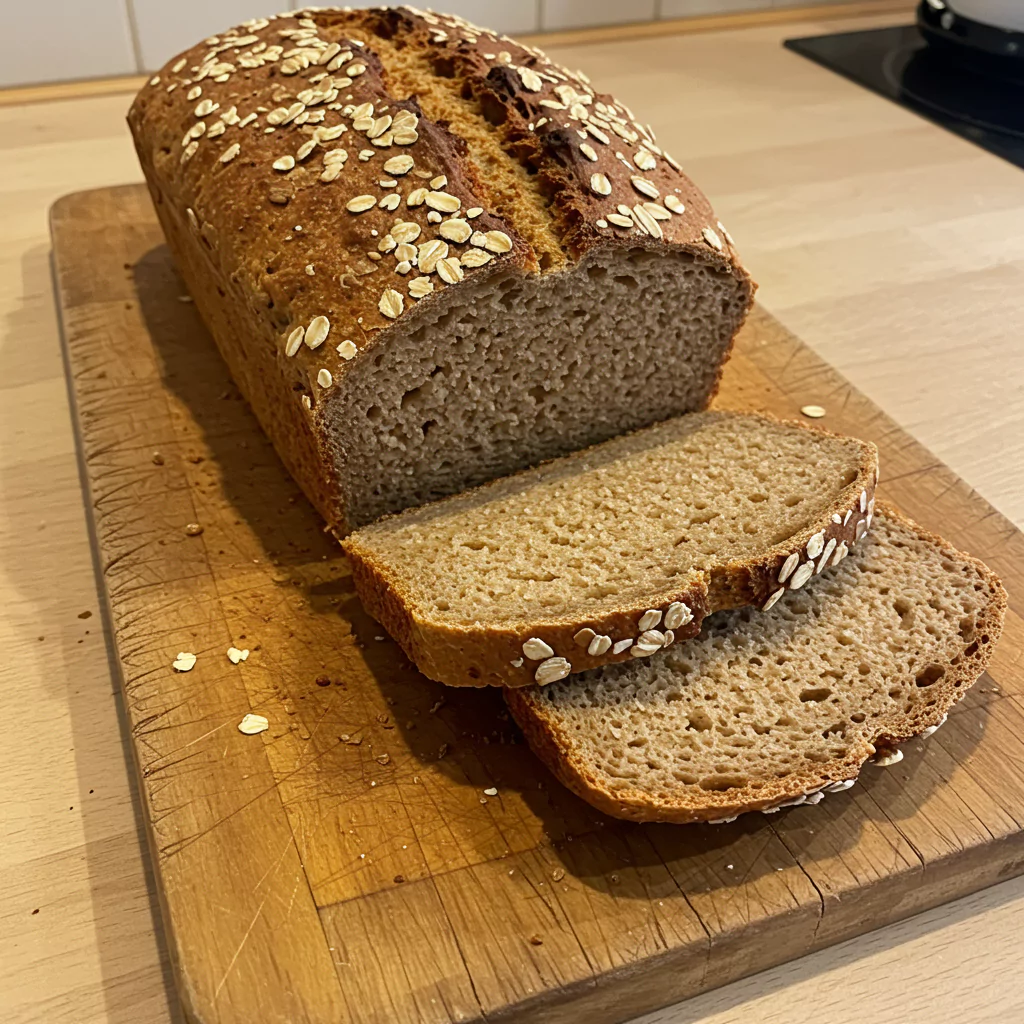
- Taste & Feel: It’s got that lovely nutty, wholesome flavour from the whole wheat, but it’s not heavy like some whole wheat bricks can be. The molasses adds a deep, slightly sweet note that’s just right. Soft inside, nice crust outside. Checks all the boxes.
- It’s Actually Easy! For a bread with yeast, this one is surprisingly low-drama. No weird steps, just basic stuff. If you’re new to bread baking, this is a fantastic place to start. You can DO this!
- That “I Made Bread!” Feeling: There’s just something so cool about taking flour, water, and yeast and turning it into a beautiful, delicious loaf. It’s a little bit of kitchen magic, and it feels awesome.
- It Goes With Everything: Seriously, toast, sandwiches, soup, just butter… it’s the little black dress of the bread world. Always appropriate.
Baking this brown bread recipe is just… nice. Kneading is surprisingly therapeutic (get that stress out!), and the end result is just pure, edible comfort.
So, go on, give it a whirl! Don’t let yeast scare you. I promise this brown bread recipe is worth trying. And please, tell me how it goes in the comments below! Did you love it? Did you change anything? What’s your favourite way to eat it? I genuinely love hearing from you guys!
Right then, oven on? Flour out? Happy Baking! You’ve totally got this!
brown bread recipe

Bake an easy, delicious homemade brown bread recipe! Hearty whole wheat loaf with simple steps. Perfect results every time. Try it today!
Ingredients
- 1 ½ cups Warm Water (around 40-45°C / 105-115°F)
- 1 packet Active Dry Yeast (2 ¼ teaspoons or 7g)
- ¼ cup Molasses (Unsulphured)
- 2 tablespoons Melted Butter (Unsalted)
- 1 ½ teaspoons Salt
- 2 ½ cups Whole Wheat Flour (approx. 300g)
- 1 to 1 ½ cups All-Purpose Flour (or Bread Flour, approx. 120g-180g, plus more for dusting)
- Optional: Rolled Oats or Seeds for Topping
Instructions
Step 1: Get the Yeast Going
Grab a big bowl (or your stand mixer bowl). Pour in the warm water, then sprinkle the yeast over top. Give it a tiny stir. Now, leave it alone for 5-10 minutes. You’re looking for it to get foamy or creamy-looking. That foam means “Woohoo, the yeast is alive!” No foam? Uh oh. Your yeast might be dead, or the water was too hot/cold. Best bet is to toss it and start again with fresh yeast. Bummer, but better than a flat loaf!
Step 2: Mix in the Good Stuff
Once your yeast looks happy and bubbly, stir in the molasses, melted butter, and salt. Mix it up until that molasses isn’t just sitting in blobs. Mmm, smells good already, right?
Step 3: Flour Power!
Dump in the 2 ½ cups of whole wheat flour and just 1 cup of the all-purpose/bread flour for now. Use a sturdy spoon (or the dough hook on low) to mix everything until it comes together into a shaggy, kinda messy ball. Totally normal!
Step 4: Knead It ‘Til You Make It!
Flour your counter lightly. Plop the dough onto it. Now, get kneading! Push the dough away with the heel of your hand, fold it over, give it a quarter turn, and repeat. Do this for about 8-10 minutes. If you’re using a mixer, let the dough hook do the work on medium-low for 6-8 minutes. You want the dough to go from sticky and messy to smooth and elastic – like a nice, pliable stress ball. If it’s sticking to your hands like crazy, add just a tiny bit more all-purpose flour (like a tablespoon at a time). Don’t go overboard, or your bread will be tough! Kneading builds up gluten – that’s the network that gives your brown bread recipe its awesome structure.
Step 5: Let It Rise (The First Time)
Wipe out the bowl you used, give it a quick swipe of oil, or grab a clean oiled bowl. Put your lovely smooth dough ball in there, and flip it over once so the top gets lightly oiled too (stops it drying out). Cover the bowl tightly – plastic wrap works great, or a clean tea towel. Find a warm-ish spot away from drafts (like inside your turned-off oven with the light on!) and let it hang out for 60-90 minutes. Go do something fun! It should puff up to about double its original size.
Step 6: Punch & Shape
Okay, satisfying part! Once it’s doubled, gently punch down the middle of the dough. Deflates like a balloon! Turn it out onto your very lightly floured counter. Pat it gently into a sort of rectangle. Now, roll it up fairly tightly, like a sleeping bag, starting from one of the shorter ends. Pinch the seam where the edge meets the roll to seal it shut. Tuck the ends under a little bit. Boom – loaf shape!
Step 7: Rise Again (Nearly There!)
Grease a standard 9×5 inch loaf pan. Carefully place your shaped loaf into the pan, seam-side down. Cover it loosely again (oiled plastic wrap or a tea towel) and let it rise in that warm spot for another 30-45 minutes. It should look noticeably puffier and nearly reach the top of the pan. Careful: Don’t let it get too huge now, or it might collapse in the oven. While it’s doing its final rise, get your oven preheating to 375°F (190°C).
Step 8: Bake Time!
Optional fancy touch: brush the top lightly with water or milk and sprinkle on those oats or seeds if you’re using them. Now, into the hot oven it goes! Bake for 30-40 minutes. Your brown bread recipe loaf should be a beautiful deep golden brown. The ultimate test? Carefully tip it out of the pan (use oven mitts!) and give the bottom a tap. It should sound hollow. Techy tip: An instant-read thermometer stuck in the middle should read about 200-210°F (93-99°C).
Step 9: Cool Your Jets (Seriously, Wait!)
Get that gorgeous loaf out of the pan immediately and onto a wire rack. This lets air circulate so the bottom doesn’t get soggy. Now comes the hardest part: WAITING. You absolutely must let it cool for at least 30 minutes, but an hour is even better, before you slice into it. I know, the smell is torture! But cutting it too soon messes up the texture inside, making it gummy. Patience, grasshopper!
Notes
Nutrition Information
Yield
10-12 slicesAmount Per ServingCalories Approximately 130 kcal per slice