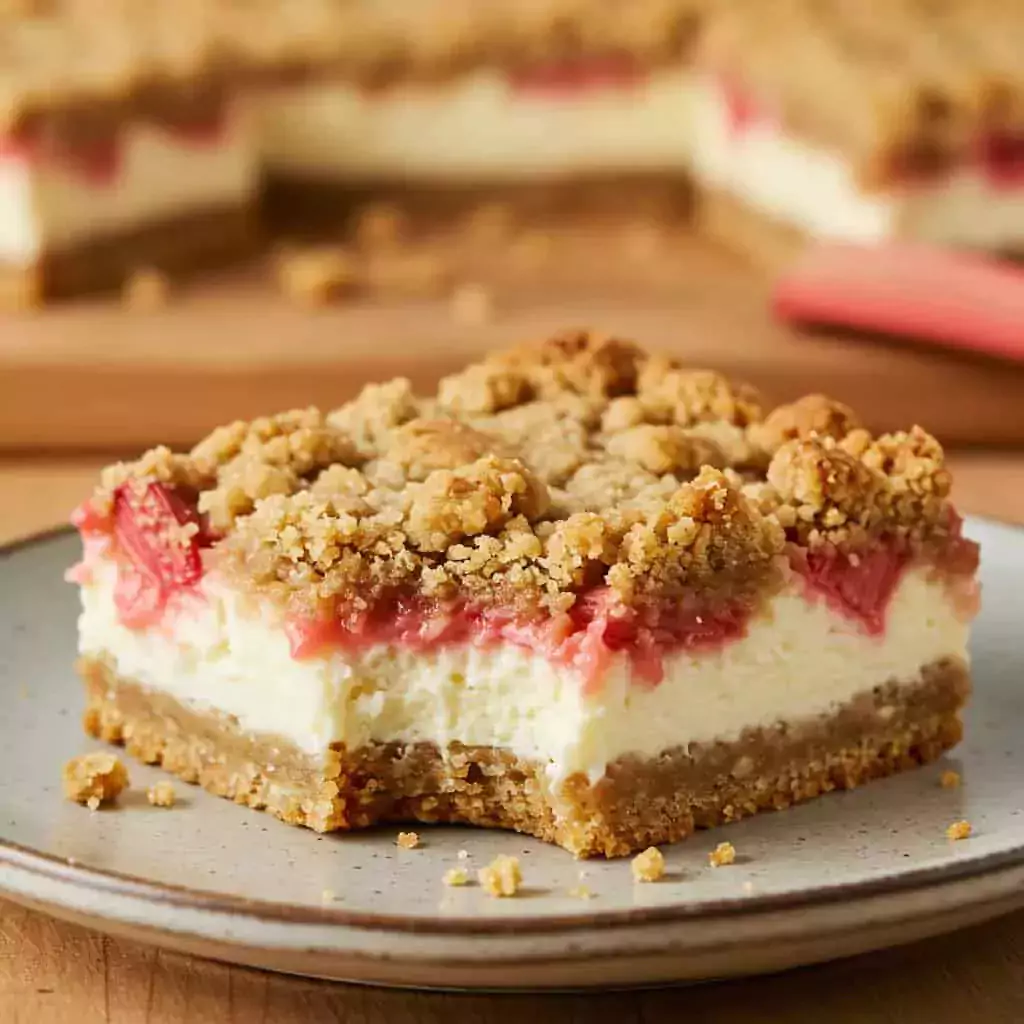
Let me tell you about these Rhubarb Cheesecake Bars with Oatmeal Crust. My love affair with this recipe kicked off a few springs back. My lovely neighbor, bless her, handed me this absolutely massive armful of bright pink rhubarb from her garden. I’d made crumbles before, sure, and the odd pie, but I was itching for something different. Something that really let that zingy rhubarb shine but also had that creamy, dreamy cheesecake vibe and a good, satisfying crunch. So, picture this: my kitchen, a battlefield of flour and sugar for a while there. After, let’s just say, a spirited round of taste-testing (my family were surprisingly enthusiastic volunteers, ha!), messing with the rhubarb’s tang, getting the cheesecake layer just so, and nailing that oatmeal crust, this beauty was born. Now, it’s my absolute signal that spring has sprung! And honestly, these bars are just so incredibly good because they’ve got it all: that pop of tart rhubarb, the super smooth, rich cheesecake, and the buttery, slightly nutty oatmeal crust. Pure magic, I tell ya!
Ingredients You’ll Need (And Some Handy Swaps!)
Alright, gather ’round, bakers! These are the bits and pieces you’ll need to whip up your own pan of incredible Rhubarb Cheesecake Bars with Oatmeal Crust. I’ve laid it all out for you, plus a few little tips and tricks for when you’re rummaging through your pantry.
For that Irresistible Oatmeal Crust:
- All-Purpose Flour: 1 ¼ cups. Your basic building block! If you’re gluten-free, a good 1:1 gluten-free baking blend usually does the trick, though the texture might be a tad different – still delicious, though!
- Rolled Oats: ¾ cup. Go for the old-fashioned kind here; they give the best chewy, hearty texture. Quick oats can sub in if you’re in a real pinch, but it won’t have quite the same oomph.
- Light Brown Sugar: ½ cup, make sure it’s packed in there! This gives that lovely, slightly caramelly depth. Dark brown sugar works too, for an even deeper, more molasses-y flavor.
- Granulated Sugar: ¼ cup. Just a little extra to balance all those lovely flavors.
- Ground Cinnamon: ½ teaspoon. That little whisper of warmth is so good! If you’re feeling it, a tiny pinch of nutmeg wouldn’t go amiss either.
- Salt: ¼ teaspoon. Seriously, don’t skip this! It makes everything else taste better.
- Unsalted Butter: ½ cup (that’s 1 whole stick!), nice and cold, and cut into little cubes. Cold butter is your secret weapon for a perfectly crumbly and tender crust. If you’ve only got salted butter, just cut back a tiny bit on the added salt.
For the Zingy Rhubarb Layer:
- Fresh Rhubarb: About 4 cups, chopped into ½-inch bits. You want those nice, firm, vibrant pinky-red stalks. If you’re using frozen rhubarb (totally fine!), give it a thaw and then pat it really well with paper towels to get rid of extra water, otherwise, your rhubarb layer might be a bit on the soupy side.
- Granulated Sugar: ½ cup. Now, you can play with this a bit. If your rhubarb is super tart, or if you like things on the sweeter side, you might want to add a touch more.
- Fresh Lemon Juice: 1 tablespoon. This just makes the rhubarb taste even brighter and more rhubarb-y! Bottled is okay if that’s all you’ve got on hand.
- Cornstarch: 1 tablespoon. Our little helper for making sure that rhubarb filling is perfectly thick and jammy, not runny.
For the Creamiest Cheesecake Filling:
- Cream Cheese: 16 ounces (that’s two of the 8-ounce packages), and please, please let it soften to room temperature! This is SO key for a silky smooth, non-lumpy cheesecake. Just pull it out of the fridge an hour or so before you start.
- Granulated Sugar: ¾ cup. For that classic, sweet cheesecake goodness.
- Large Eggs: 2 of ’em. Room temperature eggs mix in much better, trust me.
- Sour Cream or Full-Fat Plain Yogurt: ¼ cup. This adds a lovely little tang and extra creaminess. Make sure this is at room temp too!
- Vanilla Extract: 1 teaspoon. The real stuff, pure vanilla extract, makes all the difference.
- All-Purpose Flour: Just 1 tablespoon. A tiny bit to help the cheesecake set up beautifully.
Timing – Let’s Get This Bake On!
I know, I know, you want these Rhubarb Cheesecake Bars with Oatmeal Crust in your belly like, yesterday! So here’s a rough idea of how your baking adventure will play out:
- Get Ready Time (Prep): Plan for about 30-35 minutes. This is you, music on, chopping that gorgeous rhubarb, mixing up the crust, and getting that cheesecake filling all velvety. It’s actually pretty therapeutic!
- Oven Time (Cook): Somewhere between 45 and 55 minutes. Your kitchen is going to smell absolutely heavenly, by the way. You’re looking for set edges and a center that’s just barely wobbly.
- The Waiting Game (Cooling & Chilling): Okay, this is the toughest part – you gotta have patience! Let them cool on a wire rack for at least 30 minutes, and then into the fridge they go for at least 2-3 hours. Honestly, overnight is even better. This lets the cheesecake firm up perfectly so you get those nice, clean slices.
- Total Time (From Start to Sweet Reward, with minimum chill): You’re looking at roughly 4 hours. But oh, that first bite makes every second worth it!
Step-by-Step to Your Own Rhubarb Cheesecake Bar Heaven
Alright, ready to make some serious deliciousness? Let’s walk through how to create these amazing Rhubarb Cheesecake Bars with Oatmeal Crust. It’s easier than you think, and I’m here with you!
Step 1: Oven On, Pan Prepped!
First up, get that oven preheating to 375°F (that’s 190°C). Find your trusty 9×13 inch baking pan. You can give it a light grease, but my favorite trick is to line it with parchment paper, letting a little hang over the two long sides like little handles. Makes lifting the whole thing out later a total cinch – you’ll thank me!
Step 2: Let’s Make That Buttery Oatmeal Crust
In a medium-sized bowl, whisk together your flour, those lovely rolled oats, the brown sugar, granulated sugar, cinnamon, and salt. Now, toss in those cold, cubed butter pieces. Get your hands in there (or use a pastry blender if you’re fancy, or even give it a few quick pulses in a food processor) and work that butter into the dry stuff until it looks like coarse crumbs. A few little pea-sized bits of butter are actually a good thing – they make the crust extra tender! Take about two-thirds of this crumbly goodness and press it firmly and evenly into the bottom of the pan you prepped. Tuck the other one-third of the crust mixture aside for a bit; that’s our yummy topping!
Step 3: Cook Up That Tangy Rhubarb Goodness
Grab a medium saucepan and toss in your chopped rhubarb, that ½ cup of granulated sugar, and the lemon juice. Set it over medium heat and give it a stir every now and then. You’ll see the rhubarb start to soften and get juicy – probably about 5 to 7 minutes. While that’s happening, in a tiny bowl, whisk your cornstarch with a tablespoon or two of cold water until it’s smooth. Pour this slurry into your rhubarb mixture and keep stirring constantly for another minute or two until it’s all nice and thickened up. Take it off the heat and let it cool down a bit while you make the cheesecake layer. The smell alone is amazing, right? Try not to sneak too many spoonfuls!
Step 4: Time for the Dreamy Cheesecake Batter
In a big bowl (use an electric mixer for this – a handheld one is fine, or a stand mixer with the paddle), beat your softened cream cheese on medium speed until it’s totally smooth and creamy. Seriously, hunt down any lumps! Now, gradually pour in the ¾ cup of granulated sugar and keep beating until it’s looking light and almost fluffy. Don’t forget to scrape down the sides of your bowl a few times. Next, beat in your room-temperature eggs, one at a time, mixing just until each one disappears into the batter. Easy does it here – if you overmix, your cheesecake might crack later (still tasty, just not as pretty!). Lastly, gently stir in the sour cream (or yogurt), that lovely vanilla extract, and the tablespoon of flour until it’s all just combined. Perfect!
Step 5: Let’s Assemble This Masterpiece!
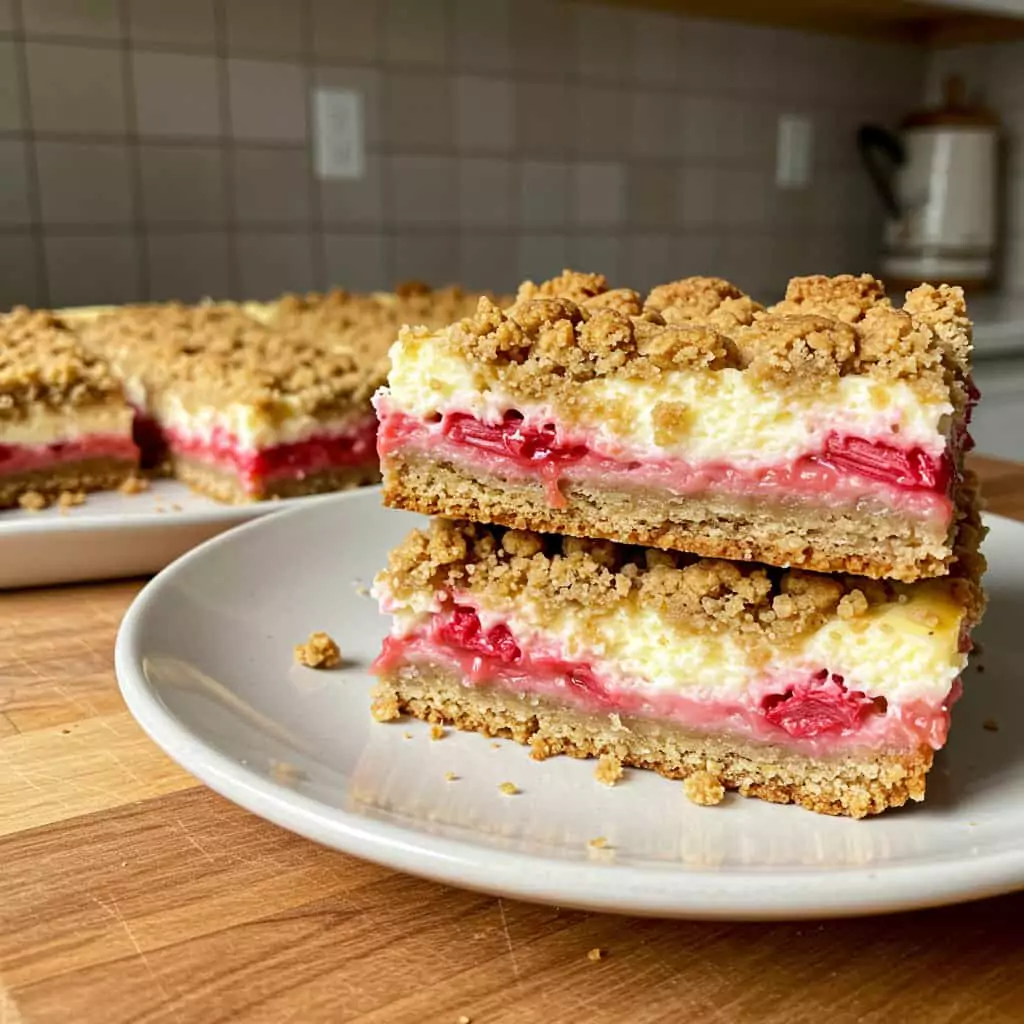
This is where the magic really comes together for your Rhubarb Cheesecake Bars with Oatmeal Crust! Pour that luscious cheesecake batter all over the crust you pressed into the pan, spreading it out evenly. Now, spoon the cooled (or just slightly warm is okay) rhubarb filling in dollops all over the cheesecake. You can get creative here – use a knife or a skewer to gently swirl the rhubarb into the cheesecake for a pretty marbled look, or just leave it as happy little pockets of tartness. Your bars, your rules! Finally, take that remaining one-third of the oatmeal crust mixture you saved and sprinkle it all over the top.
Step 6: Bake ‘Til Golden and Glorious
Super carefully, pop that pan into your hot oven. Let it bake for about 45 to 55 minutes. What you’re looking for is the edges to be nice and set, maybe a little golden, and the very center of the cheesecake should be mostly set but still have a tiny, tiny bit of a jiggle if you gently nudge the pan. If that yummy topping starts getting too brown too fast, you can just loosely lay a piece of aluminum foil over the top for the last 10-15 minutes.
Step 7: The All-Important Cool Down (Patience, Grasshopper!)
Once it’s baked, take the pan out and put it on a wire rack to cool down to room temperature. This will probably take about 30 to 45 minutes. Then, cover the pan loosely with some plastic wrap and slide it into the fridge to chill completely. You need at least 2-3 hours, but honestly, if you can wait, overnight is the absolute best. This chilling time is so, so important – it lets the cheesecake set up properly so it’s firm and sliceable, and all those amazing flavors get to know each other.
Step 8: Slice, Serve, and Get Ready for Compliments!
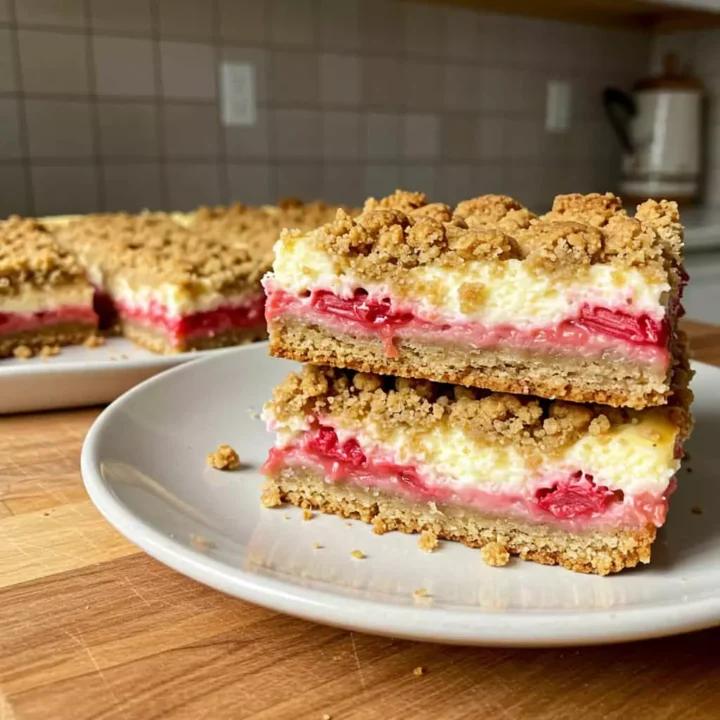
Okay, after the long (but worthwhile!) chill, use those parchment paper “handles” to lift the whole beautiful slab right out of the pan and onto a cutting board. Now you can cut it into bars – whatever size you like! For the cleanest, prettiest cuts on your Rhubarb Cheesecake Bars with Oatmeal Crust, wipe your knife clean with a damp cloth between each slice.
Recipes You May Like
Seriously Sensational Ways to Serve ‘Em
So, you’ve done it! You’ve baked these incredible Rhubarb Cheesecake Bars with Oatmeal Crust, they’re chilled to perfection, and you’ve sliced them into tempting squares. Now, how to present these beauties? To be perfectly honest, they are absolutely heavenly just as they are, maybe with a nice hot cuppa tea or coffee. That combo of tart rhubarb, creamy cheesecake, and the oaty, buttery crust is a total knockout all by itself.
But hey, if you’re feeling a bit extra, or you want to really wow some guests (or, you know, just treat yourself – you totally deserve it!), here are a few of my favorite ways to jazz them up:
- A Fluffy Cloud of Cream: You just can’t go wrong with a dollop of freshly whipped cream. If you want to be fancy, sweeten it just a touch with powdered sugar and a tiny splash of vanilla. Mmm.
- Ice Cream’s Best Friend: Try warming a bar just a tiny bit (I’m talking like 10 seconds in the microwave – you don’t want to melt that gorgeous cheesecake!) and then serve it with a scoop of really good vanilla bean ice cream. That warm-cold thing? Oh, it’s divine.
- A Little Snowy Dusting: A super simple, but really elegant, dusting of powdered sugar right before you serve them makes them look like they came from a fancy bakery. So pretty!
- Berry Nice Addition: While rhubarb is definitely the star here, a few fresh raspberries or some sliced strawberries alongside can add an extra pop of color and a lovely fruity complement, especially when summer fruits start appearing.
- A Touch of Green: A tiny sprig of fresh mint on each bar? It just looks so fresh and pretty, perfect if you’re going for a spring garden party kind of vibe!
- Picnic All-Star: You know what? These bars actually travel really well once they’re thoroughly chilled! They are a fantastic, and very welcome, addition to any picnic basket or potluck table. Just keep ’em cool until it’s time to serve. Your friends will be clamoring for the recipe for these Rhubarb Cheesecake Bars with Oatmeal Crust, guaranteed!
Play around with it! Sometimes the simplest way is the best, letting all those amazing flavors just sing.
Why I’m Completely, Utterly Hooked on This Recipe!
Okay, for real, you guys, I am just beyond obsessed with these Rhubarb Cheesecake Bars with Oatmeal Crust, and I have a sneaky feeling you’re going to be right there with me. I mean, what’s not to absolutely adore? You’ve got that amazingly tart, almost jammy rhubarb that just sings of springtime, cutting right through that rich, unbelievably velvety smooth cheesecake layer. And then – THEN! – you get that buttery, slightly cinnamon-kissed oatmeal crust and crumble on top. It is the perfect textural one-two punch – a little bit chewy, a little bit crunchy. It’s basically a party in your mouth with every single bite!
I honestly believe this recipe for Rhubarb Cheesecake Bars with Oatmeal Crust is one for the ages. It looks like you fussed for hours, tastes even better than it looks, and is actually pretty darn straightforward to make. So, go on, bake a batch! I would be absolutely thrilled to hear how they turn out for you. Please, drop a comment below – tell me what you thought, if you added your own little twist, or who you shared them with (if you decided to share at all, no judgment here!). Happy baking, everyone!
Rhubarb Cheesecake Bars with Oatmeal Crust
Delicious Rhubarb Cheesecake Bars with Oatmeal Crust an easy recipe featuring tart rhubarb creamy cheesecake and a crisp oat topping Try this treat
Ingredients
- All-Purpose Flour 1 ¼ cups
- Rolled Oats ¾ cup (old-fashioned recommended)
- Light Brown Sugar ½ cup packed
- Granulated Sugar ¼ cup
- Ground Cinnamon ½ teaspoon
- Salt ¼ teaspoon
- Unsalted Butter ½ cup (1 stick) cold and cubed
- Fresh Rhubarb 4 cups chopped (about ½-inch pieces)
- Granulated Sugar ½ cup (adjust to tartness)
- Fresh Lemon Juice 1 tablespoon
- Cornstarch 1 tablespoon
- Cream Cheese 16 ounces (two 8-ounce packages) softened
- Granulated Sugar ¾ cup
- Large Eggs 2 room temperature
- Sour Cream or Full-Fat Plain Yogurt ¼ cup room temperature
- Vanilla Extract 1 teaspoon
- All-Purpose Flour 1 tablespoon
Instructions
Step 1: Oven On, Pan Prepped!
First up, get that oven preheating to 375°F (that’s 190°C). Find your trusty 9×13 inch baking pan. You can give it a light grease, but my favorite trick is to line it with parchment paper, letting a little hang over the two long sides like little handles. Makes lifting the whole thing out later a total cinch – you’ll thank me!
Step 2: Let’s Make That Buttery Oatmeal Crust
In a medium-sized bowl, whisk together your flour, those lovely rolled oats, the brown sugar, granulated sugar, cinnamon, and salt. Now, toss in those cold, cubed butter pieces. Get your hands in there (or use a pastry blender if you’re fancy, or even give it a few quick pulses in a food processor) and work that butter into the dry stuff until it looks like coarse crumbs. A few little pea-sized bits of butter are actually a good thing – they make the crust extra tender! Take about two-thirds of this crumbly goodness and press it firmly and evenly into the bottom of the pan you prepped. Tuck the other one-third of the crust mixture aside for a bit; that’s our yummy topping!
Step 3: Cook Up That Tangy Rhubarb Goodness
Grab a medium saucepan and toss in your chopped rhubarb, that ½ cup of granulated sugar, and the lemon juice. Set it over medium heat and give it a stir every now and then. You’ll see the rhubarb start to soften and get juicy – probably about 5 to 7 minutes. While that’s happening, in a tiny bowl, whisk your cornstarch with a tablespoon or two of cold water until it’s smooth. Pour this slurry into your rhubarb mixture and keep stirring constantly for another minute or two until it’s all nice and thickened up. Take it off the heat and let it cool down a bit while you make the cheesecake layer. The smell alone is amazing, right? Try not to sneak too many spoonfuls!
Step 4: Time for the Dreamy Cheesecake Batter
In a big bowl (use an electric mixer for this – a handheld one is fine, or a stand mixer with the paddle), beat your softened cream cheese on medium speed until it’s totally smooth and creamy. Seriously, hunt down any lumps! Now, gradually pour in the ¾ cup of granulated sugar and keep beating until it’s looking light and almost fluffy. Don’t forget to scrape down the sides of your bowl a few times. Next, beat in your room-temperature eggs, one at a time, mixing just until each one disappears into the batter. Easy does it here – if you overmix, your cheesecake might crack later (still tasty, just not as pretty!). Lastly, gently stir in the sour cream (or yogurt), that lovely vanilla extract, and the tablespoon of flour until it’s all just combined. Perfect!
Step 5: Let’s Assemble This Masterpiece!
This is where the magic really comes together for your Rhubarb Cheesecake Bars with Oatmeal Crust! Pour that luscious cheesecake batter all over the crust you pressed into the pan, spreading it out evenly. Now, spoon the cooled (or just slightly warm is okay) rhubarb filling in dollops all over the cheesecake. You can get creative here – use a knife or a skewer to gently swirl the rhubarb into the cheesecake for a pretty marbled look, or just leave it as happy little pockets of tartness. Your bars, your rules! Finally, take that remaining one-third of the oatmeal crust mixture you saved and sprinkle it all over the top.
Step 6: Bake ‘Til Golden and Glorious
Super carefully, pop that pan into your hot oven. Let it bake for about 45 to 55 minutes. What you’re looking for is the edges to be nice and set, maybe a little golden, and the very center of the cheesecake should be mostly set but still have a tiny, tiny bit of a jiggle if you gently nudge the pan. If that yummy topping starts getting too brown too fast, you can just loosely lay a piece of aluminum foil over the top for the last 10-15 minutes.
Step 7: The All-Important Cool Down (Patience, Grasshopper!)
Once it’s baked, take the pan out and put it on a wire rack to cool down to room temperature. This will probably take about 30 to 45 minutes. Then, cover the pan loosely with some plastic wrap and slide it into the fridge to chill completely. You need at least 2-3 hours, but honestly, if you can wait, overnight is the absolute best. This chilling time is so, so important – it lets the cheesecake set up properly so it’s firm and sliceable, and all those amazing flavors get to know each other.
Step 8: Slice, Serve, and Get Ready for Compliments!
Okay, after the long (but worthwhile!) chill, use those parchment paper “handles” to lift the whole beautiful slab right out of the pan and onto a cutting board. Now you can cut it into bars – whatever size you like! For the cleanest, prettiest cuts on your Rhubarb Cheesecake Bars with Oatmeal Crust, wipe your knife clean with a damp cloth between each slice.
Notes
Ingredient Quality: Using good quality vanilla extract and fresh lemon juice really enhances the flavors
Recipes You May Like
Nutrition Information
Yield
20Serving Size
1Amount Per ServingCalories 350Total Fat 9gSaturated Fat 5gTrans Fat 0gUnsaturated Fat 3gCholesterol 44mgSodium 115mgCarbohydrates 31gFiber 1gSugar 21gProtein 4g