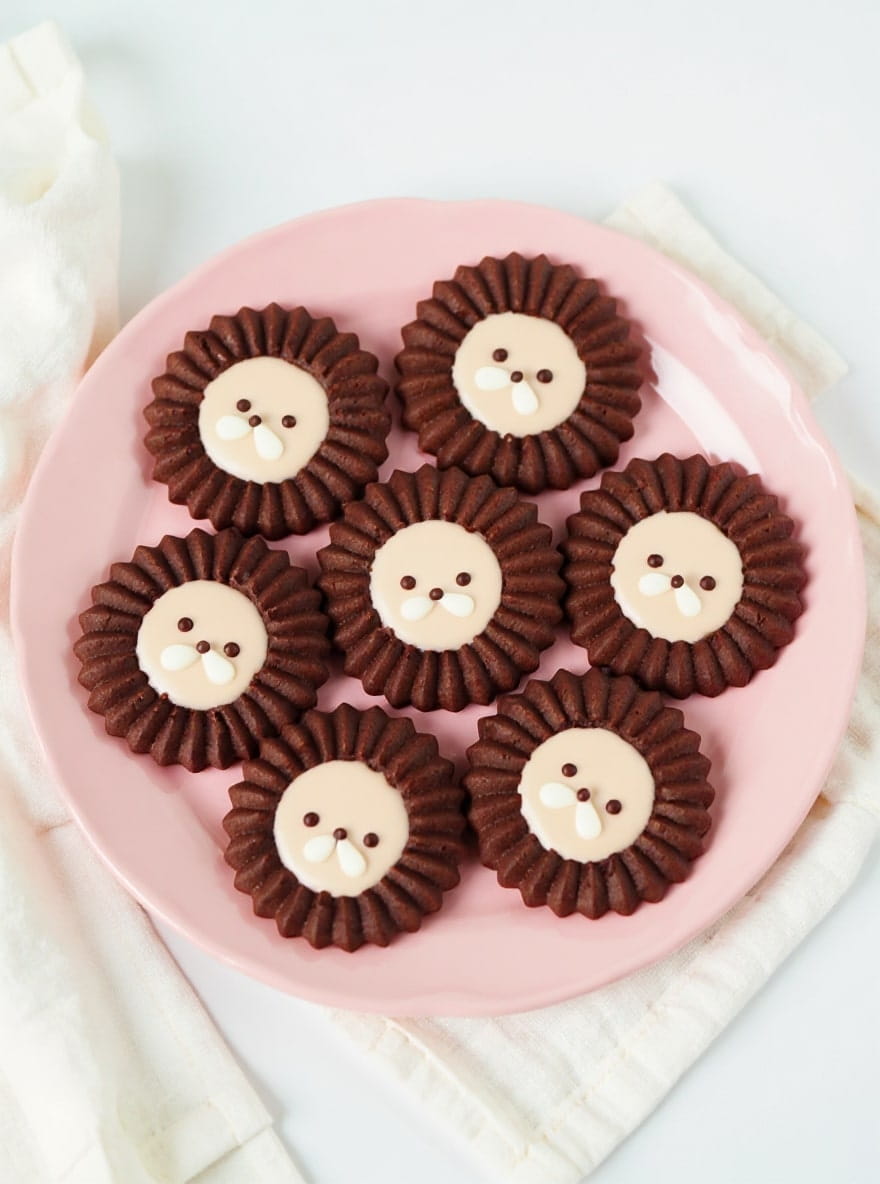
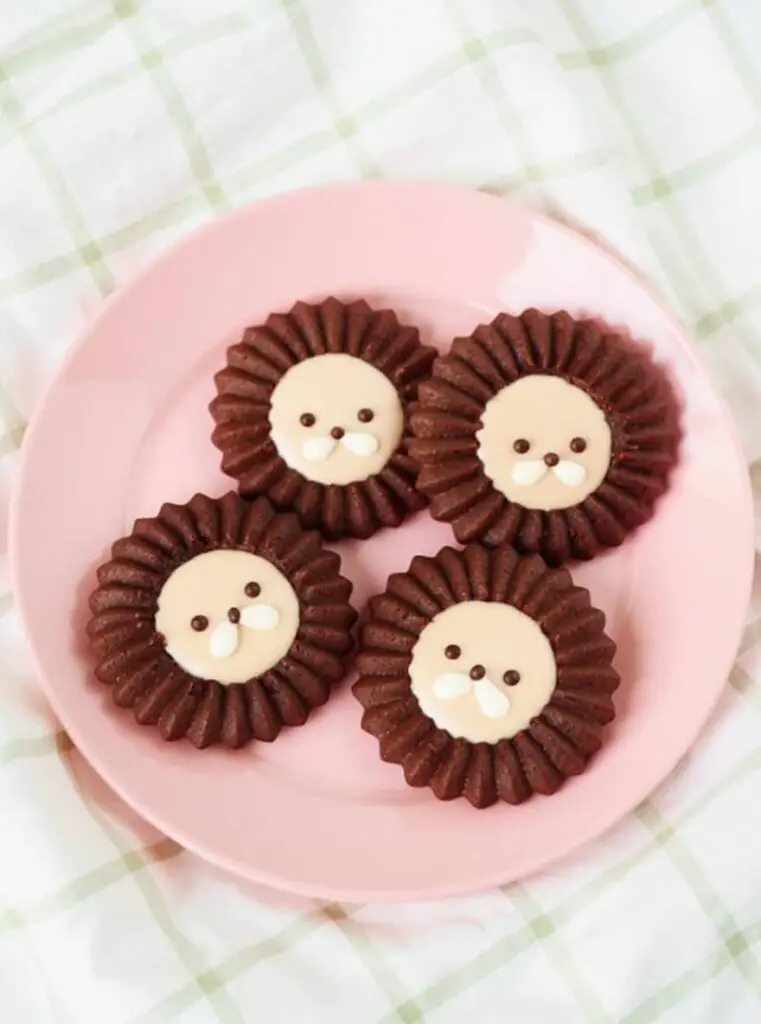
I’ve been making these chocolate lion cookies non-stop lately, and I just had to share the recipe. They’ve become super popular. It’s the perfect mix of rich, deep cocoa cookies and a really cute design. They’re a hit at parties, but honestly I love making a batch just for a chill weekend. It’s such a fun little baking project.
Ingredients
Yields approximately 50 cookies
For the Cocoa Cookies:
- 100g Butter (make sure it’s softened to room temp)
- 60g Powdered Sugar
- 43g Whole Egg (also at room temp)
- 120g Cake Flour
- 25g Cocoa Powder (use pure cocoa)
For Decoration:
- 30g Coating Chocolate (Sweet)
- 30g Coating Chocolate (White)
- 100g Coating Chocolate (White) for the face base
- Approx. 8 pieces Coating Chocolate (Sweet) for the face base
Equipment:
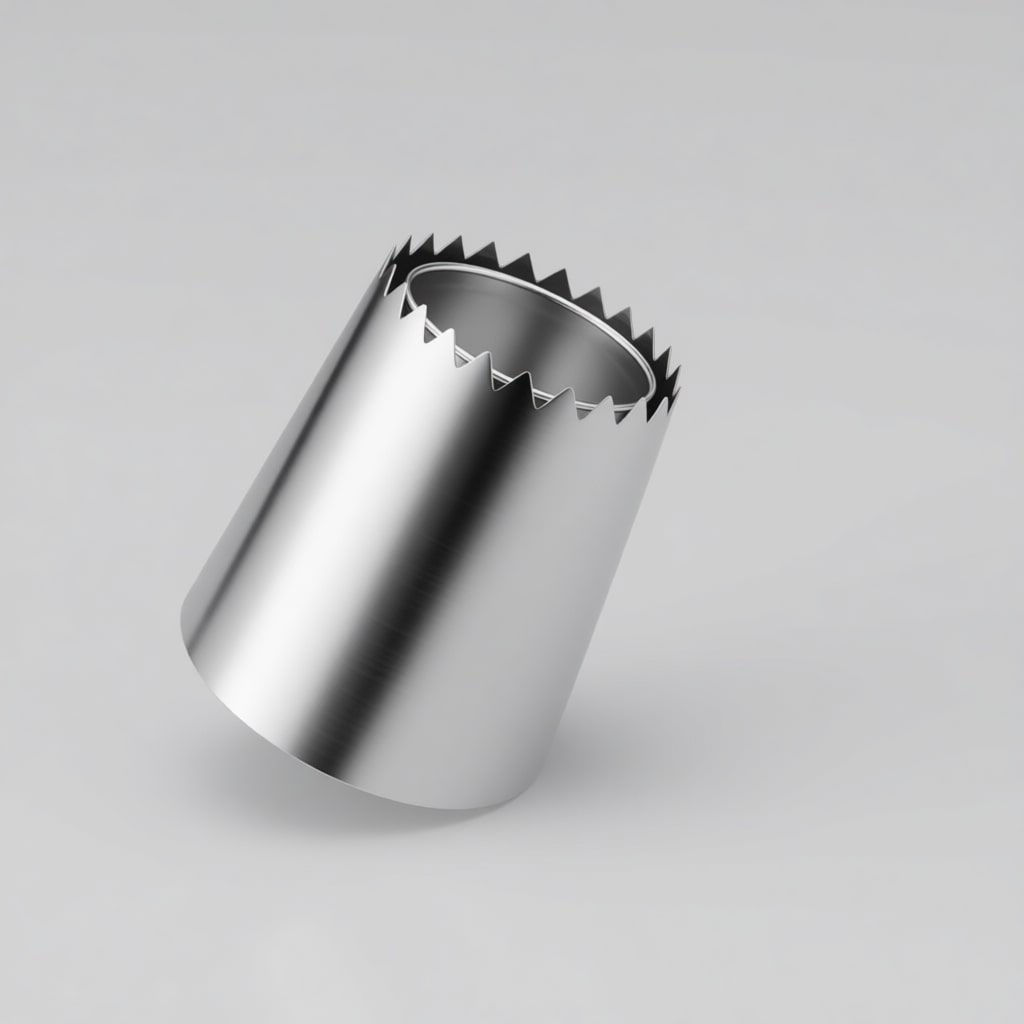
Get the Suuker Sultan Nozzle Here. (affiliate link, no extra cost to you)
Recipes You May Like
Step-by-Step Instructions
Step 1: First, preheat the oven to 170°C (340°F). Sift the cake flour and cocoa powder into a bowl.
Step 2: In a different, larger bowl, beat your softened butter until it’s smooth. Add the powdered sugar and keep mixing until it’s light and fluffy.
Step 3: Add the room-temp egg in a few splashes, mixing between each one until it’s all combined.
Step 4: Swap the spoon for a flat spatula. Add the flour/cocoa mixture and fold it in gently. Stop as soon as the flour disappears. Don’t overmix, If the dough is too sticky to pipe easily, popping it in the fridge for 10-15 minutes will make it way easier to handle.
Step 5: Load up a piping bag (fitted with your Suuker Sultan Nozzle) with the cocoa dough.
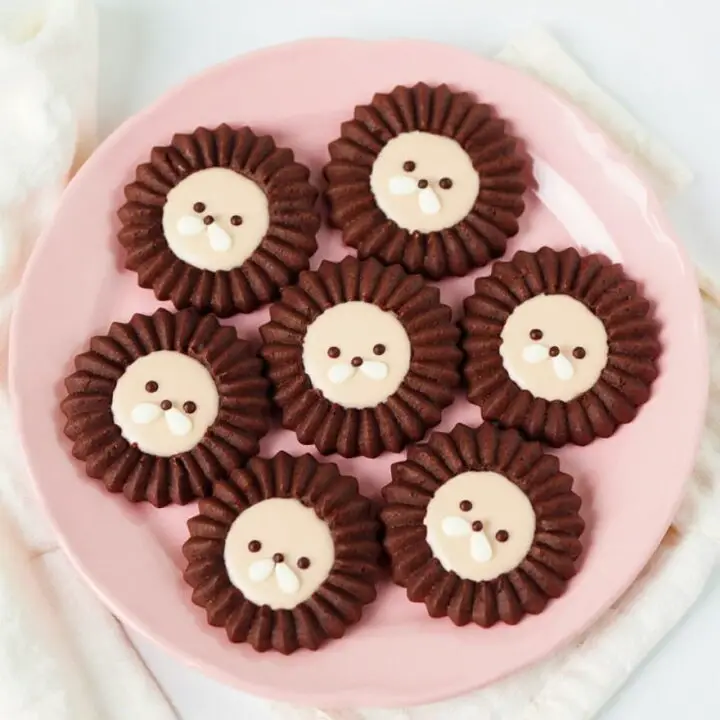
Step 6: Pipe the cookies onto a silicone mat. My tip is press the nozzle tip right against the mat as you pipe the circle. It helps the ‘mane’ spread out nicely.
Step 7: Bake for about 15 minutes. Let them cool completely on the pan. Don’t rush this part, or they’ll be too delicate for decorating.
Step 8: Time to decorate! Here’s how I do the faces: melt the 100g white chocolate with those 8 sweet chocolate pieces. A double boiler is your friend here. It gives you the perfect tan color.
Step 9: Pour that tan chocolate into a small piping bag and pipe a filled-in circle in the middle of each cookie. Let these harden up.
Step 10: Once the faces are set, melt the 30g of plain white chocolate. Use this to pipe the little two-part muzzle.
Step 11: For the final part, melt 30 grams of milk chocolate. Carefully place two little dots for the eyes and a small dot for the nose. Let it set, and there you go, you’re done!
What’s Not to Love?
These Chocolate Lion Cookies are just so satisfying to make. Yeah, it looks super cute, almost too cute to eat, but the rich cocoa cookie underneath is the real star. It looks like it came from a fancy bakery, but it’s not too complicated, right? It’s become my new go-to for cute chocolate cookies that melt in your mouth and look as amazing as they taste. I really hope you give it a try. Let me know what you think in the comments!
Make these adorable Chocolate Lion Cookies! This recipe guides you through baking rich cocoa cookies. They're perfect for parties, as fun cookies christmas bakes, or just because! A super fun project.
Ingredients
- 100g Butter (softened)
- 60g Powdered Sugar
- 43g Whole Egg (at room temperature)
- 120g Cake Flour
- 25g Cocoa Powder (pure cocoa)
- 30g Coating Chocolate (Sweet)
- 30g Coating Chocolate (White)
- 100g Coating Chocolate (White) (for face base)
- Approx. 8 pieces Coating Chocolate (Sweet) (for face base)
Equipment
Instructions
- Preheat your oven to 170°C (340°F). Sift the cake flour and cocoa powder together in a bowl.
- In a separate large bowl, beat the softened butter until smooth. Add the powdered sugar and mix until light and fluffy.
- Gradually add the room-temperature egg, mixing well after each addition until it's fully combined.
- Switch to a spatula and add the sifted flour/cocoa mixture. Gently fold it in using cutting motions until the dough just comes together. Do not overmix.
- If the dough feels too soft to pipe, chill it in the refrigerator for 10-15 minutes to firm it up.
- Fit a piping bag with a Suuker Sultan Nozzle and fill it with the dough.
- Pipe the cookies onto a silicone mat or parchment-lined baking sheet. Press the nozzle tip lightly onto the mat as you pipe each circle to help the "mane" form.
- Bake for about 15 minutes.
- Let the cookies cool completely on the pan before decorating.
- For the faces: Melt the 100g white chocolate and 8 sweet chocolate pieces together over a double boiler to create a tan color.
- Transfer this to a small piping bag and pipe a circle in the center of each cooled cookie. Let this set completely.
- Once firm, melt the 30g of plain white chocolate. Use it to pipe two small, teardrop-shaped "muzzles" on top.
- Melt the 30g of sweet chocolate. Carefully pipe two tiny dots for eyes and a small triangle for the nose. Let everything set before serving.
Notes
- Make sure your butter and egg are at room temperature for the best dough consistency.
- If the dough is too soft, a quick 10-1To 5-minute chill in the fridge makes it much easier to pipe.
- Let the cookies cool 100% before adding any chocolate decoration, or it will melt.
- A Suuker Sultan Nozzle is necessary to get the signature lion's mane shape.
Recommended Products
As an Amazon Associate and member of other affiliate programs, I earn from qualifying purchases.