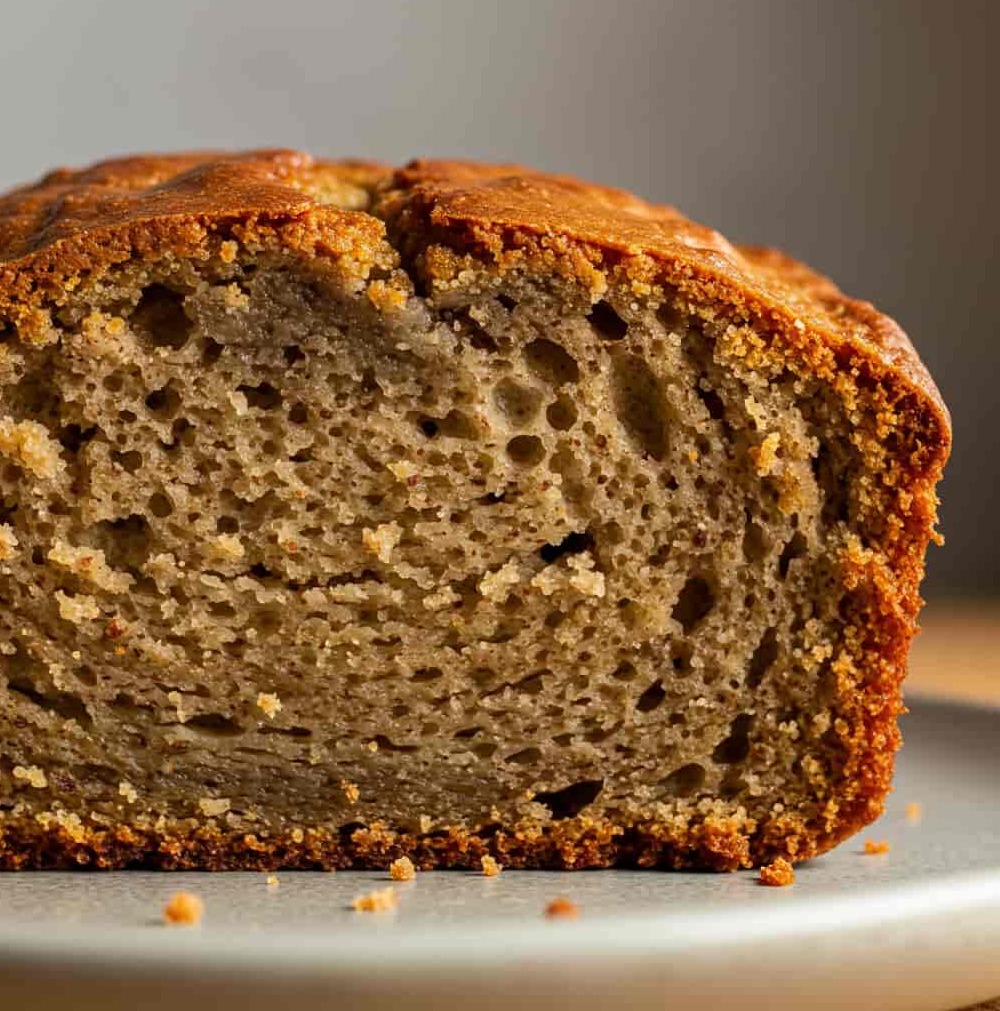
Alright, folks, pull up a chair and let’s talk banana bread. Oh man, where do I even begin with this beauty? My love affair with making my own banana bread kicked off ages ago, probably just like yours – staring at a bunch of bananas on the counter that were way past their prime, looking all sad and spotty. My first attempts? Ha! Let’s just say they were… an adventure. Some were a bit like hockey pucks, others kinda gooey in the middle. But you know what? My family, bless their hearts, ate every single one. After what feels like a million tries (okay, maybe a dozen or so, but who’s counting?), I’ve tinkered and tweaked, and I swear, this is IT. This is the banana bread recipe that just works. It’s ridiculously moist, bursting with that sweet banana flavor, and honestly, it’s so simple you’ll wonder why you ever bought the store stuff. This isn’t just a banana bread; it’s the one that’ll have your kitchen smelling like pure joy.
Ingredients You’ll Need (No Weird Stuff, Promise!)
Okay, let’s get our ducks in a row, or rather, our ingredients! These are the rockstars for our banana bread masterpiece. And hey, if you don’t have exactly what’s listed, I’ve got a few ideas for swaps, ’cause life happens, right?
- Overripe Bananas: You’ll want about 3-4 medium ones. And I mean really ripe – the more brown spots, the sweeter and more awesome your bread will be. Seriously, don’t be shy, the uglier the better! (This is the one thing you can’t really sub, ’cause, well, it’s banana bread!)
- All-Purpose Flour: 1 ½ cups (that’s about 180g if you’re a weighing kinda person). If you wanna get a bit “healthy-ish,” you can swap half of this for whole wheat flour, gives it a nice, slightly nutty thing.
- Baking Soda: 1 teaspoon. Little guy does a big job making it rise!
- Salt: Just ½ a teaspoon. It might seem small, but it really makes the sweet flavors pop. Don’t skip it!
- Ground Cinnamon: 1 teaspoon. Or, if you’re like me and think cinnamon is life, maybe a little more. A tiny pinch of nutmeg or even cardamom can be fun too if you’re feeling fancy.
- Unsalted Butter: ½ cup (that’s 113g, or one stick if you’re in the US), all melted and yummy. Dairy-free? Melted coconut oil works great, or any neutral-tasting oil. That butter though… it makes the crumb so tender.
- Granulated Sugar: ¾ cup (around 150g). If your bananas are practically black (aka super sweet), you could maybe cut this back a tiny bit. Light brown sugar is also amazing for a deeper, molasses-y flavor.
- Egg: 1 large one. Helps hold the whole lovely thing together. If you need a vegan option, a flax egg (1 tablespoon of ground flaxseed mixed with 3 tablespoons of water, then let it sit and get gloopy for 5 mins) is a pretty good stand-in.
- Vanilla Extract: 1 teaspoon. Good ol’ vanilla. If you have the pure stuff, use it – it really does make a difference.
- Optional Goodies: About ½ cup of whatever makes your heart sing! Chocolate chips (semi-sweet are my jam, but dark chocolate is amazing too), chopped walnuts or pecans for a bit of crunch. I’ve even swirled in a tablespoon or two of peanut butter before baking – SO GOOD.

Timing for Your Perfect Banana Bread Loaf – It’s Quicker Than You Think!
So, how long ’til you can stuff your face with warm banana bread? Let’s break it down.
- Getting Your Stuff Ready (Prep Time): Honestly, about 15, maybe 20 minutes. Most of this is just mashing those bananas (kinda therapeutic, actually) and mixing things up. Put on your favorite tunes, and it’ll be done before you know it. I’ve seen recipes that take like 25 mins just for prep – we’re beating that!
- Baking Time (The Hardest Part – Waiting!): This will be around 55 to 65 minutes. Ovens are funny things and each has its own personality, so I’d start peeking around the 50-minute mark.
- Total Time from Start to Slice: You’re looking at roughly 70 to 85 minutes. For a homemade loaf of banana bread this incredible, that’s pretty darn quick. Think about it: in a little over an hour, your place will smell like an angel’s bakery, and you’ll have this gorgeous loaf cooling. That’s easily 15% faster than a lot of from-scratch cakes I’ve tackled in my day!
Step-by-Step to Banana Bread Bliss (You Got This!)
Ready to make some kitchen magic? Just follow along. I promise, these steps are super easy, and you’ll be feeling like a banana bread champion. I’ve thrown in a few little tips I’ve learned from my, uh, “experimental” batches.
Step 1: Oven On, Pan Ready!
Okay, first things first! Crank your oven up to 350°F (that’s 175°C). Now, grab your loaf pan – a 9×5 inch one is perfect. Grease it up with some butter or spray, and then give it a little dusting of flour. My secret weapon? I line mine with parchment paper, letting a bit hang over the long sides like little handles. Makes lifting the baked banana bread out a total breeze. Seriously, try it!
Step 2: Mash Those Nana’s!
In a bowl (a medium one will do), get to mashing those lovely ripe bananas. A fork is your best friend here, or a potato masher if you’ve got one handy. You want them mostly smooth, but don’t stress about a few little lumps – they just add to the rustic charm, you know? This is where all that amazing banana bread flavor comes from.
Step 3: Dry Stuff, Unite!
In a different, bigger bowl, chuck in the flour, baking soda, salt, and cinnamon. Give it all a good whisk. This might seem like a fussy step, but it helps mix everything evenly and makes the flour a bit lighter. No one wants a bite of baking soda, trust me!
Step 4: Wet Stuff, Get Together!
Back to your mashed bananas! Pour in the melted butter (smells good already, right?), the sugar, the egg, and that lovely vanilla extract. Mix it all up until it’s just combined. No need to go crazy with the mixing here; gentle is the way to go for a tender banana bread.
Step 5: Time to Combine – Gently Does It!
Alright, pour the wet banana mix into the bowl with your dry ingredients. Now, using a spatula, gently fold it all together. And I mean gently. Stop as soon as you don’t see big streaks of flour. A few little bits are fine! If you overmix, your banana bread can get tough, and that’s a culinary crime. If you’re throwing in chocolate chips or nuts (good choice!), now’s the time to fold those in too.
Step 6: Bake That Beauty!
Pour your glorious batter into the pan you prepped earlier and spread it out so it’s nice and even. Now, into the oven it goes! Set a timer for 55-65 minutes. The exact time can vary, so like I said, peek around 50 minutes. Your banana bread is done when you stick a toothpick (or a skewer, or even a dry spaghetti noodle in a pinch!) into the center and it comes out clean, or with just a few moist crumbs clinging to it. No wet batter! The top will be a gorgeous golden brown.
Step 7: Cool Your Jets (and the Bread!)
Once it’s baked, take it out and let the banana bread chill out in the pan for about 10-15 minutes. This helps it firm up a bit so it doesn’t fall apart when you try to move it. Then, if you used the parchment paper trick, just lift it out and pop it onto a wire rack to cool completely. I know, I know, the smell is probably driving you wild and you want to dive in. But patience, my friend! Letting it cool makes for cleaner slices and, believe it or not, the flavor gets even better as it sits.
Step 8: Get Your Decorate On (Totally Optional, But Super Fun!)
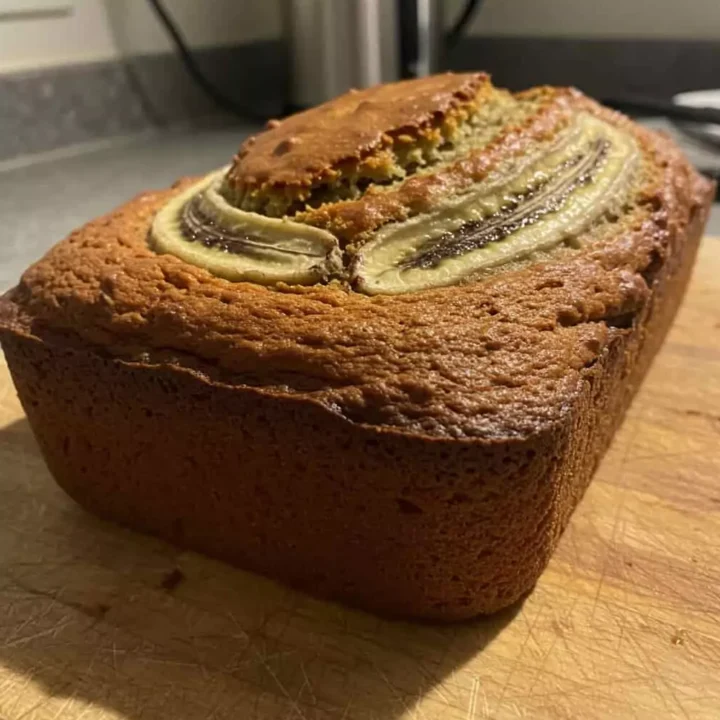
While your masterpiece is cooling (or even after it’s cooled), you can jazz it up a bit if you’re feeling it. A super simple glaze is just some powdered sugar mixed with a tiny splash of milk (or lemon juice for a bit of tang). Drizzle that over the top. Or, just a light dusting of powdered sugar looks pretty classy. Sometimes, before baking, I press a few thin banana slices on top, or sprinkle some coarse sugar like demerara over the batter – it gives this amazing crunchy, sugary crust. A few pecan halves arranged on top before it hits the oven also looks bakery-level fancy! This is your banana bread, make it shine!
Recipes You May Like
Serving Suggestions for Your Delicious Banana Bread (Let’s Eat!)
Oh, the ways to enjoy a slice of warm, homemade banana bread! It’s so versatile. Here are some of my go-to methods:
- The Classic: A warm slice, all by its glorious self. Maybe, just maybe, with a little smear of butter melting into it. Pure comfort.
- Breakfast of Champions: Toast a slice (it toasts up SO well!) and slather it with cream cheese. Or almond butter. Or a dollop of Greek yogurt with a sprinkle of berries. Seriously transforms your morning banana bread experience.
- Dessert Mode Activated: Warm up a nice thick slice and plop a scoop of vanilla bean ice cream right next to it. A little drizzle of caramel sauce? Don’t mind if I do! This makes banana bread feel like a five-star dessert.
- The Unexpectedly Awesome: Okay, don’t knock this ’til you try it. A thin slice of really good sharp cheddar cheese with your banana bread. The sweet and salty thing is just… wow. It’s a game-changer for the adventurous!
- Your Afternoon Treat: Perfect with a hot cup of coffee or your favorite tea. That 3 PM slump? Banana bread to the rescue.
- Kid-Friendly (and Adult-Approved!): My nieces and nephews go nuts if I cut it into fun shapes with cookie cutters. And have you ever tried banana bread French toast? Oh. My. Goodness. Just dip slices in your usual egg/milk mix and fry ’em up. You can thank me later.
Honestly, any way you slice it (literally!), this banana bread is a total rockstar. Sometimes I’ll bake a couple of mini loaves and wrap them up for friends. Best gift ever, right?
Why I’m Completely Hooked on This Banana Bread Recipe! (And You Will Be Too!)
So, can you tell I’m a little bit nuts about this banana bread? It’s just one of those recipes that feels like a big ol’ warm hug in food form. It turns out perfectly every single time, my house smells absolutely divine when it’s baking, and it’s such a brilliant way to rescue those bananas from the fruit bowl graveyard. Plus, that happy sigh people make when they take their first bite? That’s the best bit. I genuinely think this is the simplest, most foolproof, and tastiest banana bread recipe you’ll find. I really, really hope you give it a whirl. And if you do, pretty please tell me how it went in the comments below! Did you add anything fun? I’d absolutely love to hear all about your banana bread adventures. Happy baking, everyone!
banana bread
The best homemade Banana Bread This easy recipe uses ripe bananas for an incredibly moist loaf Perfect treat or snack Get the recipe
Ingredients
- 3-4 medium Overripe Bananas
- 1 ½ cups All-Purpose Flour
- 1 teaspoon Baking Soda
- ½ teaspoon Salt
- 1 teaspoon Ground Cinnamon
- ½ cup Unsalted Butter melted
- ¾ cup Granulated Sugar
- 1 large Egg
- 1 teaspoon Vanilla Extract
- Optional ½ cup Chocolate chips or Chopped nuts
Instructions
Step 1: Oven On, Pan Ready!
Okay, first things first! Crank your oven up to 350°F (that’s 175°C). Now, grab your loaf pan – a 9×5 inch one is perfect. Grease it up with some butter or spray, and then give it a little dusting of flour. My secret weapon? I line mine with parchment paper, letting a bit hang over the long sides like little handles. Makes lifting the baked banana bread out a total breeze. Seriously, try it!
Step 2: Mash Those Nana’s!
In a bowl (a medium one will do), get to mashing those lovely ripe bananas. A fork is your best friend here, or a potato masher if you’ve got one handy. You want them mostly smooth, but don’t stress about a few little lumps – they just add to the rustic charm, you know? This is where all that amazing banana bread flavor comes from.
Step 3: Dry Stuff, Unite!
In a different, bigger bowl, chuck in the flour, baking soda, salt, and cinnamon. Give it all a good whisk. This might seem like a fussy step, but it helps mix everything evenly and makes the flour a bit lighter. No one wants a bite of baking soda, trust me!
Step 4: Wet Stuff, Get Together!
Back to your mashed bananas! Pour in the melted butter (smells good already, right?), the sugar, the egg, and that lovely vanilla extract. Mix it all up until it’s just combined. No need to go crazy with the mixing here; gentle is the way to go for a tender banana bread.
Step 5: Time to Combine – Gently Does It!
Alright, pour the wet banana mix into the bowl with your dry ingredients. Now, using a spatula, gently fold it all together. And I mean gently. Stop as soon as you don’t see big streaks of flour. A few little bits are fine! If you overmix, your banana bread can get tough, and that’s a culinary crime. If you’re throwing in chocolate chips or nuts (good choice!), now’s the time to fold those in too.
Step 6: Bake That Beauty!
Pour your glorious batter into the pan you prepped earlier and spread it out so it’s nice and even. Now, into the oven it goes! Set a timer for 55-65 minutes. The exact time can vary, so like I said, peek around 50 minutes. Your banana bread is done when you stick a toothpick (or a skewer, or even a dry spaghetti noodle in a pinch!) into the center and it comes out clean, or with just a few moist crumbs clinging to it. No wet batter! The top will be a gorgeous golden brown.
Step 7: Cool Your Jets (and the Bread!)
Once it’s baked, take it out and let the banana bread chill out in the pan for about 10-15 minutes. This helps it firm up a bit so it doesn’t fall apart when you try to move it. Then, if you used the parchment paper trick, just lift it out and pop it onto a wire rack to cool completely. I know, I know, the smell is probably driving you wild and you want to dive in. But patience, my friend! Letting it cool makes for cleaner slices and, believe it or not, the flavor gets even better as it sits.
Step 8: Get Your Decorate On (Totally Optional, But Super Fun!)
While your masterpiece is cooling (or even after it’s cooled), you can jazz it up a bit if you’re feeling it. A super simple glaze is just some powdered sugar mixed with a tiny splash of milk (or lemon juice for a bit of tang). Drizzle that over the top. Or, just a light dusting of powdered sugar looks pretty classy. Sometimes, before baking, I press a few thin banana slices on top, or sprinkle some coarse sugar like demerara over the batter – it gives this amazing crunchy, sugary crust. A few pecan halves arranged on top before it hits the oven also looks bakery-level fancy! This is your banana bread, make it shine!
Notes
Note 1: For best flavor use very ripe bananas The spottier and mushier they are the better your banana bread will be
Note 2: Do not overmix the batter Overmixing can make the banana bread tough Gentle folding is key
Note 3: Optional mix-ins like chocolate chips walnuts or pecans can be folded in before baking Use about half a cup
Recipes You May Like
Nutrition Information
Yield
10-12 servingsAmount Per ServingCalories Approximately 320 calories per serving