
Last summer, watermelon kiwi popsicles saved us from the scorching heat, when the air was stifling and the kids were climbing on the couch, grumbling. I almost gave up and went to the store to grab any random candy, when I spotted a huge watermelon on the counter, next to some forgotten kiwis. An idea popped into my head – Why not? And the result was this refreshing recipe that quickly became our favorite. The real secret? Picking a ripe watermelon, so ripe it practically sings from ripeness. Trust me, I learned this the hard way after a failed attempt. Don’t make the same mistake I did.
Ingredients
- About 4 cups of seedless watermelon, all chopped up
- 4 or 5 ripe kiwis, with the skins taken off (give ’em a gentle squeeze; you want soft, not mushy)
- A spoonful or two of agave or honey (Only if you taste the watermelon and it needs a little help. Be a hero, taste it first.)
- A splash of fresh lime juice (Don’t skip this! It wakes everything up.)
Let’s Talk Timing
Look, the absolute worst part about making any kind of frozen treat is the time you spend staring into the freezer, willing it to work faster. I am not a patient person, so I feel your pain. Here’s the reality of the timeline for these Watermelon Kiwi Popsicles.
- Hands-on time: Maybe 15 minutes of actual work. Super quick.
- Freeze time: This is the test of your willpower. It needs a good 4-6 hours to really set up properly.
- Total wait: From start to finish, you’re looking at around 4 hours and 15 minutes. Plan accordingly!
Step-by-Step Instructions
Part 1:
Okay, first up. Get your chopped watermelon and that little bit of lime juice into a blender. Just let the blender go until you don’t see any more chunks and it looks like a beautiful pink juice. Some people strain the pulp out here, but I never do. I feel like you’re throwing away some of the good stuff, you know? But you do you. This is the moment of truth: taste it. If it’s not quite sweet enough, now’s your chance to add that drizzle of agave or honey and give it a final, quick blend.
Part 2:
Now, start pouring that watermelon juice into your popsicle molds. A good rule of thumb is to fill them about 2/3 to 3/4 of the way full. We need to save room for the kiwi moment. Carefully get them into the freezer. Set a timer for about 90 minutes. You’re not trying to freeze them solid yet, just get them slushy and firm enough to hold their own.
Part 3:
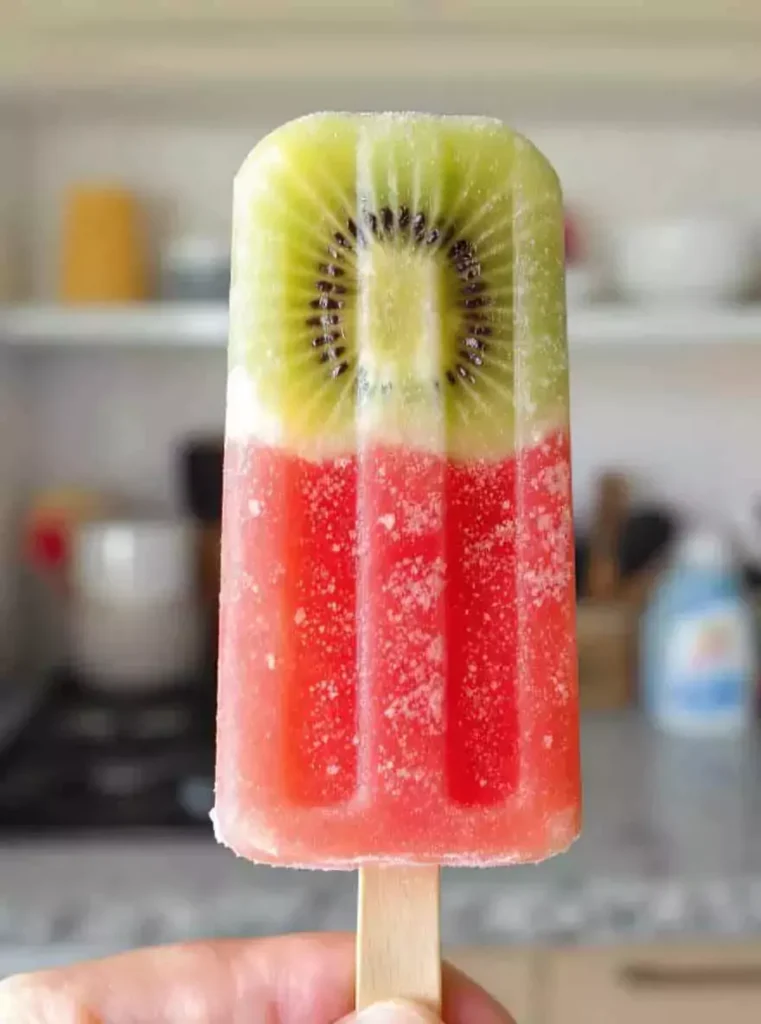
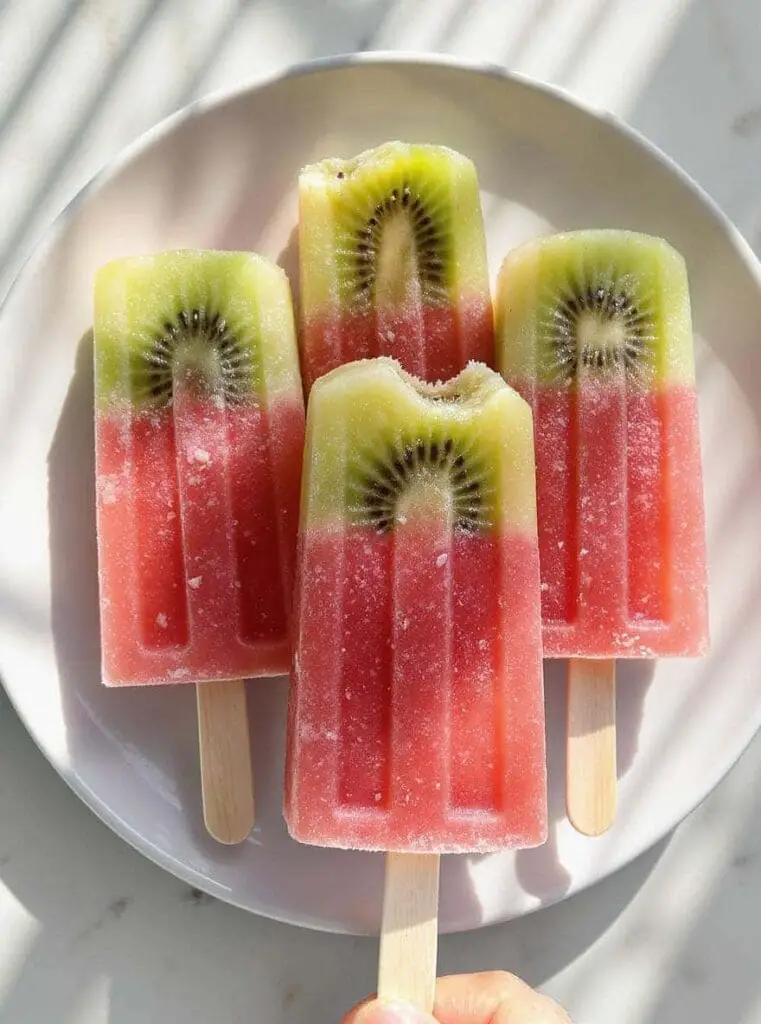
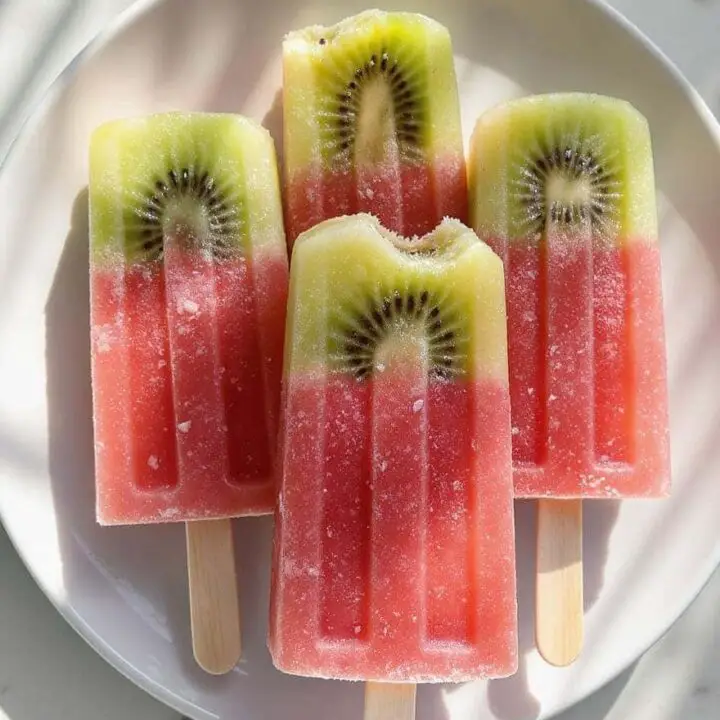
While the watermelon part is chilling out, peel and slice your kiwis. I like them fairly thin so you can squeeze a couple into each pop. Once your timer goes off, pull the molds out. The watermelon mix should be firm enough that when you poke the kiwi slices in, they don’t just plummet to the bottom. Gently arrange a few slices in each mold. It always looks so cool, like little green polka dots.
Part 4:
Alright, last step. Put the popsicle sticks in and march those molds right back into the freezer. Now they need their long sleep. Give them at least another 3 hours, but honestly, I just leave them in overnight. It guarantees they’re frozen solid and you won’t have the tragedy of a soft popsicle falling off its stick.
Recipes You May Like
Fun Ways to Serve Your Watermelon Kiwi Popsicles
These pops are amazing on their own, obviously. But if you have people coming over, they make you look like a culinary genius. Last Fourth of July, I made a double batch and served them on a metal tray full of ice. They were gone in about five minutes flat. They’re also a great, light thing to have after a big, heavy meal from the grill. Oh, and one night I was feeling extra and dipped the ends in some melted white chocolate… game-changer. Just let the chocolate harden in the freezer for a few minutes. So good.
Okay, I’m a Little Obsessed With This Recipe
Is it weird to have a favorite popsicle recipe? Because this is mine. It’s just so simple and clean, and it makes me feel good knowing exactly what my family is eating. It’s not a sugary science experiment, it’s just fruit. The bright pink and green colors are just a bonus that happens to look fantastic. For real, if you make these, drop a comment below or tag me in a picture online. I’m not kidding, I actually want to see how yours turn out!
Watermelon Kiwi Popsicles
An incredibly easy and refreshing frozen treat. Made with just 4 simple ingredients its the perfect healthy homemade snack to beat the summer heat.
Ingredients
- 4 cups seedless watermelon chopped up
- 4-5 ripe kiwis peeled
- 1-2 tablespoons agave or honey (optional)
- 1 tablespoon fresh lime juice
Instructions
Step 1
toss your watermelon chunks and the lime juice in a blender just whiz it up till its totally smooth if you wanna add sweetener do it now and give it one last blend
Step 2
pour that pink juice into your popsicle molds go about three quarters full we need room for the kiwi now carefully get them in the freezer for maybe 90 minutes till they're slushy
Step 3
while the pops are chilling slice up your kiwis once the watermelon part is firm just gently push the kiwi slices down into each mold right on top
Step 4
ok last step put the sticks in and get them back in the freezer for their long sleep they need at least 4 more hours but overnight is best so they dont fall apart
Notes
- seriously find the ripest sweetest watermelon you can it makes a huge difference
- dont like pulp just strain the watermelon juice before you pour it no big deal
- if you feelin fancy dip the frozen pops in melted white chocolate its so good
- to make it 100% vegan just be sure to use agave not honey
Nutrition Information
Yield
10Serving Size
1Amount Per ServingCalories 57Total Fat 0gSaturated Fat 0gTrans Fat 0gUnsaturated Fat 0gCholesterol 0mgSodium 2mgCarbohydrates 14gFiber 1gSugar 11gProtein 1g