So, you know those amazing strawberry shortcake ice cream bars from when we were kids? That crunchy outside, the creamy inside? Yeah, that. I got obsessed with recreating that vibe but, like, a million times better in a proper, grown-up cheesecake. Let me tell you, the journey to this strawberry crunch cheesecake was… messy! My kitchen looked like a strawberry exploded, and my family? Bless their hearts, they became official cheesecake testers whether they liked it or not (spoiler: they always liked it!). But after tweaking everything – the crust crunch level, the perfect cheesecake tang, getting that strawberry swirl just right – I finally cracked the code. This isn’t just good, you guys. It’s smooth, tangy cheesecake bliss meets sweet strawberry goodness meets the most incredible, addictive crunchy topping EVER. Making this strawberry crunch cheesecake is basically my love language now.
What You’ll Need for This Strawberry Crunch Cheesecake Dream
Okay, let’s raid the pantry and fridge! Don’t panic when you see the list – it’s mostly normal stuff, but put it all together, and BAM! Magic happens. It’s all about that creamy/crunchy/fruity combo that makes this strawberry crunch cheesecake so ridiculously good.
For That Perfect Graham Cracker Base:
- Graham Cracker Crumbs: ‘Bout 121 cups should do it. That’s like 10-12 full crackers – just whiz ’em in a food processor or put ’em in a bag and bash ’em! Feeling adventurous? Crushed vanilla wafers or even shortbread cookies are yummy swaps.
- Unsalted Butter: 6 tablespoons, melted down ’til it smells all nutty and wonderful. This is our crust glue!
- Sugar: Just a tiny bit – 2 tablespoons – ’cause the rest of the cake is sweet enough!
For the Dreamiest Cheesecake Filling:
- Cream Cheese: Four blocks (32 oz total), and PLEASE, I’m begging you, let it sit out on the counter for hours until it’s soft. Room temp is NON-NEGOTIABLE for smooth cheesecake! Use the full-fat good stuff.
- Sugar: 141 cups. Yep, it’s dessert!
- Large Eggs: 4 of ’em. Let these guys hang out on the counter with the cream cheese, okay? They mix in way better when they’re not freezing cold.
- Sour Cream: 1/2 cup, full fat, also room temp! Gives it that tang that cuts the richness. Out of sour cream? No biggie, plain full-fat Greek yogurt works like a charm.
- Vanilla Extract: A whole tablespoon! Good vanilla makes such a difference.
- Lemon Juice: 1 tablespoon, fresh squeezed if you can! It just brightens everything up.
- Strawberry Puree: 1/2 cup. Easiest way? Blend about a cup of strawberries (fresh or thawed frozen) ’til smooth. Strain the seeds if they bother you, but I usually don’t!
For the Crunch That Will Change Your Life (Seriously):
- All-Purpose Flour: 1/2 cup – gives our crumble some structure.
- Freeze-Dried Strawberries: 1 cup! These are little flavour bombs. Pulse ’em in a food processor ’til they’re mostly powder but still have some little crunchy bits. Find ’em near the dried fruit usually. They make the crunch PINK and taste intensely strawberry-y!
- Vanilla Sandwich Cookies: Like Golden Oreos! Crush up about a cup’s worth (maybe 10-12 cookies?). Adds sweetness and that perfect cookie crunch.
- Unsalted Butter: 1/2 cup (that’s one stick), COLD COLD COLD, and cut into little pieces. Cold butter = crumbly topping!
- Sugar: 1/4 cup for sweetening up our crunch.
For Making It Look Awesome (Easy Peasy!):
- Whipped Cream: Whatever kind you like – homemade, spray can, tub-o-cool-whip, you do you!
- Fresh Strawberries: A few pretty ones for slicing and decorating.
- Extra Crunch: Remember that little bit we set aside? Perfect for sprinkling!

Let’s Talk Time: Making Your Strawberry Crunch Cheesecake Happen
Okay, deep breaths. This isn’t a 30-minute dessert. Making a truly amazing cheesecake takes some time, but most of it is just chill time (literally!). So put on some tunes and enjoy the process!
- Actually Doing Stuff (Prep): Plan for around 45 minutes. This is when you’ll make the crust, mix the dreamy filling, whip up that awesome crunch, and layer it all up. It’s the fun part!
- Oven Time (Baking): It needs a good 70-80 minutes baking nice and slow. Think low heat, gentle cooking.
- The Waiting Game (Cooling & Chilling): This is CRUCIAL! Let it cool super slowly: 1 hour in the turned-off oven (door cracked!), then fully cool on the counter, THEN into the fridge for at least 6 hours. Overnight is honestly the best. Don’t rush this part! Your patience will be rewarded with the most amazing strawberry crunch cheesecake texture.
- Total Hands-On Time: Really only about 45 minutes. Not bad, right?
- Total Time ‘Til You Can Eat It: Yeah, it’s about 8-9 hours start to finish, but YOU aren’t working that whole time! It’s mostly just letting science and deliciousness happen in the fridge.
Step-by-Step: Let’s Bake This Strawberry Crunch Cheesecake!
Alright, apron on? Let’s get this strawberry crunch cheesecake party started! Just follow along, don’t stress, it’s gonna be great.
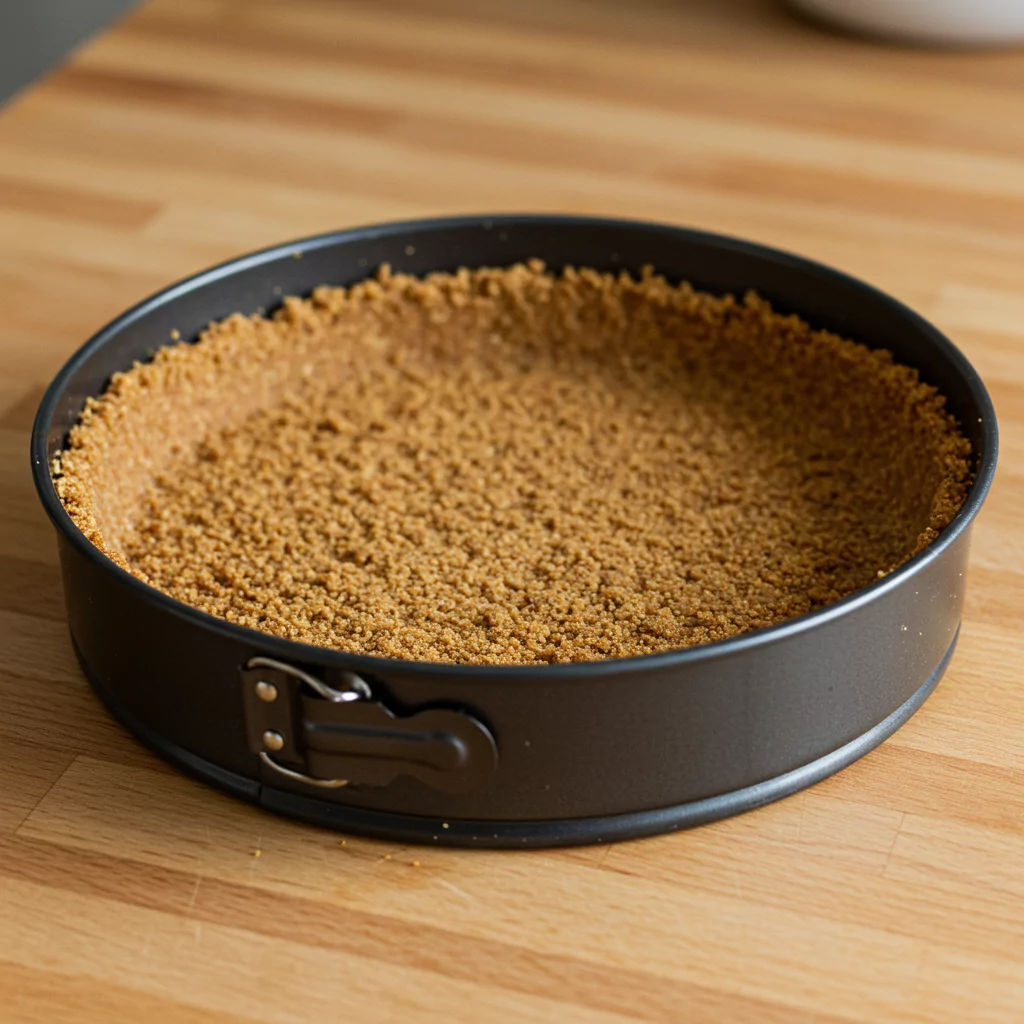
Step 1: Get the Crust Ready
First things first: crank your oven up to 350∘F (175∘C). Grab your 9-inch springform pan (the kind with the removable sides). Now, my secret weapon against leaky water baths: wrap the outside bottom and sides of the pan SUPER tightly with two layers of heavy-duty foil. Seriously, make it snug! Okay, now mix your graham cracker crumbs, that lovely melted butter, and the 2 tablespoons of sugar in a bowl. It should feel like wet sand. Press this mixture firmly and evenly into the bottom of your foil-wrapped pan. Use the bottom of a glass to get it nice and flat! Bake it for 10 minutes. Let it cool completely on a wire rack while you make the filling magic happen.
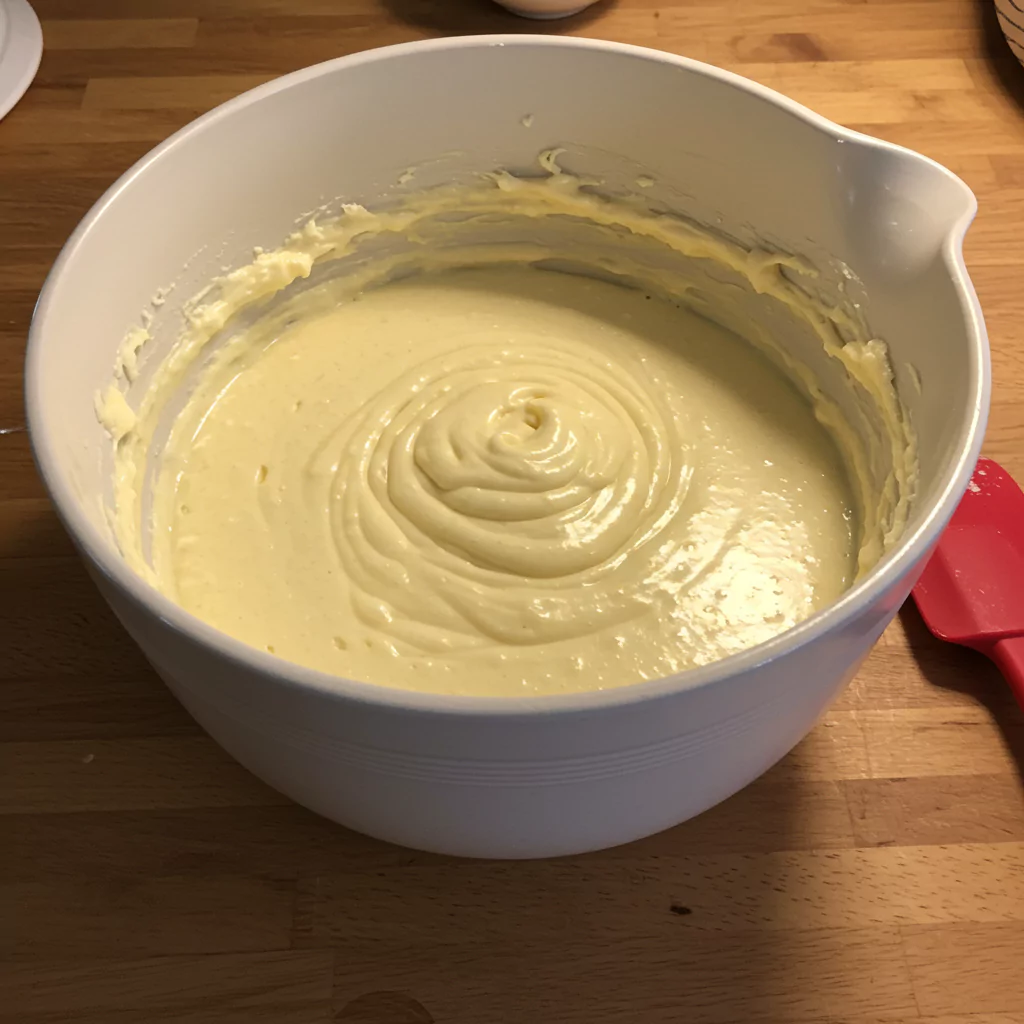
Step 2: Make That Silky Smooth Filling
Big bowl time! Using an electric mixer (stand mixer or hand mixer, doesn’t matter), beat your very soft room temp cream cheese on medium-low speed until there are absolutely ZERO lumps. Scrape down the bowl a lot! Slowly pour in the 141 cups sugar and beat until it’s smooth and gorgeous. Now, add your room temp eggs one at a time, mixing on LOW speed only until each egg disappears. Seriously, be gentle here – overmixing eggs = sad, cracked cheesecake. Nobody wants that! Gently mix in the room temp sour cream, vanilla, and lemon juice just until it’s all combined. That’s it! Stop mixing! The batter should look thick, pale, and luscious.
Step 3: Layer Up and Get Swirly!
Pour about half of that beautiful batter over your cooled crust. Spoon about half of your strawberry puree in little dollops randomly over the batter. Gently pour the rest of the cheesecake batter on top. Dollop the remaining strawberry puree over this layer. Now, grab a butter knife or a skewer and gently swirl the puree into the batter. Make some lazy figure-eights or zig-zags. Don’t mix it completely – you want pretty ribbons of strawberry, not just pink batter!
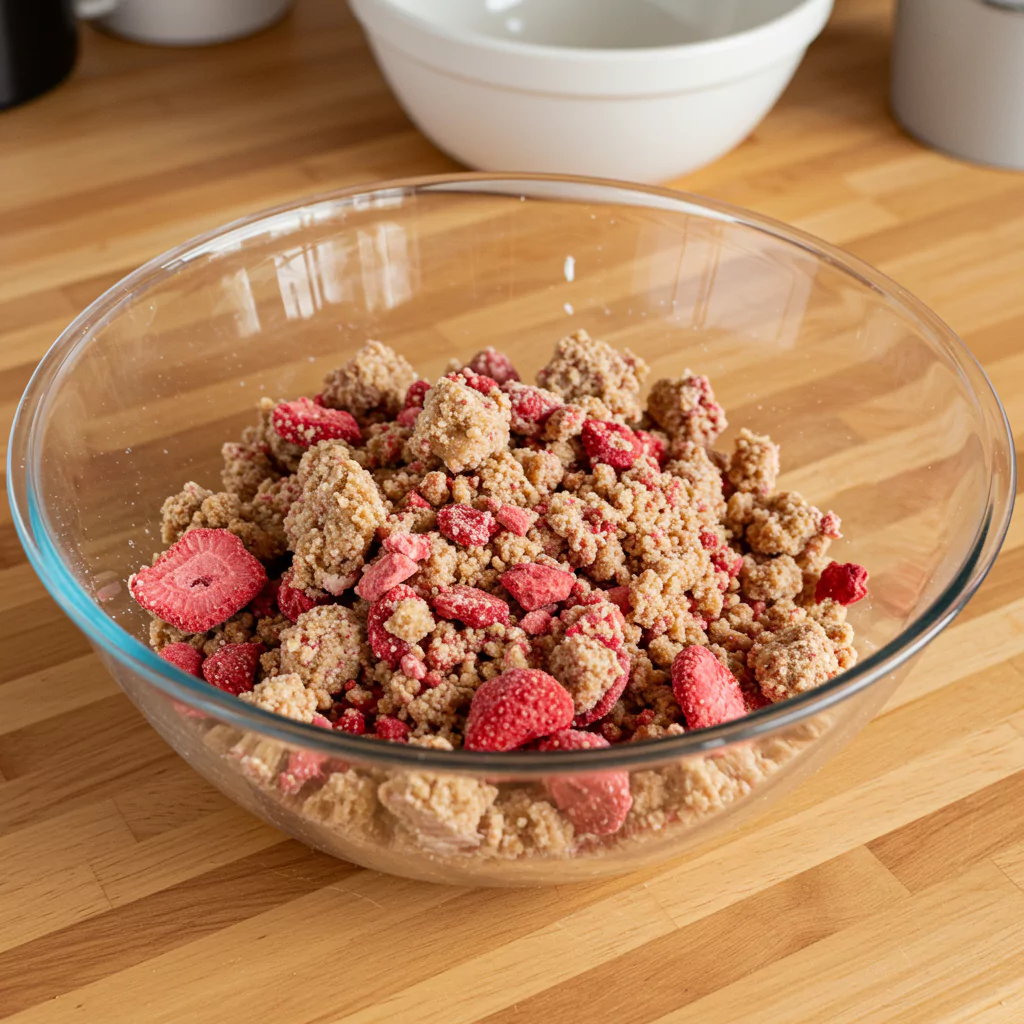
Step 4: Whip Up the CRUNCH!
In another bowl (sorry, dishes!), whisk the flour and the 1/4 cup sugar together. Add the COLD butter cubes. Now, get your hands in there (or use a pastry blender/forks) and squish and rub the butter into the flour until it looks like chunky crumbs – some small bits, some pea-sized bits. Stir in the crushed vanilla cookies and that vibrant freeze-dried strawberry powder. Give it a good mix! My little trick: I like to leave some slightly bigger cookie pieces for extra crunch factor! Okay, scoop out about 1/2 cup of this amazing stuff and set it aside – that’s for decorating later. Sprinkle the rest evenly all over the top of your cheesecake batter. Be generous!
Step 5: Time for a Gentle Bake (Water Bath Fun!)
Find a big roasting pan that your foil-wrapped springform pan can sit inside comfortably. Carefully place the cheesecake pan into the roasting pan. Now, carefully pour HOT water into the roasting pan (not the cheesecake!) until the water comes about halfway up the sides of your cheesecake pan. This steamy water bath is like a spa day for your cheesecake – it helps it bake super evenly and prevents cracks. Gently, carefully, slide the whole contraption into your preheated oven. Bake for 70-80 minutes. You’re looking for the edges to be set, but the very center should still have a little wobble when you gently nudge the pan.
Step 6: The Slow Chill Down (No Cracks Allowed!)
This is maybe the most important step for a perfect cheesecake! Turn the oven OFF. Prop the oven door open just a little bit (a wooden spoon handle works great) and just leave the cheesecake in there to cool down slowly for one whole hour. Let it adjust gradually. After the hour, carefully take the cheesecake pan out of the water bath (you can peel off the foil now – careful, it’s hot!). Let it cool ALL the way down to room temperature sitting on a wire rack. No rushing!
Step 7: Fridge Nap Time (The Final Wait!)
Once your cheesecake is completely cool (no warmth left at all!), cover it loosely with plastic wrap (try not to let the plastic touch the top, especially the crunch!) and slide it into the fridge. Now comes the hard part: waiting! It needs at least 6 hours to fully set up and for the flavors to get happy together. Honestly? Overnight is king. Your future self, eating amazing strawberry crunch cheesecake, will thank you for your patience now.
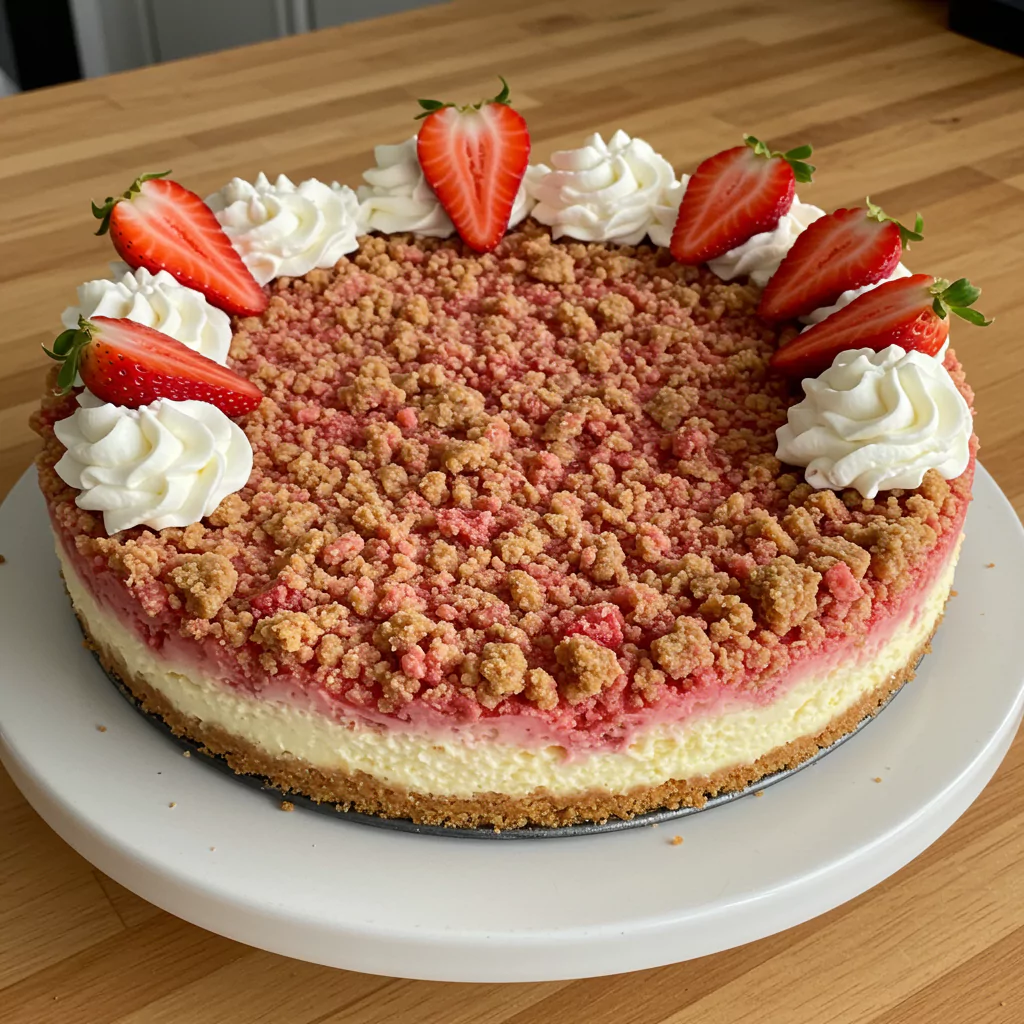
Step 8: Make it Pretty & EAT!
Woohoo, you made it! Before you serve this beauty, run a thin knife around the edge between the cake and the pan, then carefully undo the springform latch. The sides should come away cleanly. Now, make it look stunning! Pipe some whipped cream swirls around the edge, arrange some fresh strawberry slices, and sprinkle over that glorious crunch topping you saved. Use a big, sharp knife to slice it – dip the knife in hot water and wipe it clean between each cut for those perfect, Insta-worthy slices. Ta-da!
Recipes You May Like
How to Serve Up Your Strawberry Crunch Cheesecake Masterpiece
Honestly? Just hand me a fork and a slice, I’m happy. But if you wanna jazz it up:
- Extra Strawberry Vibes: A little drizzle of strawberry sauce takes it over the top.
- Ice Cream Buddy: Vanilla bean ice cream + this cheesecake = match made in heaven.
- Perfect with Coffee: Seriously, the tang and crunch are amazing with a hot cuppa.
- Party Hero: Show up with this strawberry crunch cheesecake and you’ll be the most popular person there. Guaranteed.
- My Fave Way: A dollop of whipped cream, extra crunch, maybe a tiny mint leaf for color. Simple, perfect.
Storing Your Precious Strawberry Crunch Cheesecake
IF (and that’s a big IF) you have leftovers:
- Fridge: Cover it up well with plastic wrap or pop it in an airtight container. It’ll be great in the fridge for 4-5 days. The crunch might get a little less crunchy over time, but it’s still darn tasty.
- Freezer: Yes, you can freeze this star! Slice it first, freeze the slices solid on a baking sheet, then wrap ’em individually really well in plastic wrap and foil. They’re best eaten within a month or two. Thaw overnight in the fridge. Texture might change slightly, but still good in a pinch!
- Plan Ahead: You can totally make the crust (press it into the pan) and the crunch topping a day before. Keep the crust covered on the counter, and the crunch in an airtight container. Boom, day-of assembly is faster!
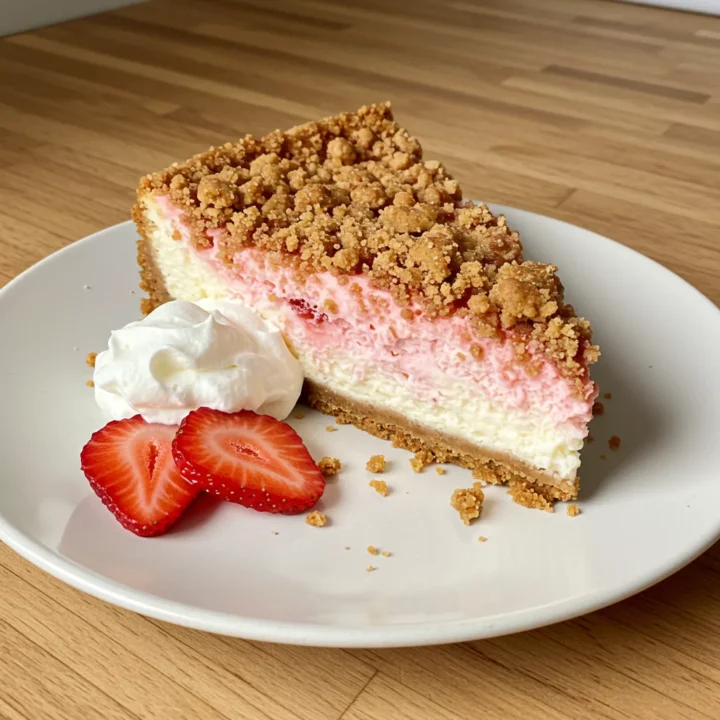
Okay, For Real, Why I Adore This Strawberry Crunch Cheesecake
Can you tell I’m a little obsessed? This strawberry crunch cheesecake just hits different. It’s got everything: that super smooth, slightly tangy cheesecake filling that just melts in your mouth, the bright pop of sweet strawberry swirled through, and then – BAM! – that buttery, crispy, strawberry-packed crunch on top. It’s like childhood nostalgia met a fancy dessert and had a beautiful baby.
It’s become my signature bake. Birthdays? Anniversaries? Just feeling fancy on a Wednesday? This is what I make. It always, always gets rave reviews, and watching people’s faces light up when they take that first bite? That’s the best part.
So please, please, PLEASE, if you love cheesecake, or strawberries, or crunchy things (who doesn’t?!), give this strawberry crunch cheesecake a try! I poured my heart (and many pounds of cream cheese) into figuring this recipe out, and I’d be absolutely thrilled if you loved it too. If you make it, come back and spill the tea in the comments! Tell me everything! Did you nail it? Did you add your own spin? Any questions? Let’s talk cheesecake! Happy baking, you awesome human!
Strawberry Crunch Cheesecake
Creamy, tangy cheesecake meets sweet strawberry and a buttery, crunchy topping! This showstopper dessert is easier than you think! Try it now!
Ingredients
- 1 1/2 cups graham cracker crumbs
- 6 tablespoons unsalted butter, melted
- 2 tablespoons granulated sugar
- 32 ounces cream cheese, softened
- 1 1/4 cups granulated sugar
- 4 large eggs, room temperature
- 1/2 cup sour cream, room temperature
- 1 tablespoon pure vanilla extract
- 1 tablespoon fresh lemon juice
- 1/2 cup strawberry puree
- 1/2 cup all-purpose flour
- 1 cup freeze-dried strawberries, pulsed
- 1 cup vanilla sandwich cookies, crushed
- 1/2 cup (1 stick) unsalted butter, cold, cubed
- 1/4 cup granulated sugar
- Whipped cream
- Fresh strawberries, sliced
- Extra crunch topping
Instructions
Step 1: Get the Crust Ready
First things first: crank your oven up to 350∘F (175∘C). Grab your 9-inch springform pan (the kind with the removable sides). Now, my secret weapon against leaky water baths: wrap the outside bottom and sides of the pan SUPER tightly with two layers of heavy-duty foil. Seriously, make it snug! Okay, now mix your graham cracker crumbs, that lovely melted butter, and the 2 tablespoons of sugar in a bowl. It should feel like wet sand. Press this mixture firmly and evenly into the bottom of your foil-wrapped pan. Use the bottom of a glass to get it nice and flat! Bake it for 10 minutes. Let it cool completely on a wire rack while you make the filling magic happen.
Step 2: Make That Silky Smooth Filling
Big bowl time! Using an electric mixer (stand mixer or hand mixer, doesn’t matter), beat your very soft room temp cream cheese on medium-low speed until there are absolutely ZERO lumps. Scrape down the bowl a lot! Slowly pour in the 141 cups sugar and beat until it’s smooth and gorgeous. Now, add your room temp eggs one at a time, mixing on LOW speed only until each egg disappears. Seriously, be gentle here – overmixing eggs = sad, cracked cheesecake. Nobody wants that! Gently mix in the room temp sour cream, vanilla, and lemon juice just until it’s all combined. That’s it! Stop mixing! The batter should look thick, pale, and luscious.
Step 3: Layer Up and Get Swirly!
Pour about half of that beautiful batter over your cooled crust. Spoon about half of your strawberry puree in little dollops randomly over the batter. Gently pour the rest of the cheesecake batter on top. Dollop the remaining strawberry puree over this layer. Now, grab a butter knife or a skewer and gently swirl the puree into the batter. Make some lazy figure-eights or zig-zags. Don’t mix it completely – you want pretty ribbons of strawberry, not just pink batter!
Step 4: Whip Up the CRUNCH!
In another bowl (sorry, dishes!), whisk the flour and the 1/4 cup sugar together. Add the COLD butter cubes. Now, get your hands in there (or use a pastry blender/forks) and squish and rub the butter into the flour until it looks like chunky crumbs – some small bits, some pea-sized bits. Stir in the crushed vanilla cookies and that vibrant freeze-dried strawberry powder. Give it a good mix! My little trick: I like to leave some slightly bigger cookie pieces for extra crunch factor! Okay, scoop out about 1/2 cup of this amazing stuff and set it aside – that’s for decorating later. Sprinkle the rest evenly all over the top of your cheesecake batter. Be generous!
Step 5: Time for a Gentle Bake (Water Bath Fun!)
Find a big roasting pan that your foil-wrapped springform pan can sit inside comfortably. Carefully place the cheesecake pan into the roasting pan. Now, carefully pour HOT water into the roasting pan (not the cheesecake!) until the water comes about halfway up the sides of your cheesecake pan. This steamy water bath is like a spa day for your cheesecake – it helps it bake super evenly and prevents cracks. Gently, carefully, slide the whole contraption into your preheated oven. Bake for 70-80 minutes. You’re looking for the edges to be set, but the very center should still have a little wobble when you gently nudge the pan.
Step 6: The Slow Chill Down (No Cracks Allowed!)
This is maybe the most important step for a perfect cheesecake! Turn the oven OFF. Prop the oven door open just a little bit (a wooden spoon handle works great) and just leave the cheesecake in there to cool down slowly for one whole hour. Let it adjust gradually. After the hour, carefully take the cheesecake pan out of the water bath (you can peel off the foil now – careful, it’s hot!). Let it cool ALL the way down to room temperature sitting on a wire rack. No rushing!
Step 7: Fridge Nap Time (The Final Wait!)
Once your cheesecake is completely cool (no warmth left at all!), cover it loosely with plastic wrap (try not to let the plastic touch the top, especially the crunch!) and slide it into the fridge. Now comes the hard part: waiting! It needs at least 6 hours to fully set up and for the flavors to get happy together. Honestly? Overnight is king. Your future self, eating amazing strawberry crunch cheesecake, will thank you for your patience now.
Step 8: Make it Pretty & EAT!
Woohoo, you made it! Before you serve this beauty, run a thin knife around the edge between the cake and the pan, then carefully undo the springform latch. The sides should come away cleanly. Now, make it look stunning! Pipe some whipped cream swirls around the edge, arrange some fresh strawberry slices, and sprinkle over that glorious crunch topping you saved. Use a big, sharp knife to slice it – dip the knife in hot water and wipe it clean between each cut for those perfect, Insta-worthy slices. Ta-da!
Notes
Nutrition Information
Amount Per ServingCalories Approximately 450-550 calories per serving