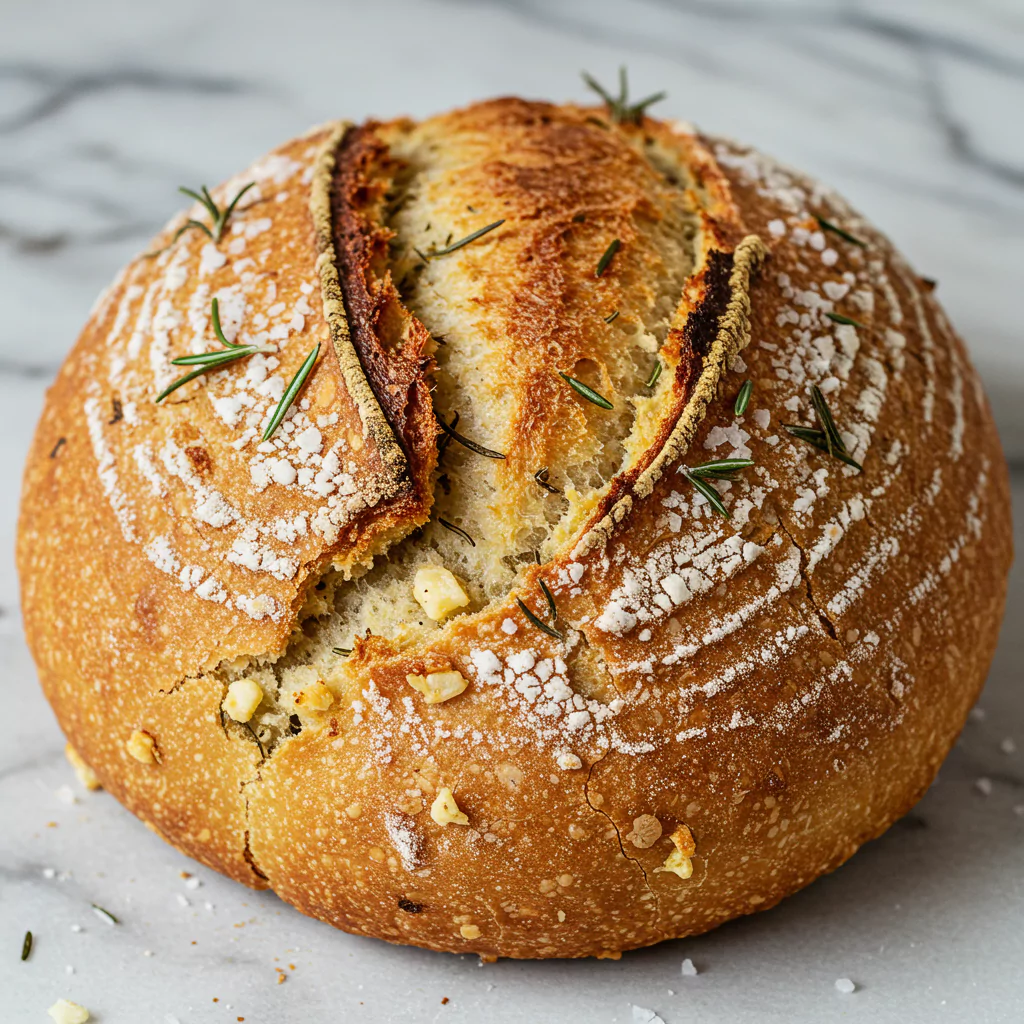
I almost didn’t try this whole “no-knead” thing. Sounded too good to be true, right? Like some kind of kitchen magic trick. How could you possibly get that kind of amazing, chewy, hole-filled bread without wrestling with dough for ages? My first attempt, I was SO sure it was a dud. The dough looked… well, frankly, it looked like goo in my favorite old mixing bowl. I left it overnight, half-expecting a disaster. And the next day? Pulling that golden, gorgeous, perfectly round loaf out of my screaming hot Dutch oven… I think I actually gasped. I felt like I’d cracked the code!
This Rustic No Knead Rosemary Garlic Bread is the version that lives in my head now, the one I can practically make with my eyes closed (though, please don’t actually do that with a hot oven!). I’ve made it for friends, for family dinners (it always disappears first), just for myself on a Tuesday because why not? I’ve fiddled with the garlic level (more! always more!), messed with different kinds of salt, learned exactly how dark I like the crust. The biggest secret I learned? Don’t fuss! Seriously, the less you mess with it, the better it seems to turn out. Let the yeast and time work their quiet little miracle.
It’s just… ridiculously easy for how insanely delicious it is. You stir some stuff together, you ignore it for a while, you bake it. That’s the gist! And the aroma? Oh my goodness. Forget fancy scented candles. Baking this makes your entire home smell like the coziest, happiest place imaginable – warm bread, earthy herbs, that hint of garlic… pure comfort. If you want that incredible “I baked this!” pride without the usual bread-baking drama, you have to try this. Trust me on this one.
What You Need to Make This Rustic No Knead Rosemary Garlic Bread Magic Happen
Okay, let’s grab our gear for this Rustic No Knead Rosemary Garlic Bread. Don’t worry, it’s mostly basic stuff you probably already have rattling around.
- Bread Flour (3 cups / about 400g): Okay, listen. You can use all-purpose. But if you want that truly amazing chewy, stretchy texture that makes you feel like a pro baker? Use bread flour. It just works better. Pinky promise. Wanna get fancy? Swap maybe a cup for whole wheat. Adds a nice rustic vibe. Might need a tiny splash more water – just see how the dough feels.
- Instant Yeast (Just 1/4 teaspoon – I know, right?!): It seems crazy small! But the long, slow rise means this little bit is all you need. Make sure it’s the instant kind, not the one you have to proof first.
- Salt (1 ¼ teaspoons): Flavor KING! Also helps the yeast chill out a bit. Kosher or sea salt just tastes better than plain table salt here, I think.
- Fresh Rosemary (About 1 tablespoon, chopped up): Pleeeease use fresh if you can! The smell when you chop it! It’s bright and piney and just makes the bread. If you absolutely must use dried? Okay, fine. Use about 1 teaspoon. But fresh is better!
- Garlic (2 or 3 cloves, minced or grated super fine): How much do you love garlic? Be honest! I usually go for 3 big cloves because… garlic. Pro tip: Roasting the garlic first makes it sweet and mellow and insanely good. Just wrap a head in foil, bake till soft, squeeze it out. Game changer. Powder (1/2 tsp?) is okay in a pinch, but you miss those little pockets of garlicky goodness.
- Water (1 ½ cups / 350ml, kinda warm): Not hot tub hot, not ice cold. Just comfortably warm, like testing baby bath water. Around 100-110°F (38-43°C) is perfect.
Let’s Talk Timing (Spoiler: It’s Mostly Waiting!)
Okay, the time part for this Rustic No Knead Rosemary Garlic Bread. Don’t look at the total hours and run away! 99% of that time is you doing literally anything else while the dough becomes amazing all by itself.
- Actual Effort Time: Maybe 10 minutes of mixing? And like, 2 minutes of shaping later? That’s IT.
- The Big Sleep (First Rise): 12 to 18 hours. Let it hang out overnight or while you’re at work. Easy! This is where the flavour magic happens.
- Quick Power Nap (Second Rise): 1 to 2 hours just before baking.
- Oven Party: 45 to 55 glorious, amazing-smelling minutes.
- Reality Check: So yeah, it takes time… but your time commitment is teeny-tiny! You spend more time deciding what shoes to wear. It’s the ultimate return on investment for deliciousness!
Baking Time! Let’s Do This (It’s Easier Than You Think!)
Okay, ready? Let’s make some bread! You can totally do this.
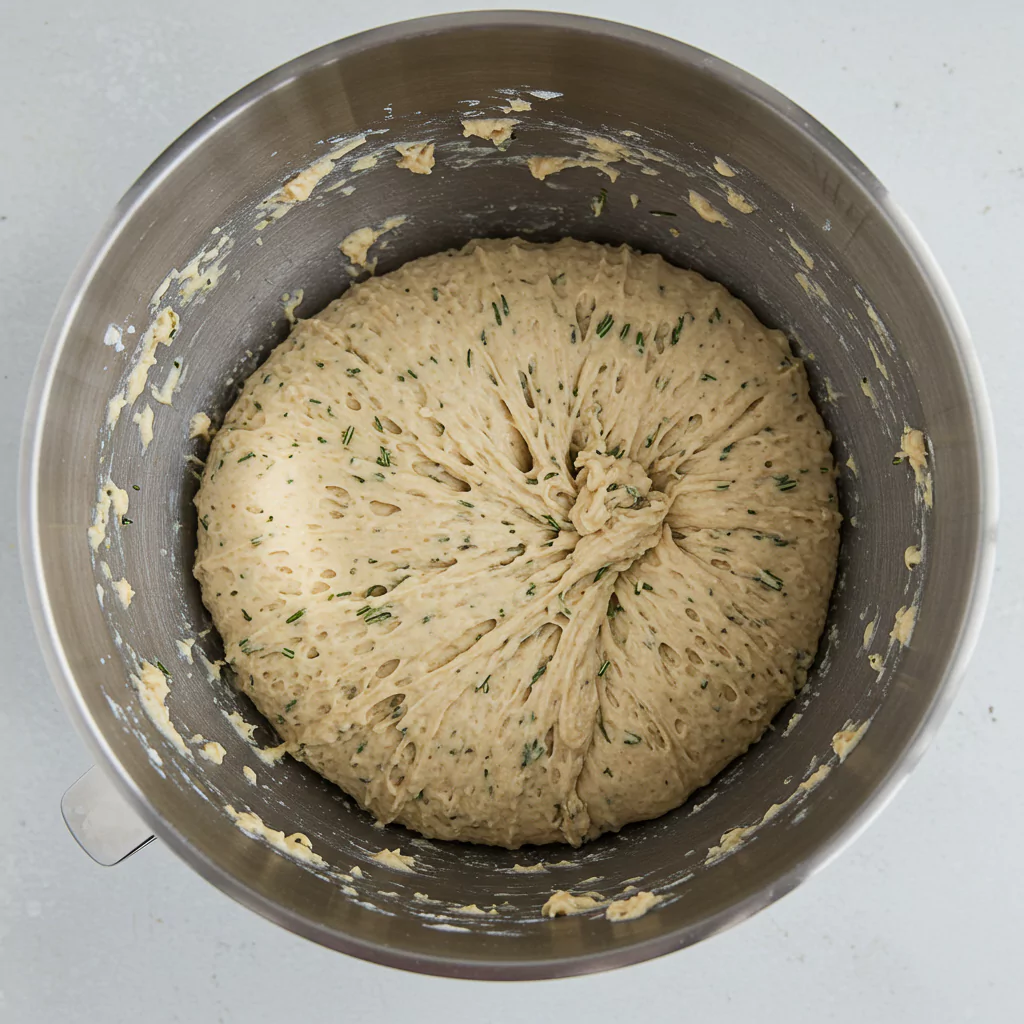
Step 1: Mix It Like You Mean It (But Gently!)
Big bowl time! Dump in the flour, the teeny bit of yeast, salt, that gorgeous rosemary, and the garlic. Give ’em a swirl with a whisk just to say hello. Pour in that warm water. Now, use a sturdy spoon, or better yet, your hands (it feels good!), and mix just until you don’t see dry flour anymore. It’s gonna look like a shaggy, sticky mess. Seriously, kinda ugly. THAT’S WHAT YOU WANT! Stop mixing! Do NOT knead!
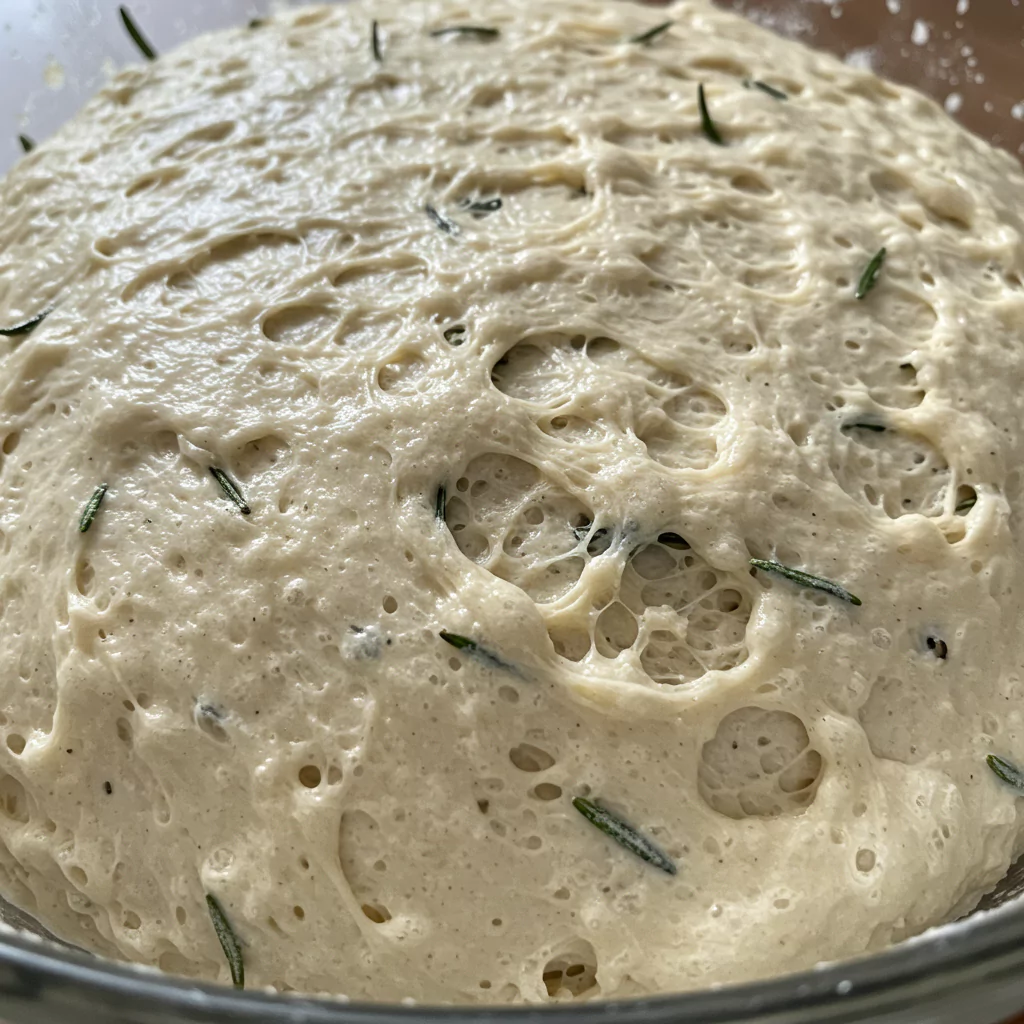
Step 2: Let It Be (The Long, Lazy Rise)
Cover the bowl nice and tight – plastic wrap is your friend here. Now, just shove it somewhere on your counter where it won’t get knocked over. Room temperature is fine. And… walk away. For 12 to 18 hours. Go sleep, go out, whatever! When you come back, the dough will be all bubbly and jiggly, maybe smelling a little fermented (in a good way!). It’s alive!
Step 3: The Gentle Tuck & Shape (Don’t Fight It!)
Flour your work surface. And I mean, FLOUR IT. This dough is sticky! Gently scrape the dough out of its bowl. Sprinkle more flour on top. Now, using floured hands (or a scraper if you’re fancy), gently fold the edges into the middle – top to bottom, side to side. Like folding a messy blanket. Don’t squish all the air out! Just a few quick folds. Then kinda nudge it into a rough ball shape. Perfection is not required!
Step 4: The Final Rest Stop
Get a piece of parchment paper, maybe sprinkle it with a little more flour or cornmeal (looks nice!). Carefully move your floppy dough ball onto the parchment, trying to keep the seam side down. Loosely cover it up again (plastic or a towel) and let it sit for 1 to 2 hours. It’ll puff up some more, looking sleepy. SUPER IMPORTANT: About 30-45 minutes before this rise is done, get your oven heating up with the pot inside!
Step 5: Operation Hot Pot! (The Secret Weapon!)
This is KEY! Grab your Dutch oven (the heavy pot with a lid). Put the EMPTY pot AND its lid into your COLD oven. Now, turn that oven WAY up to 450°F (230°C). Let the pot heat up in there while the oven preheats, and then for another 30 minutes AT LEAST. You want that thing blistering hot. This heat shock is what gives your Rustic No Knead Rosemary Garlic Bread that incredible crunchy crust. Don’t rush this!
Step 6: Into the Fiery Furnace! (Carefully!)
Okay, moment of truth! Using your BEST oven mitts (seriously, be careful!), pull that insanely hot pot out of the oven. Take the lid off (watch out for steam like a dragon’s breath!). Now, grab the parchment paper holding your dough, lift it up, and gently lower the whole package – dough and paper – right into the hot pot. It’s okay if the paper wrinkles! Slap that hot lid back on. Carefully put it back in the oven. Bake for 30 minutes. Go you!
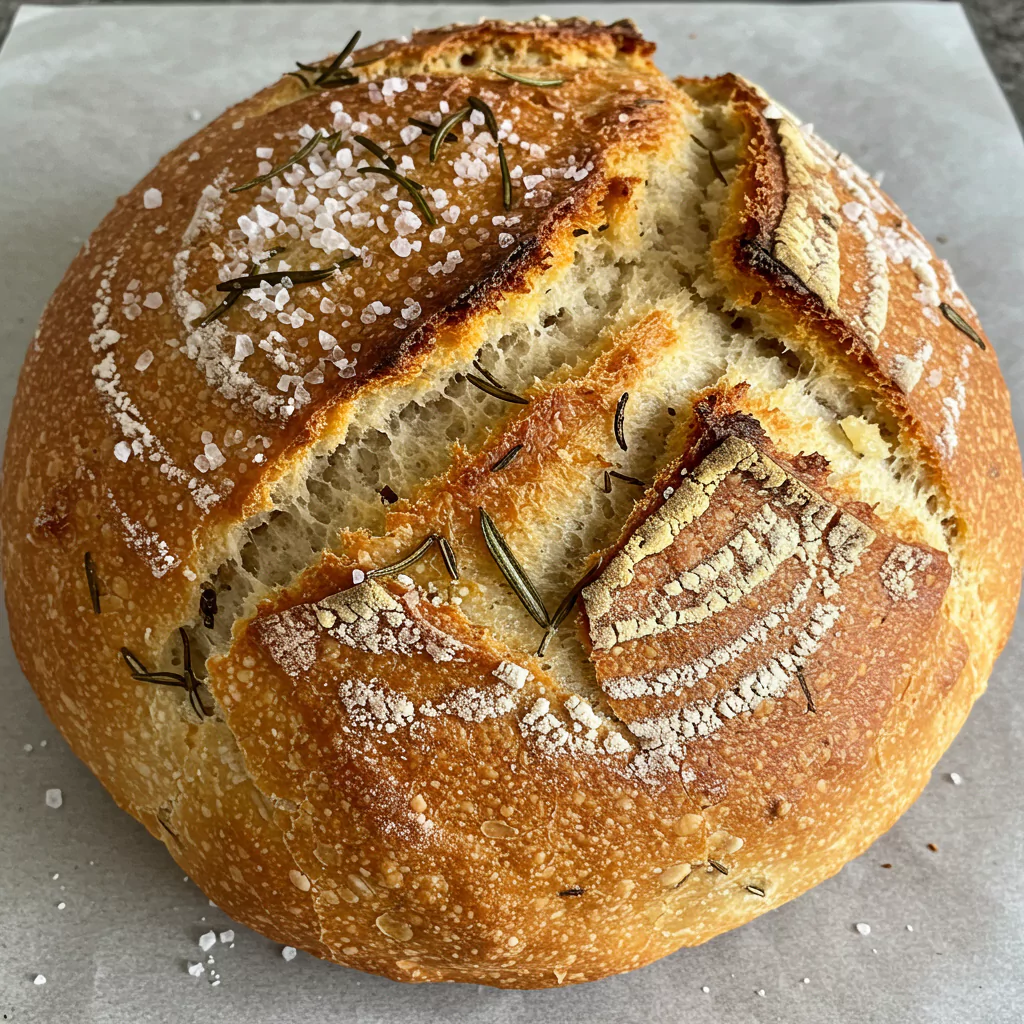
Step 7: Golden Time! (Lid Off!)
After 30 minutes, mitts back on! Carefully take the lid off the pot. Ooooh! It should look puffy but pale. Now it’s time to get that gorgeous color. Leave the lid off, put the pot back in the oven, and bake for another 15 to 25 minutes. Keep an eye on it – you want it deeply golden brown and beautiful. Your house smells like heaven right now, doesn’t it?
Step 8: Cool Down! (I KNOW, It’s Hard!)
Victory! Use the parchment paper edges to carefully lift your masterpiece out of the pot and onto a wire rack. Now for the ultimate test of willpower: DO NOT CUT IT YET. You have to let it cool for at least an hour, maybe longer. I know, it’s agony! But the inside needs time to finish cooking and set up. If you cut it hot, it can be gummy. Listen closely while it cools… sometimes you can hear the crust crackling softly. It’s the best sound. Patience!
Wanna Play? Fun Swaps & Healthier Ideas
Feel like getting creative with your Rustic No Knead Rosemary Garlic Bread? Do it!
- Whole Wheat Wonder: Like I said, swap in up to a cup of whole wheat flour. Adds a lovely nutty depth. Just maybe add a tiny splash more water if it feels thirsty.
- Seed Explosion: Throw in a few tablespoons of your favorite seeds with the flour – pumpkin, sunflower, flax, sesame – whatever makes you happy! Great texture.
- Salt Sense: Watching salt? You can dial it back to 1 teaspoon, but it does impact the flavour and how brown the crust gets, just FYI.
- Garlic Nuance: Seriously, try roasting the garlic sometime. It becomes sweet and jammy and takes the bread to a whole new level.
Recipes You May Like
Serving This Bad Boy (Way Beyond Butter!)
Okay, warm slice + butter = classic perfection. We know this. But this Rustic No Knead Rosemary Garlic Bread is begging for more adventure!
- Dip Champion: A little bowl of really good olive oil, maybe some balsamic, flaky salt, red pepper flakes? Forget appetizers, just give me this.
- Soup Sponge: This bread was made to be ripped up and plunged into hearty soups and stews. It holds up beautifully!
- Toast Nirvana: Thick slices, toasted golden… pile on avocado, make epic French toast, top with creamy mushrooms… ENDLESS.
- Next Level Sandwiches: Makes the best grilled cheese of your life. Or pile it high with turkey and cranberry, or roasted veggies and hummus. Elevates everything!
- Garlic Bread Max: Slice it, slather with garlic butter (maybe with more rosemary?), maybe some Parmesan? Pop under the broiler? Danger zone! So good.
My personal obsession? Toasted thick, spread with tangy goat cheese, a little drizzle of honey, maybe some cracked black pepper. The combo of the herby bread, the creamy cheese, the sweet honey… it just works. You gotta try it!
Keeping Your Creation Happy (Storage Secrets)
This Rustic No Knead Rosemary Garlic Bread shines brightest on day one, let’s be honest. But if miracles happen and you have leftovers:
- Counter Strategy: Once it’s totally cool (really, wait!), the best way to keep that crust is cut-side down on a cutting board, just naked, for the first day. After that, a paper bag (never plastic! Plastic steams the crust!) is your best bet for another day or two.
- Freeze Your Assets: This bread freezes like a charm! Cool completely, slice it ALL up first, then wrap slices tightly (plastic wrap is okay here, then into a freezer bag) and freeze ’em. Toast emergencies solved for months!
- Revival Time: Frozen slices toast up perfectly! Or wrap in foil and warm gently in the oven (around 350°F/175°C). Good as (almost) new!
Seriously, Why Am I This Excited? (You Will Be Too!)
Okay, I’m basically bouncing in my seat talking about this Rustic No Knead Rosemary Garlic Bread. Can you tell? It’s just… it makes you feel SO capable! Taking flour, water, salt, and yeast and turning it into this gorgeous, delicious thing with barely any effort? It’s like a magic trick you can EAT. The smell, the crackly sound when you slice it, the chewy texture… it’s pure, simple, edible joy. It makes you feel like a rockstar baker, even if it’s your first time ever making bread!
So please, pretty please, gather your handful of ingredients and give this a go. Don’t be scared! It’s so forgiving and SO rewarding. You absolutely CAN make amazing bread at home.
And then you HAVE to come back and tell me all about it! Did it work? Did you feel like a superhero? Did your house smell amazing? What did you eat it with first? Spill the beans in the comments below! I honestly love hearing your baking stories! Go forth and bake! You’ve got this

Rustic No Knead Rosemary Garlic Bread
Bake incredible Rustic No Knead Rosemary Garlic Bread with minimal effort! Get tips for a perfect crusty, homemade artisan loaf. So easy & delicious. Try it!
Ingredients
- 3 cups (about 400g) bread flour – I love how this gives the bread that chewy, pro-baker vibe! All-purpose works too if that’s what you’ve got.
- 1/4 teaspoon instant yeast – Yep, just a tiny pinch! The slow rise does all the heavy lifting.
- 1 ¼ teaspoons salt – I go for kosher or sea salt; it just tastes better here.
- 1 tablespoon fresh rosemary, chopped – Fresh is the way to go for that amazing smell! Dried? Use 1 teaspoon if you must.
- 2 or 3 cloves garlic, minced or grated fine – I’m team 3 cloves because garlic is life. Roast it if you’re feeling extra!
- 1 ½ cups (350ml) warm water – Not too hot, not too cold, just cozy like a baby’s bath, around 100-110°F (38-43°C).
Instructions
Step 1: Mix It Like You Mean It (But Gently!)
Big bowl time! Dump in the flour, the teeny bit of yeast, salt, that gorgeous rosemary, and the garlic. Give 'em a swirl with a whisk just to say hello. Pour in that warm water. Now, use a sturdy spoon, or better yet, your hands (it feels good!), and mix just until you don't see dry flour anymore. It's gonna look like a shaggy, sticky mess. Seriously, kinda ugly. THAT'S WHAT YOU WANT! Stop mixing! Do NOT knead!
Step 2: Let It Be (The Long, Lazy Rise)
Cover the bowl nice and tight – plastic wrap is your friend here. Now, just shove it somewhere on your counter where it won't get knocked over. Room temperature is fine. And… walk away. For 12 to 18 hours. Go sleep, go out, whatever! When you come back, the dough will be all bubbly and jiggly, maybe smelling a little fermented (in a good way!). It's alive!
Step 3: The Gentle Tuck & Shape (Don't Fight It!)
Flour your work surface. And I mean, FLOUR IT. This dough is sticky! Gently scrape the dough out of its bowl. Sprinkle more flour on top. Now, using floured hands (or a scraper if you're fancy), gently fold the edges into the middle – top to bottom, side to side. Like folding a messy blanket. Don't squish all the air out! Just a few quick folds. Then kinda nudge it into a rough ball shape. Perfection is not required!
Step 4: The Final Rest Stop
Get a piece of parchment paper, maybe sprinkle it with a little more flour or cornmeal (looks nice!). Carefully move your floppy dough ball onto the parchment, trying to keep the seam side down. Loosely cover it up again (plastic or a towel) and let it sit for 1 to 2 hours. It’ll puff up some more, looking sleepy. SUPER IMPORTANT: About 30-45 minutes before this rise is done, get your oven heating up with the pot inside!
Step 5: Operation Hot Pot! (The Secret Weapon!)
This is KEY! Grab your Dutch oven (the heavy pot with a lid). Put the EMPTY pot AND its lid into your COLD oven. Now, turn that oven WAY up to 450°F (230°C). Let the pot heat up in there while the oven preheats, and then for another 30 minutes AT LEAST. You want that thing blistering hot. This heat shock is what gives your Rustic No Knead Rosemary Garlic Bread that incredible crunchy crust. Don't rush this!
Step 6: Into the Fiery Furnace! (Carefully!)
Okay, moment of truth! Using your BEST oven mitts (seriously, be careful!), pull that insanely hot pot out of the oven. Take the lid off (watch out for steam like a dragon's breath!). Now, grab the parchment paper holding your dough, lift it up, and gently lower the whole package – dough and paper – right into the hot pot. It’s okay if the paper wrinkles! Slap that hot lid back on. Carefully put it back in the oven. Bake for 30 minutes. Go you!
Step 7: Golden Time! (Lid Off!)
After 30 minutes, mitts back on! Carefully take the lid off the pot. Ooooh! It should look puffy but pale. Now it's time to get that gorgeous color. Leave the lid off, put the pot back in the oven, and bake for another 15 to 25 minutes. Keep an eye on it – you want it deeply golden brown and beautiful. Your house smells like heaven right now, doesn't it?
Step 8: Cool Down! (I KNOW, It's Hard!)
Victory! Use the parchment paper edges to carefully lift your masterpiece out of the pot and onto a wire rack. Now for the ultimate test of willpower: DO NOT CUT IT YET. You have to let it cool for at least an hour, maybe longer. I know, it’s agony! But the inside needs time to finish cooking and set up. If you cut it hot, it can be gummy. Listen closely while it cools… sometimes you can hear the crust crackling softly. It's the best sound. Patience!