
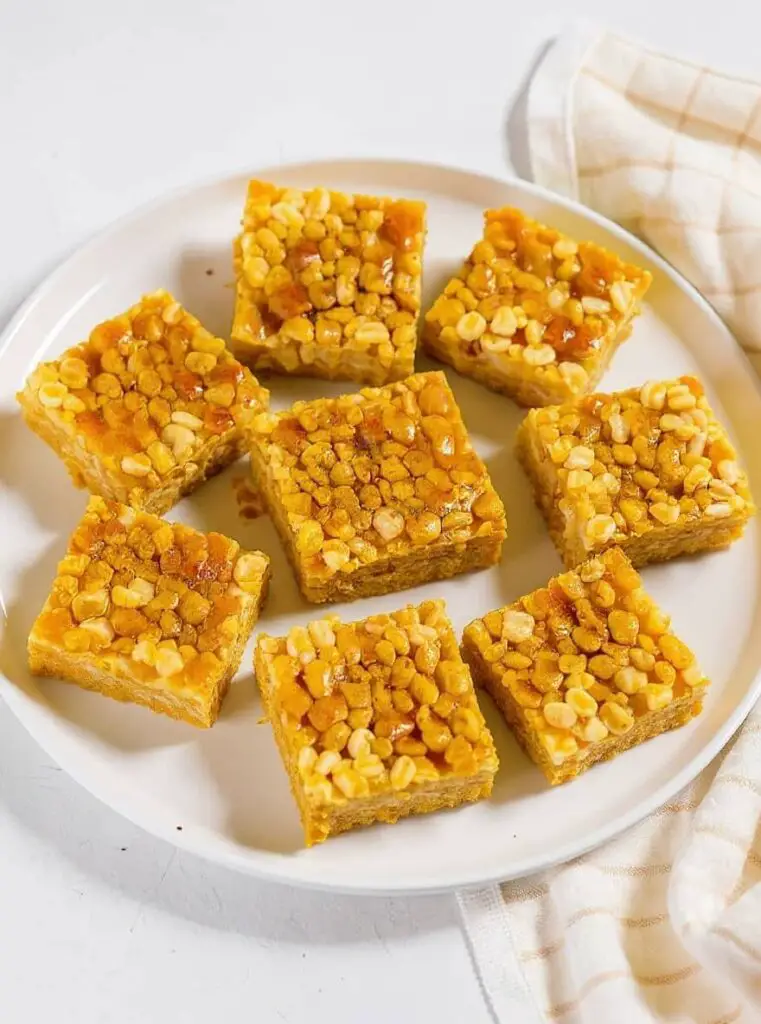
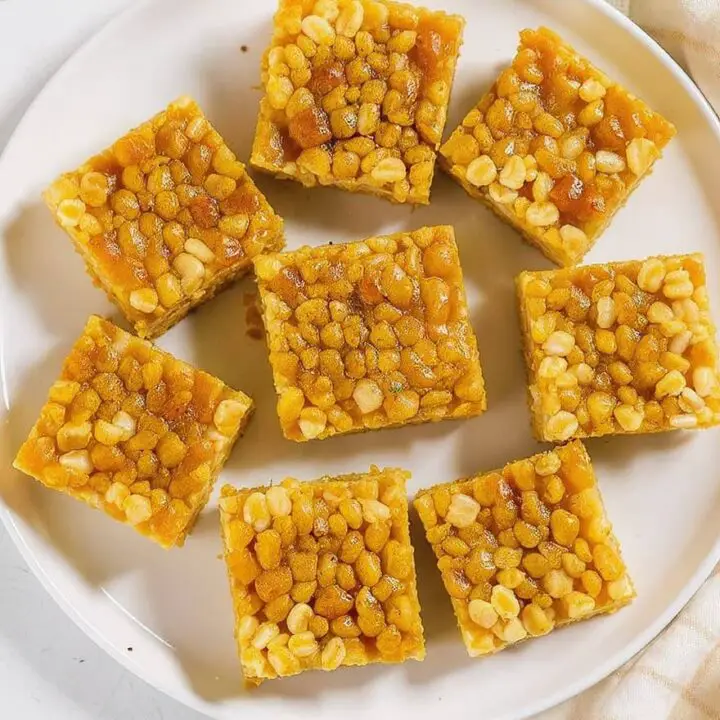
You HAVE to make these Pumpkin Pie Rice Krispies Treats. I’m not joking, I whipped up a batch last weekend and they were gone before they even cooled down completely. It’s the old-school treat we all know, but with pumpkin puree and spices mixed in. The result is this chewy, gooey, perfectly spiced fall thing that’s just so good. It’s probably the best easy fall dessert recipe out there for when you need something fast and amazing.
Ingredients You’ll Need
- 6 cups crispy rice cereal
- 1 (10-ounce) bag of mini marshmallows
- ¼ cup salted butter
- ½ cup pumpkin puree
- 1 ½ teaspoons pumpkin pie spice
- ½ teaspoon vanilla extract
Recipes You May Like

Step-by-Step Instructions for Pumpkin Pie Rice Krispies Treats
Step 1: Melt the Marshmallows
First, melt the butter in a big pot on low. Throw in all the marshmallows. Keep stirring so nothing sticks or burns. You just want it all to melt into one big gooey mess. Seriously keep the heat low, it makes a difference.
Step 2: Add the Pumpkin Spice Flavor
Pull the pot off the heat. Now stir in the pumpkin puree, spice, and vanilla. Mix it until it’s all combined and looks like pumpkin-y goodness.
Step 3: Combine with Cereal
Okay, now for the cereal. Dump it all in there. Gently stir it all up. Just make sure all the cereal gets coated with the pumpkin marshmallow stuff.
Step 4: Press and Set
Spoon the whole sticky mess into your 9×9 pan (use parchment paper, trust me). Pat it down GENTLY. Don’t press hard or you’ll get rock-hard pumpkin spice treats instead of soft chewy ones. Let them sit on the counter for maybe 30 minutes to set up before you cut them.
Why I’m Obsessed With This Recipe
Honestly the best part of this whole no-bake pumpkin dessert is that it’s DONE in 20 minutes. It’s so fast. These Pumpkin Pie Rice Krispies Treats are just the perfect amount of chewy and spicy and they literally vanish whenever I make them. For real, give them a shot and drop a comment below to let me know how they came out! Can’t wait to hear.
Pumpkin Pie Rice Krispies Treats
The easiest Pumpkin Pie Rice Krispies Treats! A chewy, gooey, no-bake fall dessert with real pumpkin and spice. The perfect autumn treat ready in 20 minutes.
Ingredients
- 6 cups crispy rice cereal
- a 10-ounce bag of mini marshmallows (the whole thing)
- 1/4 cup of salted butter
- 1/2 cup pumpkin puree (not the pie filling!)
- 1 and 1/2 teaspoons pumpkin pie spice
- a splash of vanilla extract (about 1/2 teaspoon)
Instructions
- first melt the butter in a big pot on low. throw in all the marshmallows. keep stirring so nothing sticks. you want it all to melt into one big gooey mess.
- pull the pot off the heat. now stir in the pumpkin puree spice and vanilla. mix it until its all combined and looks like pumpkin-y goodness.
- okay now for the cereal. dump it all in. gently stir it all up. just make sure all the cereal gets coated with the pumpkin marshmallow stuff.
- spoon the sticky mess into your 9x9 pan (use parchment paper trust me). pat it down GENTLY. dont press hard or youll get rock-hard treats. let them sit on the counter for maybe 30 minutes to set before you cut them.