Some nights, cooking feels like climbing Mount Everest in flip-flops. you’re tired, you’re hungry and the idea of a complicated meal is just… nope. That’s where this Honey Garlic Chicken Recipe swoops in like a culinary superhero. I stumbled upon it years ago during a classic “what on earth is in the fridge?” moment, and let me tell you, it was love at first bite. I’ve probably made it hundreds of times since (no joke!), tweaking little things here and there until it reached this level of sticky, garlicky, sweet-and-savory perfection. It’s the dish I bring to friends, the one my family requests constantly, and honestly, the easiest way I know to make myself feel like a rockstar chef with minimal effort. This Honey Garlic Chicken Recipe isn’t just food; it’s my sanity-saver on busy evenings!
What You’ll Need for this Life-Changing Honey Garlic Chicken Recipe
Don’t let the amazing taste fool you – the ingredients list is super chill. Most of this stuff is probably doing a lazy dance in your pantry right now.
For the Chicken (The Main Event!):
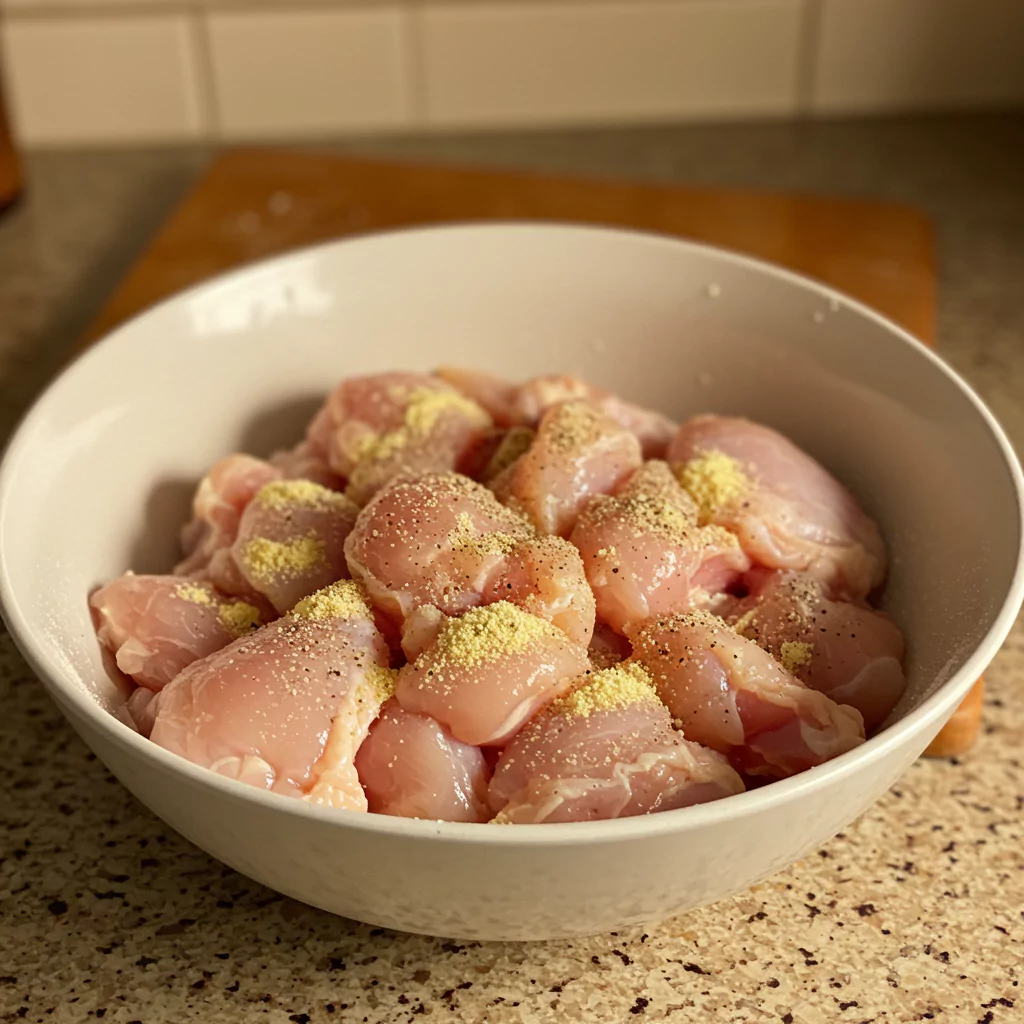
- Chicken: Grab about 1.5 lbs (that’s around 680g) of boneless, skinless chicken. Now, you can use breast, but trust me on this one: chicken thighs are where it’s AT for this recipe. Cut ’em into chunky, bite-sized pieces (like an inch or so). They just stay juicier and soak up that sauce like little sponges of deliciousness.
- Okay, fine: If you must use chicken breast, go for it! Just chop it the same way and be super careful not to overcook it, or it’ll get tragically dry.
- Cornstarch (or Cornflour if you’re across the pond): You’ll need 2 or 3 tablespoons. This stuff is like fairy dust – it gives the chicken a light little crisp and helps the sauce get all thick and gorgeous later. Don’t skip it!
- If you’re out: Arrowroot powder or even potato starch can fill in.
- Salt & Black Pepper: About half a teaspoon of each, but you do you. Season that chicken!
- Cooking Oil: A tablespoon or two of something that can handle the heat – avocado, canola, grapeseed, vegetable oil… whatever you’ve got.
For That Sauce You’ll Want to Drink (Don’t… or do, I won’t judge):
- Garlic: Okay, recipe says 4-6 cloves, minced. But let’s be honest, garlic is measured with the soul. Love garlic? Go wild! Fresh is absolutely best here – that pungent kick is everything.
- In a pinch: Yeah, garlic powder (maybe 1.5-2 tsp) will work, but it’s just not the same party, you know?
- Ginger: About a tablespoon of fresh, grated ginger. It brings this warm, zesty vibe that plays SO well with the garlic.
- No fresh ginger? Sigh. Okay, about 1 teaspoon of ground ginger will have to do.
- Honey: One-third of a cup (around 110g). The main squeeze! Use a nice, runny honey. Different types (like clover vs. wildflower) can subtly change the taste, which is kinda fun to experiment with!
- Alternatives: Maple syrup gives it a different, yummy vibe (though technically not honey garlic then!). Agave could work too. Just taste and adjust if needed.
- Soy Sauce: One-third of a cup (about 80ml). For that essential salty, umami hug.
- Good swaps: Low-sodium soy sauce is great if you’re watching salt. Tamari keeps it gluten-free. Coconut aminos are a fantastic soy-free/GF option – just know they’re a tad sweeter, so maybe dial back the honey slightly.
- Apple Cider Vinegar: Just a tablespoon. It cuts through the sweetness and adds a little tang – crucial balance!
- Substitutes: Rice vinegar or even white wine vinegar will do the trick.
- Water or Chicken Broth: Maybe 2 tablespoons, totally optional. Sometimes I add this if I feel like the sauce is getting too thick or I just want a little more sauciness to drizzle over rice.
- Red Pepper Flakes: A quarter to half a teaspoon, ONLY if you like a little whisper of heat. It’s really nice with the sweetness! Skip if spicy isn’t your jam.
- Sesame Oil: A sneaky teaspoon stirred in right at the end. Optional, but man, that toasty, nutty smell it adds? Chef’s kiss!
Pretty Things for the Top (Optional):
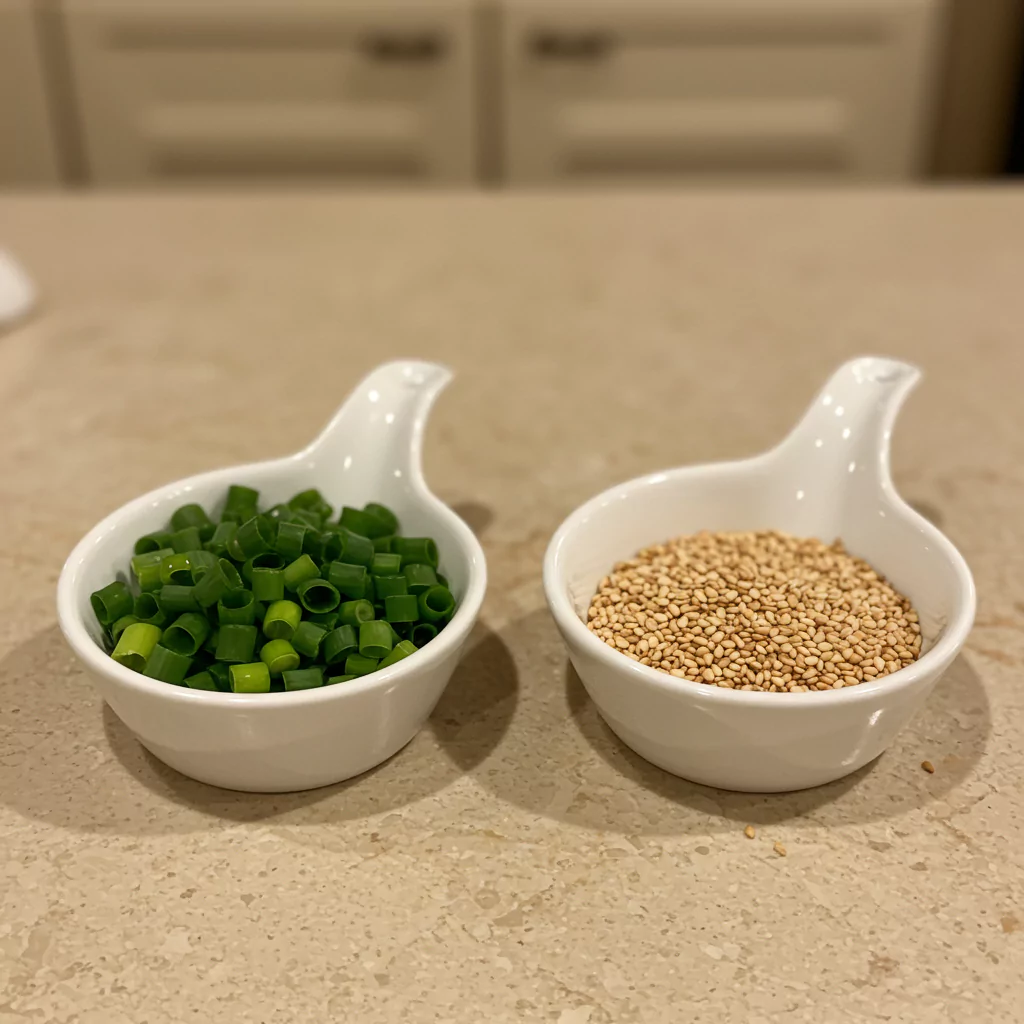
- Toasted Sesame Seeds
- Thinly Sliced Green Onions (the green parts!)
Timing: Way Faster Than Deciding What to Watch on Netflix
Seriously, this is one of the speediest dinners in my arsenal.
- Prep Time: Maybe 15 minutes? That’s chopping the chicken (if it’s not pre-cut), mincing the garlic/ginger, and whisking the sauce. Easy peasy.
- Cook Time: About 20-25 minutes max. That’s browning the chicken and letting it bubble away in that liquid gold sauce.
- Total Time: You’re looking at roughly 35-40 minutes from grabbing the ingredients to plating up.
Honestly? It takes longer for the delivery guy to find my apartment sometimes. This Honey Garlic Chicken Recipe gets you deliciousness FAST. It blows longer-cooking baked dishes out of the water when you’re short on time. Weeknight winner, guaranteed.
Step-by-Step: Making the Honey Garlic Chicken Recipe Magic!
Alright, put on some tunes, grab your pan, let’s make this happen. It’s easier than you think!
Step 1: Get Your Chicken Ready
First up, take those chicken pieces and pat them REALLY dry with paper towels. Like, desert dry. This is the secret to getting them nice and browned instead of sad and steamy. Toss ’em in a bowl with the salt, pepper, and that magical cornstarch until every piece has a light dusting. Set that bowl aside for a sec.
Step 2: Whisk Up That Awesome Sauce
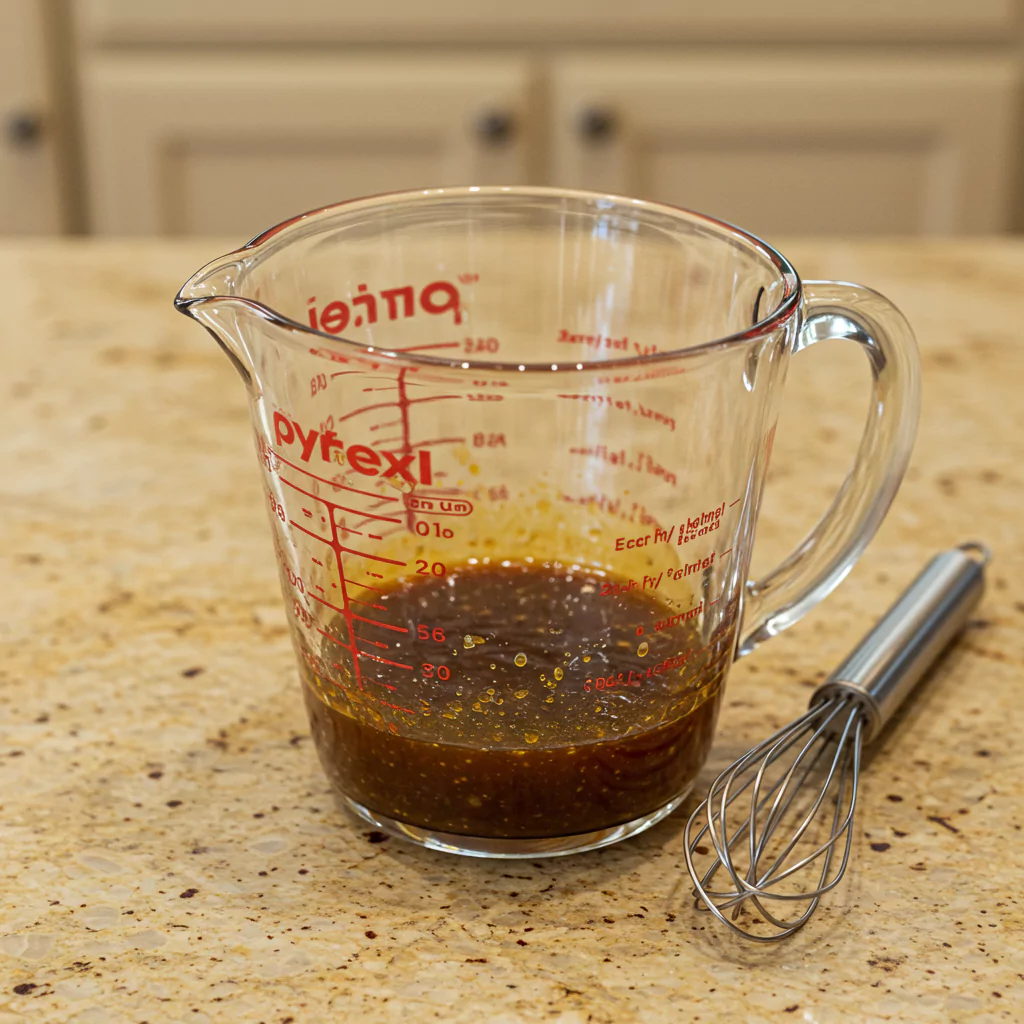
In another bowl (or hey, a measuring jug works great!), dump in the minced garlic, grated ginger, honey, soy sauce (or its buddies), and apple cider vinegar. If you’re feeling spicy, toss in those red pepper flakes now too. Whisk it all together like you mean it, until the honey dissolves and it looks like liquid treasure. Have a tiny taste (go on!). That’s the soul of your Honey Garlic Chicken Recipe right there. Park this bowl nearby.
Step 3: Sizzle Time! Get That Chicken Golden
Get a big skillet or a wok heating up over medium-high heat. Add your oil. When it shimmers a little, it’s ready. Gently place the coated chicken pieces in the pan, making sure they’re in a single layer. Listen closely: DON’T CROWD THE PAN! If you cram too much chicken in, it’ll steam instead of sear. Cook in batches if you gotta! Let the chicken sizzle away without messing with it too much for 3-4 minutes per side. You want it beautifully golden brown and cooked through. I personally love getting some nice dark crispy bits! Once it’s looking gorgeous, scoop the chicken out onto a plate.
Step 4: Sauce in the Pan!
Turn the heat down to medium-low. If there’s a ton of oil left, maybe tilt the pan and carefully spoon some out (leave about a tablespoon). Now, pour that glorious honey garlic sauce mixture into the skillet. It should bubble up gently almost immediately. Let it simmer for just a minute or two, stirring it around. You’ll see it start to thicken up a bit – partly the heat, partly the leftover cornstarch magic. Warning! Keep an eye on it; honey can go from delicious to burnt really fast. If it gets too thick too quickly, splash in that optional water or broth to loosen it.

Step 5: The Grand Finale – Bring It All Together!
Toss that cooked chicken back into the skillet with the bubbling sauce. Stir everything gently until every single piece of chicken is shamelessly coated in that sticky, glossy glaze. Oh yeah. Let it all hang out together for another minute or two, just long enough for the chicken to get friendly with the sauce and warm through completely. This is where the Honey Garlic Chicken Recipe truly comes alive.
Step 6: Make it Pretty (If You Want!)
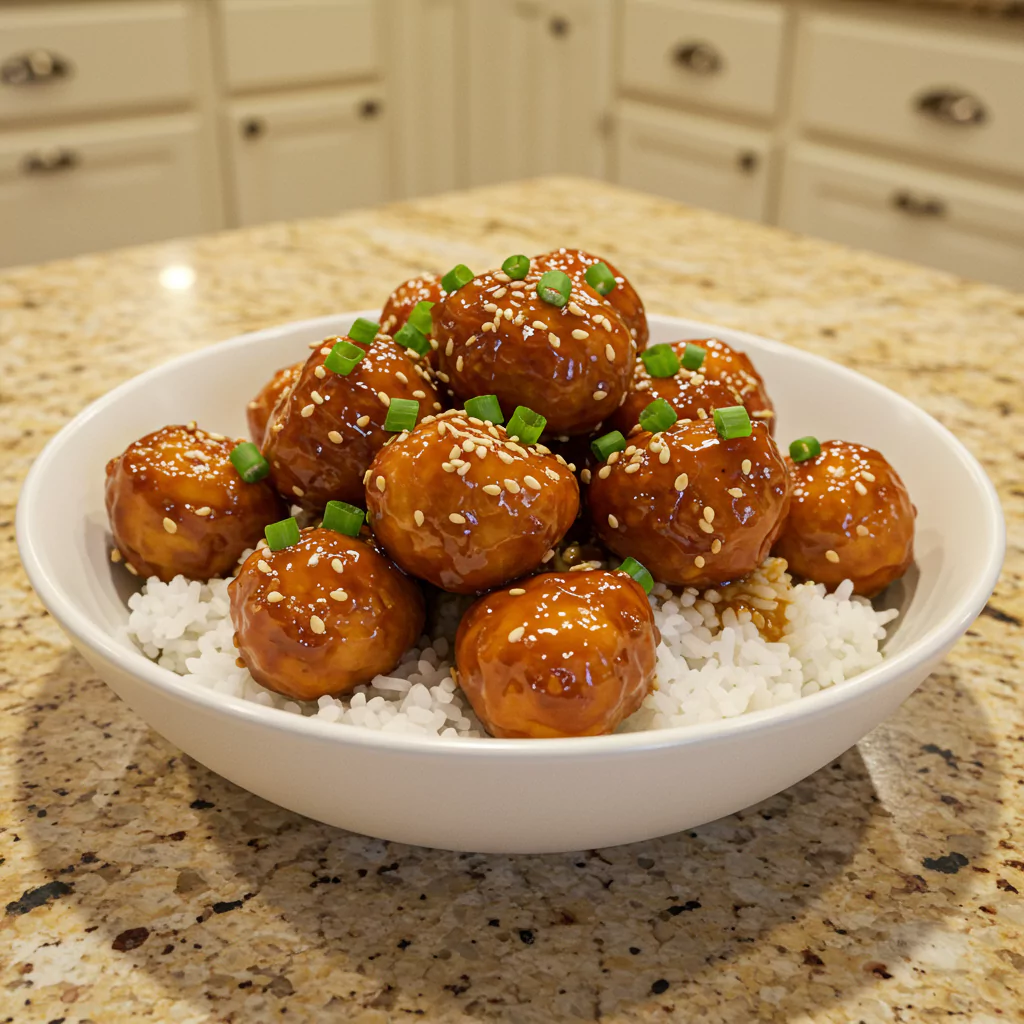
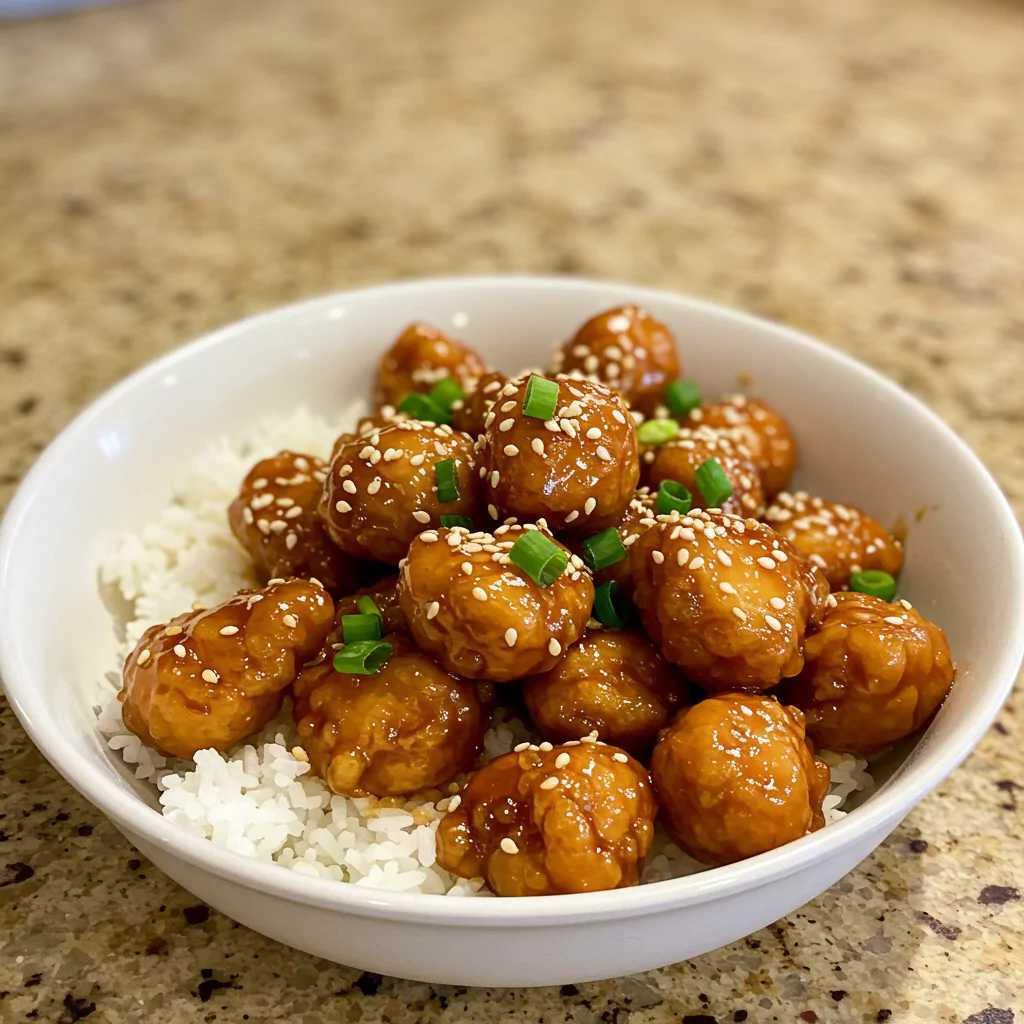
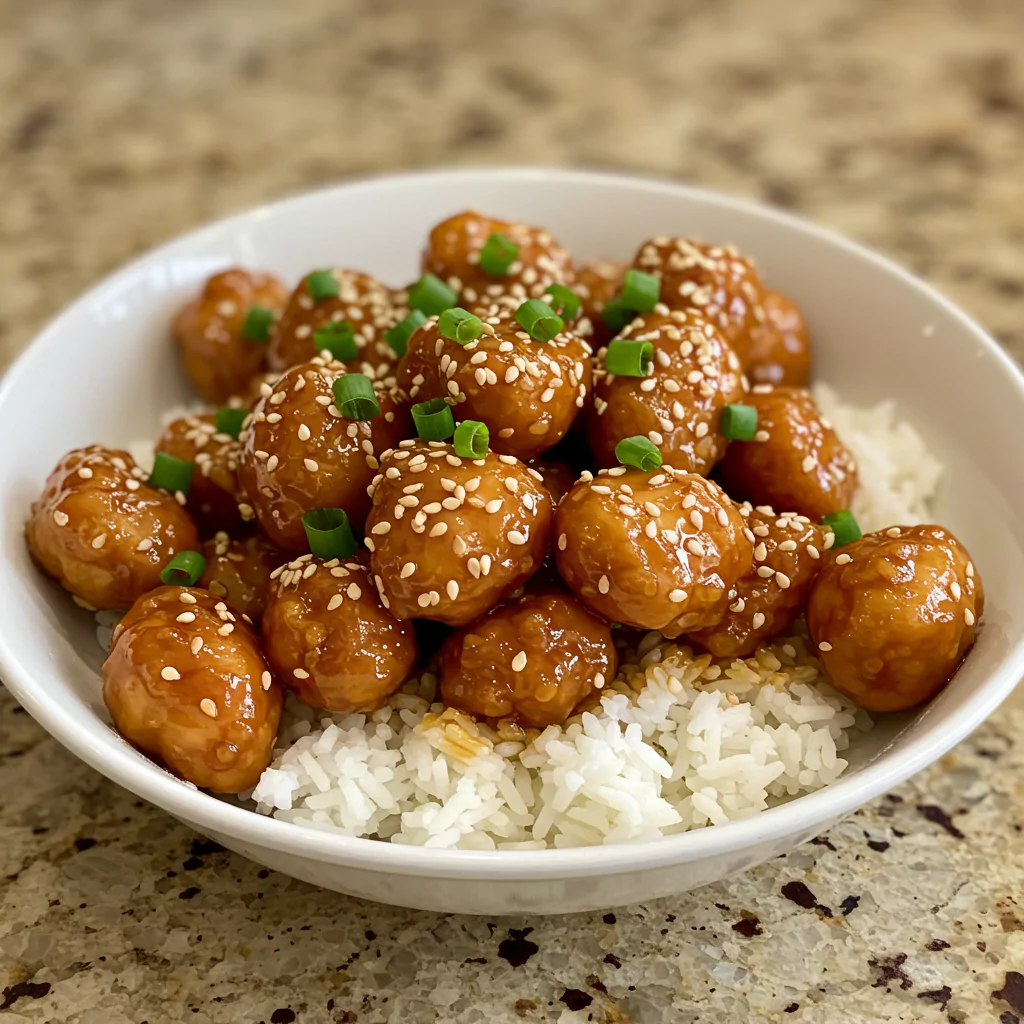
Kill the heat. If you’re using it, now’s the time to stir in that teaspoon of sesame oil – it adds a lovely nutty smell. Pile it high onto plates and shower it with toasted sesame seeds and sliced green onions. Makes it look fancy, even though you know how easy it was!
Recipes You May Like
Want a Healthier Honey Garlic Chicken Vibe? Easy Tweaks!
Feeling virtuous? Or just want to sneak in some extra goodness? Totally doable.
- Go Lean: Use boneless, skinless chicken breasts instead of thighs. Just be extra careful not to turn them into cardboard by overcooking!
- Salt Check: Use low-sodium soy sauce or tamari. Coconut aminos are also a good lower-salt choice.
- Sweetness Level: You can dial back the honey a tiny bit if you like things less sweet. Maybe try starting with a quarter cup plus a tablespoon? Balancing with a little extra vinegar or ginger helps too. I wouldn’t mess with fake sugars here, though – they just don’t bubble up the same way.
- Veggie Power! This is my favourite trick: throw in some veggies! Broccoli florets, sliced bell peppers, snow peas, chunks of zucchini – stir-fry them quickly before adding the sauce, or cook them alongside the chicken. Adds colour, crunch, vitamins – win-win!
- Bake or Air Fry: Not feeling the frying? Toss the chicken with just a touch of oil, spread it on a baking sheet, and bake at 400°F (200°C) for 15-20 mins until cooked. Or use your air fryer! Then just toss the cooked chicken with the sauce (simmer the sauce separately on the stove first). It won’t be quite the same texture, but still yummy.
- Smart Sides: Serve it over quinoa, brown rice, or even better, cauliflower rice for fewer carbs. A big side salad is always a good move too.
How to Serve Your Amazing Honey Garlic Chicken Recipe
Okay, the masterpiece is done! How do you wanna eat it? So many options!
- The Classic: Spooned generously over fluffy rice (white jasmine rice is my fave!). That rice just drinks up any extra sauce. Mmmm.
- With Greens: Steamed broccoli is practically mandatory in my house with this. Steamed green beans, bok choy, or asparagus are also fantastic partners.
- Noodle Mania: Forget rice, toss this saucy chicken with some cooked ramen, udon, or soba noodles. Instant stir-fry bliss.
- Low-Carb Dream: Serve it over cauliflower rice or zucchini noodles (zoodles). Or! Stuff it into crisp lettuce cups (butter or romaine work great) for a lighter, hands-on meal.
- Lunch Hero: Portion out leftovers with rice or veggies for the easiest, most delicious desk lunch ever. Your coworkers will be jealous.
- My Perfect Plate: For me, the ultimate way to enjoy this Honey Garlic Chicken Recipe is piled onto jasmine rice, with a side of stir-fried snap peas and red bell peppers for crunch and colour, and finished with a ridiculous amount of sliced green onions and sesame seeds. Texture heaven!
Storing Your Precious Honey Garlic Chicken Recipe Leftovers
If, by some miracle, you have leftovers, here’s the plan:
- Fridge: Let the Honey Garlic Chicken Recipe cool down completely first (important!). Then stash it in an airtight container in the fridge. It’ll be good for about 3-4 days.
- Reheating: Warm it up gently in a skillet over medium-low heat. If the sauce got super thick in the fridge, add a tiny splash of water or broth to loosen it up. The microwave works too – just do it in short bursts, stirring in between, so it heats evenly without drying out.
- Freezer: Yep, you can freeze it! The chicken’s texture might be slightly different after thawing, but it’s still good. Let it cool completely, then pop it into a freezer-safe container or bag. It should keep for 2-3 months. Thaw it overnight in the fridge before reheating.
- Smart Prep: Wanna get ahead?
- Chop the chicken and keep it sealed in the fridge (cook within a day).
- Mince the garlic/ginger and store them together in a little container in the fridge.
- Mix up the sauce ingredients (hold the sesame oil) and keep it in a jar in the fridge for 2-3 days. Just shake or whisk well before using!
Seriously, You NEED This Recipe in Your Life!
Okay, I’ll stop gushing soon, promise. But really, this Honey Garlic Chicken Recipe is one of those dishes that just makes life better. It hits that perfect spot between comforting and exciting, tastes like you ordered fancy takeout, but comes together faster than you can decide what movie to watch. It’s my secret weapon for looking like I have my life together, even when I definitely don’t.
So please, do yourself a massive favour and try this Honey Garlic Chicken Recipe. I have a feeling it’s going to become a regular in your kitchen, just like it is in mine.
And hey – tell me what you think! Did you make it? Did you add anything fun? Serve it in a cool way? Drop a comment below and let me know how it went. I love hearing from you guys! Happy cooking!
Honey Garlic Chicken Recipe

Make this easy, sticky Honey Garlic Chicken Recipe! A quick, flavorful dinner perfect for weeknights using simple ingredients. Get the recipe!
Ingredients
- Approx 1.5 lbs (680g) boneless, skinless chicken thighs (or breasts), cut into 1-inch bite-sized pieces
- 2-3 tablespoons cornstarch (or cornflour)
- 1/2 teaspoon salt (or to your taste)
- 1/2 teaspoon black pepper (or to your taste)
- 1-2 tablespoons cooking oil (like avocado, canola, or grapeseed)
- 4-6 cloves fresh garlic, finely minced (go on, add extra if you love it!)
- 1 tablespoon fresh ginger, grated
- 1/3 cup (about 110g) runny honey
- 1/3 cup (about 80ml) soy sauce
- 1 tablespoon apple cider vinegar
- 2 tablespoons water or chicken broth (optional, for a slightly thinner sauce)
- 1/4 - 1/2 teaspoon red pepper flakes (optional, for a little kick)
- 1 teaspoon sesame oil (optional, stirred in at the end)
- Toasted sesame seeds (Optional)
- Sliced green onions (Optional)
Instructions
Step 1: Get Your Chicken Ready
First up, take those chicken pieces and pat them REALLY dry with paper towels. Like, desert dry. This is the secret to getting them nice and browned instead of sad and steamy. Toss ’em in a bowl with the salt, pepper, and that magical cornstarch until every piece has a light dusting. Set that bowl aside for a sec.
Step 2: Whisk Up That Awesome Sauce
In another bowl (or hey, a measuring jug works great!), dump in the minced garlic, grated ginger, honey, soy sauce (or its buddies), and apple cider vinegar. If you’re feeling spicy, toss in those red pepper flakes now too. Whisk it all together like you mean it, until the honey dissolves and it looks like liquid treasure. Have a tiny taste (go on!). That’s the soul of your Honey Garlic Chicken Recipe right there. Park this bowl nearby.
Step 3: Sizzle Time! Get That Chicken Golden
Get a big skillet or a wok heating up over medium-high heat. Add your oil. When it shimmers a little, it’s ready. Gently place the coated chicken pieces in the pan, making sure they’re in a single layer. Listen closely: DON’T CROWD THE PAN! If you cram too much chicken in, it’ll steam instead of sear. Cook in batches if you gotta! Let the chicken sizzle away without messing with it too much for 3-4 minutes per side. You want it beautifully golden brown and cooked through. I personally love getting some nice dark crispy bits! Once it’s looking gorgeous, scoop the chicken out onto a plate.
Step 4: Sauce in the Pan!
Turn the heat down to medium-low. If there’s a ton of oil left, maybe tilt the pan and carefully spoon some out (leave about a tablespoon). Now, pour that glorious honey garlic sauce mixture into the skillet. It should bubble up gently almost immediately. Let it simmer for just a minute or two, stirring it around. You’ll see it start to thicken up a bit – partly the heat, partly the leftover cornstarch magic. Warning! Keep an eye on it; honey can go from delicious to burnt really fast. If it gets too thick too quickly, splash in that optional water or broth to loosen it.
Step 5: The Grand Finale – Bring It All Together!
Toss that cooked chicken back into the skillet with the bubbling sauce. Stir everything gently until every single piece of chicken is shamelessly coated in that sticky, glossy glaze. Oh yeah. Let it all hang out together for another minute or two, just long enough for the chicken to get friendly with the sauce and warm through completely. This is where the Honey Garlic Chicken Recipe truly comes alive.
Step 6: Make it Pretty (If You Want!)
Kill the heat. If you’re using it, now’s the time to stir in that teaspoon of sesame oil – it adds a lovely nutty smell. Pile it high onto plates and shower it with toasted sesame seeds and sliced green onions. Makes it look fancy, even though you know how easy it was!
Notes
Nutrition Information:
Yield:
Serves 3 to 4 peopleAmount Per Serving:Calories: Approximately 650 calories per serving