
Okay, Story Time: How These Cheesecake Bites Saved Me!
You guys, I have to tell you about these little spheres of awesome. My journey to perfecting this cheesecake ball recipe wasn’t exactly… smooth sailing. Let’s just say there was an incident involving a very failed full-sized cheesecake (we don’t talk about the Great Cheesecake Collapse of ’23) right before a party. Panic mode! I needed something fancy-ish, definitely cheesecakey, but FAST and foolproof. Enter the cheesecake ball idea. After a few rounds of testing – batch one was kinda bland, batch two mysteriously vanished thanks to my husband – I finally hit the jackpot with this White Chocolate Raspberry version. Seriously, they look like you slaved for hours, but shhh, they’re secretly SO easy. It’s that perfect creamy, tangy cheesecake vibe, all wrapped up in sweet white chocolate with that zingy raspberry kick. They’re now my official party trick, my “oops, I forgot dessert” lifesaver, and my Tuesday night pick-me-up. You NEED these in your life!
What You Need to Grab (Plus My Notes on Swaps!)
Alright, let’s talk ingredients. Here’s the rundown for these little flavor bombs. Don’t worry, I’ve got your back with substitution ideas too!
- Cream Cheese: You absolutely need 16 ounces (two blocks) of the good stuff – full-fat, brick-style cream cheese. Please, please, please let it soften on the counter for an hour or two. Cold cream cheese = lumpy filling = sad cheesecake balls. Trust me on this. You can technically use low-fat, but why?? Go for the glorious richness! The tub kind is a no-go here, way too soft.
- Powdered Sugar: One and a half cups. It melts into the cream cheese like a dream, keeping things super smooth. Granulated sugar just won’t cut it here; you’ll feel the grit.
- Graham Cracker Crumbs: One and a half cups. These give it that essential “crust” flavor and stop the balls from being too gooey. You can buy the crumbs, or just smash up about 10-11 full graham crackers in a bag with a rolling pin (great stress relief!) or give ’em a quick blitz in the food processor. Swapsies? Crushed vanilla wafers or shortbread cookies are pretty darn delicious too!
- Vanilla Extract: One and a half teaspoons. Pure vanilla extract, not the imitation stuff if you can help it. It just adds that warmth and depth.
- Lemon Juice: Just one teaspoon of fresh juice. Okay, this is technically optional, but I highly recommend it. It just wakes everything up and adds that little bit of tang that makes the cheesecake flavour pop against the sweet chocolate. Bottled works if that’s all you have.
- White Chocolate: Two glorious cups (around 12 oz or 340g). Use good quality white chocolate chips or, even better, melting wafers (they tend to melt smoother). Pick something you’d happily snack on by itself!
- Dark or Semi-Sweet Chocolate: Half a cup (about 3 oz or 85g). This is for making them look all fancy with that drizzle. Chips or wafers work.
- Coconut Oil or Vegetable Shortening: One tablespoon, split between the white and dark chocolate (about half-and-half). This is my secret weapon for glossy, smooth, perfectly thin chocolate coatings. Makes dipping SO much easier.
- Freeze-Dried Raspberries: Half a cup, roughly crumbled. Don’t skip these! They are the star visually and add this incredible, intense, slightly tart raspberry flavour that fresh ones just can’t match in the same way. Find them near the dried fruits or baking aisle – they look like astronaut food but taste amazing! Need a swap? Maybe finely chopped pistachios for colour, but you’ll miss that raspberry punch. Sprinkles work too if you’re feeling colourful!
- Fresh Raspberries: Totally optional, but they look SO pretty scattered around the plate when you serve ’em.

How Long Does This Actually Take?
Okay, let’s get real about the timing for this cheesecake ball recipe. When you see the total time, don’t freak out – most of it is just chilling while you can go do something else!
- Mixing & Prepping: Maybe 30 minutes? Could be faster if you use pre-made crumbs.
- Chill Time Numero Uno: At least 1 hour in the fridge. Seriously, don’t rush this.
- Rolling Fun: 15-20 minutes, depending on how much of a perfectionist you are.
- Chill Time Numero Dos: 30 minutes in the freezer. This makes dipping way less messy.
- Chocolate Dip & Drizzle Party: Give yourself about 30 minutes for this.
- Final Setting Up: Another 30 minutes back in the fridge.
Grand Total: Around 2 hours 45 minutes.
Yes, it looks like a chunk of time, but you’re only actively doing stuff for maybe an hour and fifteen minutes tops! The fridge and freezer are doing the heavy lifting. Way quicker than a baked cheesecake ordeal, right? The hardest part is waiting for them to chill!
Let’s Make Some Magic: Step-by-Step
Alright, ready to transform those ingredients into pure deliciousness? Here’s how we tackle this cheesecake ball recipe together:
Step 1: Whip Up That Creamy Filling
First things first, grab a big bowl and your electric mixer (handheld is fine, stand mixer works too!). Make SURE that cream cheese is soft – poke it, it should give easily. Now, beat that cream cheese on medium speed until it’s totally smooth. No one wants lumpy cheesecake balls! Scrape down the bowl walls to catch any stubborn bits. Tumble in the powdered sugar. Start mixing on low (unless you want a sugar snowstorm in your kitchen!), then bump it up to medium and beat ’til it’s all smooth and happy. Drizzle in the vanilla and that lovely lemon juice, give it one more quick whiz.
Step 2: Crumbs In & Chill Out
Okay, mixer off! Grab a spatula. Pour in those graham cracker crumbs. Gently, gently fold ’em in until they’re just mixed through. Don’t beat the heck out of it now. Cover the bowl nice and tight with plastic wrap (press it down onto the surface if you can, prevents a skin forming) and slide it into the fridge. It needs at least an hour to firm up. Honestly, longer is fine too – you could even do this the day before.

Step 3: Roll ‘Em Up!
Line a baking sheet (or a big plate, whatever fits in your freezer) with parchment paper or wax paper. Seriously, don’t skip this unless you enjoy chiseling cheesecake off metal. Once the filling feels firm enough to handle without immediately coating your hands, grab a small cookie scoop (about 1 tablespoon size is perfect for consistent balls) or just use a spoon. Scoop out portions and roll them gently between your palms into neat little balls. Plop them onto your prepared baking sheet. You’ll probably get somewhere between 2 and 3 dozen, give or take.
Step 4: Flash Freeze!
Stick that whole baking sheet, balls and all, straight into the freezer for 30 minutes minimum. You want them firm to the touch, almost hard. Why? Because trying to dip room-temperature cheesecake balls into warm chocolate is a recipe for disaster (and melted blobs). Frozen balls = clean dipping! This is maybe my most important tip!
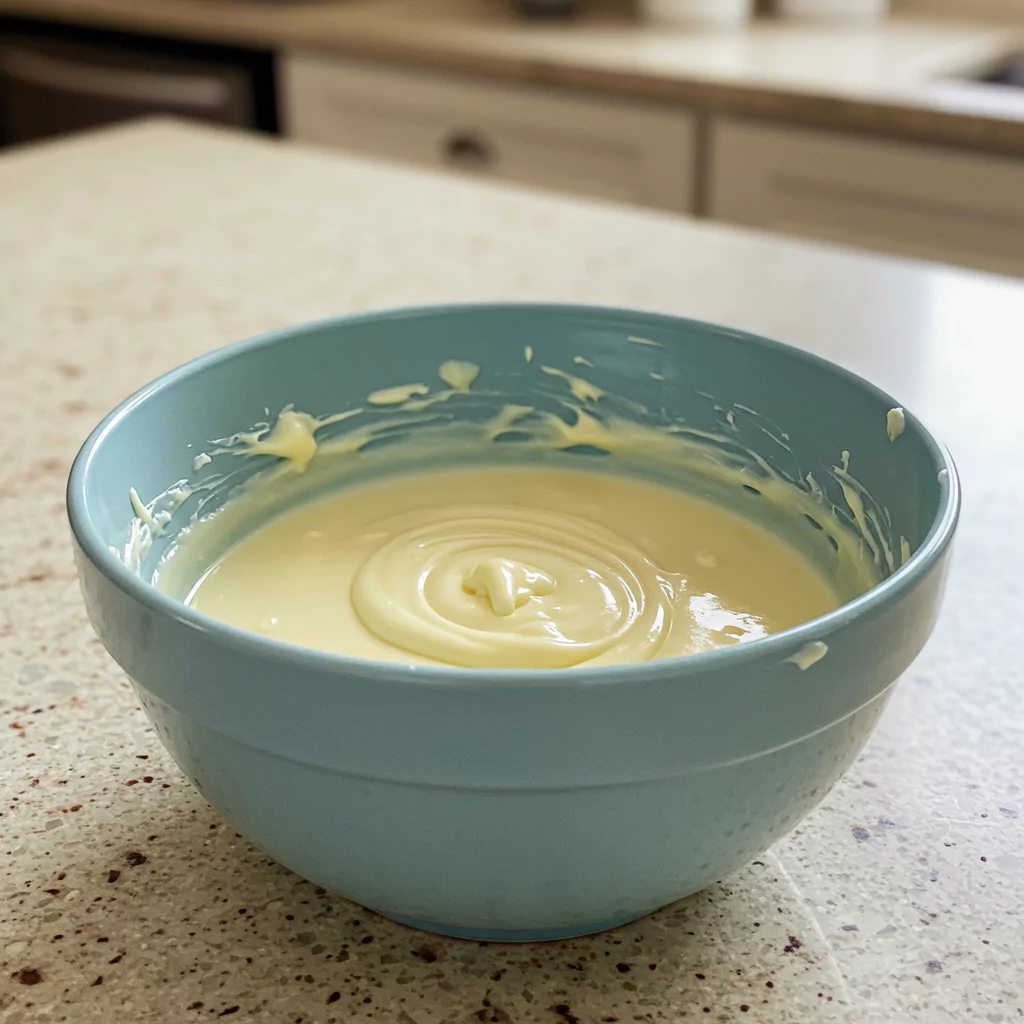
Step 5: White Chocolate Melting Time
While those little guys are chilling out (literally), let’s melt the white chocolate. Put the white chocolate chips/wafers in a microwave-safe bowl (choose one deep enough for dipping!) along with about half a tablespoon of the coconut oil/shortening. Zap it in the microwave for 30 seconds, stir well, then zap again in 20-30 second bursts, stirring really well each time, until it’s almost melted. Then just stir until the residual heat melts the last few bits and it’s totally smooth. White chocolate can be fussy and burn easily, so go slow! No microwave? A double boiler works great too (bowl over simmering water, don’t let water touch bowl).
Step 6: The Big Dip
Rescue the cheesecake balls from the freezer. Now, work fairly quickly! Drop a ball into the melted white chocolate. I find using a fork is easiest: let the ball sit on the fork tines, dunk it under, lift it out, and gently tap the fork on the side of the bowl to shake off the excess drips. Slide the coated ball back onto your parchment paper. Repeat, repeat, repeat! If the chocolate starts getting thick and gloopy, pop it back in the microwave for 10-15 seconds and stir well.
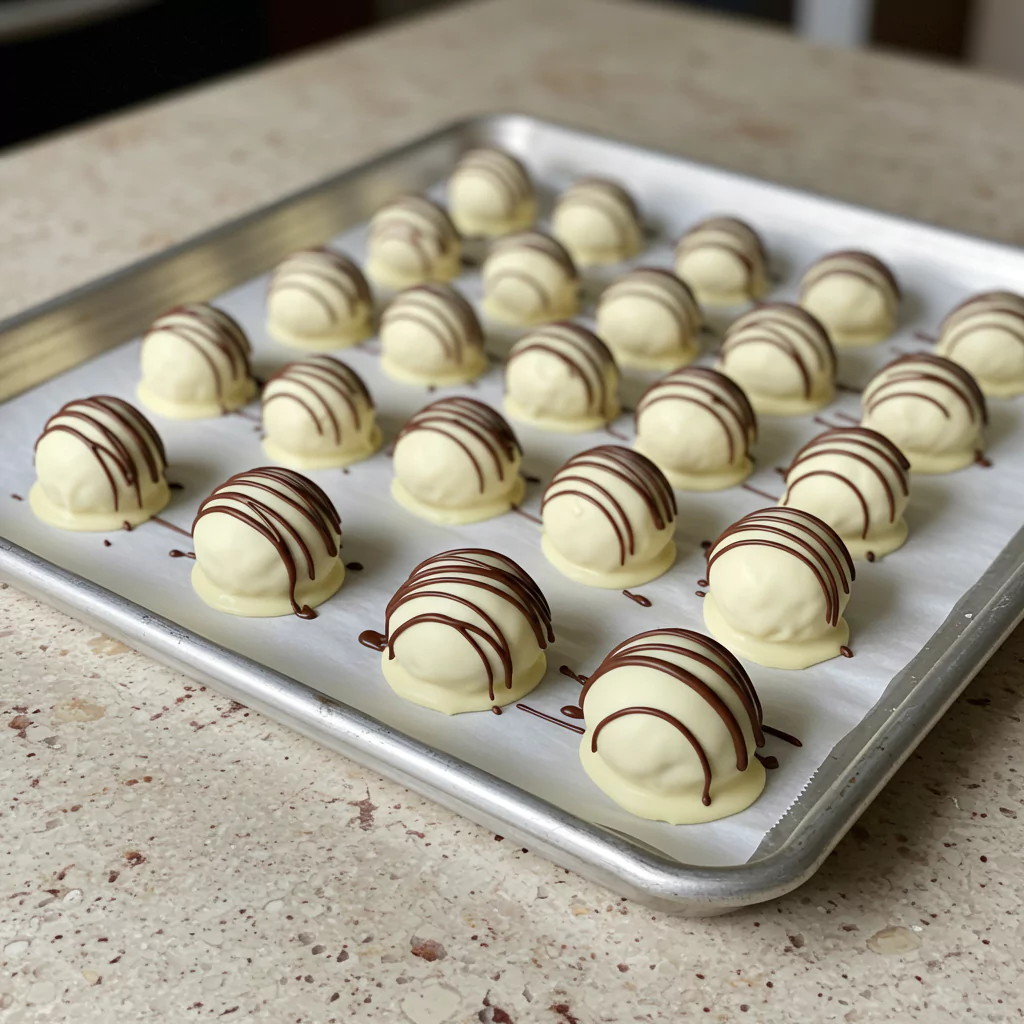
Step 7: Drizzle, Sprinkle, Jazz Hands!
Time for the fancy part! Melt your dark/semi-sweet chocolate with the other half-tablespoon of coconut oil, just like you did the white chocolate. Once it’s smooth and drizzly, you can either pour it into a little Ziploc bag, snip a tiny corner off, and drizzle away like a pro, OR just use a fork or spoon to flick drizzles back and forth over the coated balls. Go wild!
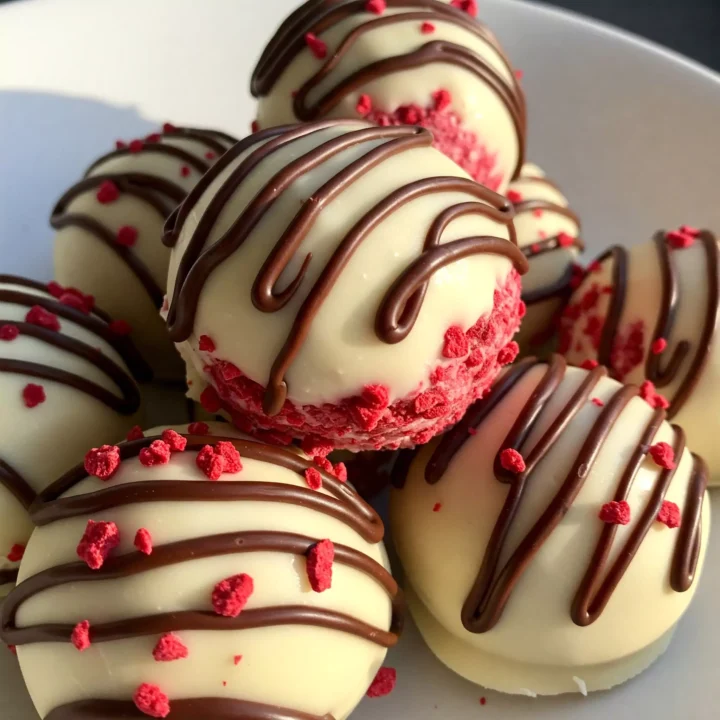
Quick, quick! While that drizzle is still wet, sprinkle over your crushed freeze-dried raspberries. They need that wet chocolate to stick to. Look how pretty they are!
Step 8: The Final Chill (Almost There!)
Carefully slide the baking sheet back into the fridge for about 30 minutes. This lets the chocolate fully set up hard. Then… finally… you can dive in! Pat yourself on the back – you made these gorgeous things!
Recipes You May Like
How to Serve These Beauties
This cheesecake ball recipe makes treats that are dying to be shown off! Here are some ideas:
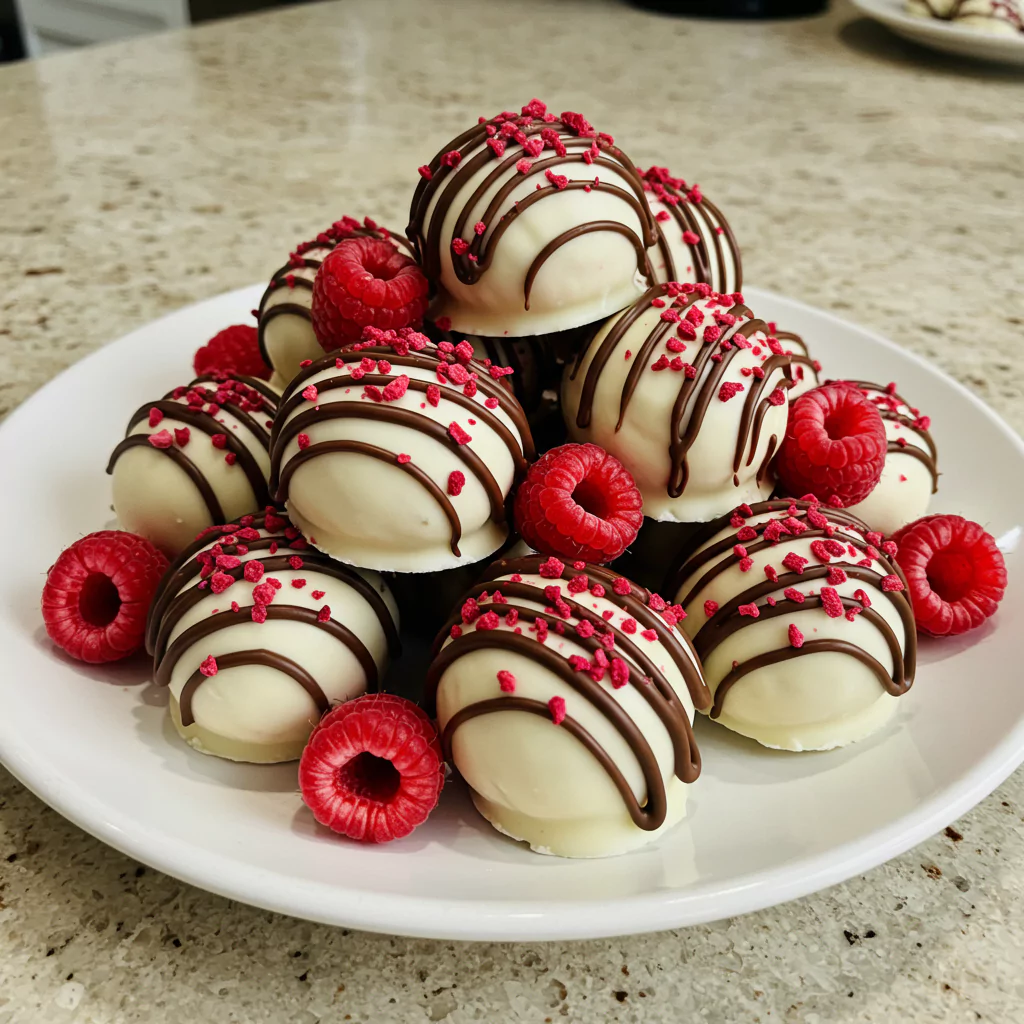
- The Classic Platter: Pile ’em high on your nicest plate. Maybe scatter some fresh raspberries around? They look stunning and always get nabbed first.
- Dessert Board Star: Make them the centerpiece of a dessert platter with cookies, fruit, maybe some caramel sauce? So fun!
- Cute & Individual: Pop one or two in mini cupcake liners. Instantly elegant, perfect for a tea party or a simple post-dinner treat.
- Coffee’s Best Friend: Seriously, one of these with a hot cup of coffee? Heaven. Pure heaven.
- Gift Like a Pro: Who wouldn’t want to receive a box of these? Line a little box with parchment, tie a ribbon… best homemade gift EVER.
Keeping Your Cheesecake Balls Happy (Storage!)
Got leftovers? Or maybe you’re being super organized and making this cheesecake ball recipe ahead? Here’s the scoop:
- Fridge: Your best bet for storing. Keep them in an airtight container in the fridge. They’ll be great for up to a week (if they last that long!). The crumbs inside might soften a tad over time, but they’re still yummy.
- Freezer: Yes! You can totally freeze them! Once the chocolate is set, freeze them solid on the baking sheet, then toss them into a freezer bag or container. They’ll keep for a month or two.
- Thawing: Just move them from the freezer to the fridge for a few hours before you want to serve them. Easy peasy. Avoid thawing on the counter, or the chocolate might get sweaty.
- Prepping Ahead: Feel free to make the filling and chill it for a day or two before rolling. You can even roll the balls and freeze them before dipping. Then just dip whenever you’re ready (let them thaw just slightly for maybe 15 mins first so the chocolate sticks well).
Okay, Real Talk: Why I’m Head-Over-Heels For These
Seriously though, why am I borderline obsessed with this specific cheesecake ball recipe? Well, number one: the TASTE. It’s got everything – creamy, tangy, sweet, fruity. It just hits all the right notes. Number two: they LOOK way fancier than they are difficult to make. You get major brownie points (or cheesecake ball points?) for minimal actual artistic talent required. Drizzles and sprinkles hide all manner of sins!
But honestly? The biggest reason is how stress-free they are compared to “real” cheesecake. No water baths, no worrying about cracks, no waiting hours for it to cool perfectly. Just mix, chill, roll, dip. It’s almost relaxing! It’s pure cheesecake joy, bite-sized and manageable. They just make me happy!
So, please, go make a batch! Tell me all about it in the comments – Did you love them? Did you try a crazy substitution that worked? Did your family devour them instantly too? I genuinely love hearing how recipes turn out for you all. Happy baking (well, no-baking)!
cheesecake ball recipe
Easy no-bake cheesecake ball recipe w/ white chocolate & raspberry! Perfect party dessert bites. Get tips for these cream cheese truffles. Try now!
Ingredients
- 16 ounces full-fat cream cheese, nice and soft at room temperature (super important!)
- 1 ½ cups powdered sugar (the key to smoothness!)
- 1 ½ cups graham cracker crumbs (store-bought or blitz your own!)
- 1 ½ teaspoons pure vanilla extract
- 1 teaspoon fresh lemon juice (optional, but adds a lovely zing!)
- 2 cups good quality white chocolate chips or melting wafers
- ½ cup dark or semi-sweet chocolate chips or melting wafers (for the fancy drizzle!)
- 1 tablespoon coconut oil or vegetable shortening, divided (helps melt chocolate smoothly!)
- ½ cup freeze-dried raspberries, lightly crushed (don't skip these!)
- Fresh raspberries, for making it look extra pretty when serving (optional)
Instructions
Notes
Nutrition Information:
Yield:
12-15 servingsAmount Per Serving:Calories: ~145 calories per ball