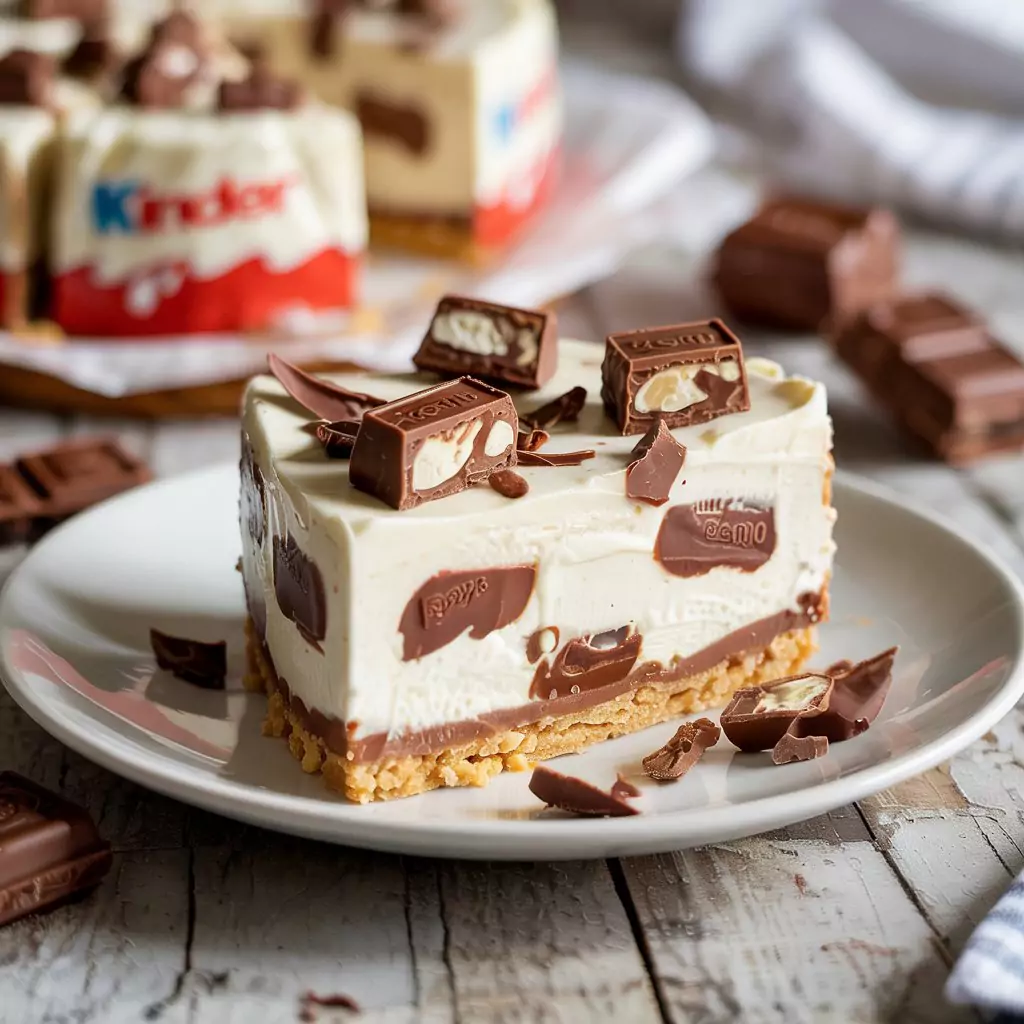
You HAVE to hear about this discovery. Remember those Kinder chocolates? The ones with the creamy hazelnut filling and that distinct taste you just can’t forget? Well, imagine that wrapped up in a creamy, dreamy cheesecake. Yeah. Mind-blowing, right?
It all started when I was desperately trying to think of a killer dessert for my nephew’s birthday. Cake felt boring. Brownies? Done them. I wanted something that would make everyone go “WOW.” I started playing around, thinking about flavours everyone loves, and BAM – Kinder! It took me a fair few tries, messing with the biscuit base, getting the cream cheese just right (no lumps allowed!), figuring out how long it really needed to chill… but oh my goodness, the result? This Kinder cheesecake recipe is now my absolute go-to. It’s ridiculously easy (no oven mitts needed!), tastes like pure joy, and honestly, it looks way fancier than it is to make. If you need a dessert that screams “special treat” without the stress, stick with me!
What You’ll Need: The Good Stuff for This Kinder Cheesecake Recipe
Alright, let’s raid the cupboards and fridge. Here’s the treasure you’ll need to gather:
- For that Buttery Base:
- Digestive Biscuits: About a pack and a half (around 250g). They just have that perfect crumbly texture. Little tip: Graham crackers or even shortbread biscuits work great if you wanna switch it up!
- Butter: A good chunk (100g), melted down ’til it’s lovely and liquid. Unsalted is usually best here.
- For the Silky, Kinder-Packed Filling:
- Cream Cheese: Grab two standard blocks (500g total). Use the full-fat stuff – it makes a world of difference! And PLEASE let it sit out for a bit to get to room temp. Cold cream cheese = lumpy cheesecake = sadness. Trust me.
- Icing Sugar: About 100g. Sift it if you can be bothered – avoids surprise sugar clumps! You can add a smidge more or less depending on how sweet you like things.
- Double Cream: A decent pour (300ml). Keep it chilly right until you whip it; helps it get nice and fluffy.
- Vanilla Extract: Just a teaspoon. It’s like a magic flavour booster.
- Kinder Chocolate Bars: The classic little ones – about 150g worth. We’re melting these down into chocolatey goodness for the filling. The smell alone is worth it!
- Kinder Bueno Bars: Okay, this is KEY. Get 3 twin packs (so 6 bars). Chop ’em up roughly. That hazelnut cream and crispy wafer inside the cheesecake? Chef’s kiss. Keep a few extra for decorating later – you won’t regret it.
That’s basically it! Pretty standard stuff for such an epic Kinder cheesecake recipe, right?

How Long Does It Take? Mostly Just Waiting!
Here’s the best bit: you’re not chained to the oven!
- Getting Your Hands Dirty: Maybe 30 minutes, tops? Crushing biscuits, melting, mixing… it’s pretty quick!
- The Waiting Game: This is where patience comes in. It needs at least 4-6 hours in the fridge to set properly. Honestly? Overnight is even better. The flavours get cozier, and it slices like a dream.
- Total Time: So, active work is minimal, but plan for it to hang out in the fridge for a good chunk of time.
Think about it – baked cheesecakes can take AGES with prep, baking, cooling… ugh. This no-bake wonder has you actively busy for half an hour, then you just… wait. Perfect for making the day before you need it!
Okay, Let’s Make This Amazing Kinder Cheesecake Recipe!
Ready? Let’s do this. It’s easier than you think!
First Up: That Crumbly Base
Grab those biscuits! Easiest way is to whiz them into fine crumbs in a food processor. If you don’t have one, chuck ’em in a freezer bag, seal it tight, and bash away with a rolling pin. Kinda fun, actually. Mix the crumbs with your melted butter until it’s all damp and sandy-looking. Plop this mix into your cake tin (a springform one, maybe 8 or 9 inches across, is ideal) and press it down really well. Use the bottom of a glass to get it flat and even. Shove that in the fridge to firm up while you do the next bit.
Now, The Star: The Creamy Kinder Filling!
This is where the magic happens. In a big bowl, beat the room-temp cream cheese until it’s totally smooth. No lumps! An electric mixer is your friend here, but strong arms and a whisk work too. Add the sifted icing sugar and vanilla, and give it another quick beat.
Melt those Kinder Chocolate bars gently. A bowl over a pan of simmering water works great (don’t let the water touch the bowl!), or do short 20-second bursts in the microwave, stirring lots, until smooth. Let it cool down just a touch – you don’t want to scramble the cheese! Pour the melted chocolate into the cream cheese mix and blend it all together. It should look pale, creamy, and delicious.
In another bowl (make sure it’s clean and maybe even chilled!), whip the cold double cream until it holds soft peaks – like gentle waves. Don’t go crazy and make butter! Now, gently fold the whipped cream into the Kinder-cheese mixture. I usually add a third first to loosen it up, then fold the rest in carefully. Finally, fold in those chopped-up Kinder Bueno pieces. Try not to eat all the filling straight from the bowl. I dare you.
Chill Out Time & Making It Pretty
Grab your chilled base from the fridge. Spoon that glorious filling on top and smooth it out. A spatula is good, or just the back of a spoon. Cover it loosely with plastic wrap (try not to let it touch the top) and pop it back into the fridge. Now, walk away! Go watch a movie, read a book, sleep… just let it do its thing for at least 4-6 hours, or ideally overnight.
When it’s set firm, carefully release the sides of the springform tin. Ta-da! Now, the final flourish. You can melt a bit more Kinder chocolate (maybe mix with a tiny splash of cream for a quick, shiny ganache?) and drizzle it all over. Then stick on those extra Kinder Bueno bits, maybe some broken Kinder bar pieces… make it look awesome!
Fancy a Healthier-ish Version?
Look, this is a treat, right? But if you want to tweak it slightly:
- Lighter Cheese: You could try light cream cheese, but fair warning, it might not be as firm or rich. Maybe mix half-and-half?
- Less Sugar: Feel free to cut back on the icing sugar a little if you don’t have a super sweet tooth.
- Different Biscuits: Wholewheat digestives could add a slightly nuttier, more wholesome vibe to the base.
- Dark Choc Drizzle: Instead of more milk chocolate on top, a drizzle of intense dark chocolate could be amazing and less sweet.
Just play around, but remember, changes will affect the final outcome!
How to Serve This Beauty
Honestly, this Kinder cheesecake recipe doesn’t need much help:
- Naked Slice: Just a simple slice on a plate is divine.
- Berry Buddy: A few fresh raspberries or sliced strawberries next to it? Gorgeous, and the tartness is lovely with the rich chocolate.
- Saucy: A little drizzle of chocolate or caramel sauce never hurt.
- Cream Cloud: A spoonful of whipped cream on the side? Classic.
- Little Pots of Joy: Make ’em in glasses! Layer the base, filling, and topping in individual jars for easy party food. Super cute.
Storing Your Precious Kinder Cheesecake Recipe
If, by some miracle, you have leftovers:
- Fridge: Cover it well (airtight container is best!) and it’ll keep happily in the fridge for 3-4 days. The base might get a little softer, but who cares?
- Freezer: Yep, you can freeze it! Wrap it really, really well (plastic wrap AND foil) and it’ll last about a month. Let it thaw overnight in the fridge. The texture might be slightly different after freezing, but it’s still pretty darn good.
- Plan Ahead: Make the whole thing the day before you need it. It’s actually better that way as it gives the flavours time to really settle in.
Honestly, Just Go Make This Thing!
I’m not kidding, this Kinder cheesecake recipe is one of my all-time favorites to make and eat. It hits that perfect spot between creamy cheesecake and that specific, wonderful Kinder flavour. It looks impressive, tastes incredible, and is secretly easy because there’s NO baking involved. It’s the ultimate crowd-pleaser.
So please, give this Kinder cheesecake recipe a go! Grab your ingredients, have fun with it, and prepare for everyone to ask you for the recipe. Let me know how yours turns out in the comments below – I genuinely love hearing about what you guys bake (or, uh, don’t bake, in this case!). Happy chilling and happy eating!
Recipes You May Like

kinder cheesecake recipe
Creamy no-bake Kinder Cheesecake with chocolate-hazelnut bliss. Easy recipe for any occasion. Make it now!
Ingredients
- 2 cups (250g) digestive biscuits or graham crackers – Your choice! I love digestives for that cozy, classic vibe.
- 7 tablespoons (100g) unsalted butter, melted – Melt it until it’s golden and dreamy.
- 2 tablespoons granulated sugar – Just a touch to sweeten the base.
- Pinch of salt – Tiny but mighty, it makes the flavors pop!
- 2 blocks (500g) cream cheese, room temperature – Let it soften on the counter for smooth mixing.
- 1/2 cup (100g) granulated sugar – Sweetens the filling just right.
- 1 1/4 cups (300ml) heavy cream – The real deal for that lush texture.
- 2 teaspoons vanilla extract – A splash of warmth and depth.
- 7oz (200g) Kinder chocolate bars, chopped – Chop them up; save some for snacking (and decorating!).
- 3 tablespoons Kinder chocolate spread – For that extra Kinder magic.
- 2 tablespoons gelatin powder (optional) – If you want it extra firm, dissolve this in the water below.
- 1/4 cup (60ml) hot water – Only if you’re using gelatin; it helps it blend in.
- 1/2 cup (100ml) whipped cream – For dolloping on top like a pro.
- 6-8 Kinder Bueno bars – The crispy, hazelnutty crown of this masterpiece.
- Additional Kinder chocolate pieces – Little treasures for decorating.
- Chocolate shavings – A fancy sprinkle to finish it off.
Instructions
- Get Crushing (Therapy Session, Optional!)First, those biscuits. Easiest way? Chuck 'em in a food processor and blitz away until they're fine crumbs. No processor? No biggie! Pop them in a zip-top bag, seal it well, and whack 'em with a rolling pin (or a wine bottle, whatever's handy!). It's surprisingly satisfying. Tip your crumbs into a bowl, pour in that gorgeous melted butter, add the sugar and salt, and give it a good stir. You want it to look kinda like wet sand. Now, press this mixture firmly into the bottom of your 9-inch springform pan. I use the bottom of a glass to get it nice and even. Stick it in the fridge for at least 30 minutes while we get the filling ready. My little trick? 10 minutes in the freezer makes the base extra solid!
- Whip Up That Creamy DreamIn your main mixing bowl, pop in the room-temp cream cheese (remember? Vital!) and the sugar. Get your electric mixer and beat 'em together for a good 2-3 minutes until it's completely smooth as silk. No lumps allowed here! Scrape down the bowl once or twice. Now, in a separate bowl (make sure it's clean and dry!), pour the heavy cream and vanilla. Whip it up until you get lovely stiff peaks – when you lift the beaters, the peak should hold its shape proudly. Okay, gentle hands now! Take about a third of the whipped cream and fold it into the cream cheese mixture with a spatula just to lighten it up. Then, add the rest of the whipped cream and gently fold it all together. Try to keep as much air in there as possible! Next, melt 150g of your chopped Kinder chocolate. I do this in the microwave in 30-second bursts, stirring each time, until it's smooth and glossy. Let it cool for just a minute – you don't want to cook the cheese! – then fold this glorious melted chocolate and the Kinder spread into your cream cheese mix. If you're using gelatin, make sure it's smoothly dissolved and slightly cooled, then gently stir it in right at the end. See? Easy does it!
- Putting Our Kinder Cheesecake Masterpiece TogetherGrab your chilled base from the fridge. Sprinkle the rest of that chopped Kinder chocolate (the 50g you saved) over the crust – little surprise nuggets! Now, pour that luscious filling over the base. Smooth the top gently with your spatula. Give the pan a couple of gentle taps on the counter just to knock out any big air bubbles. Right, into the fridge it goes! Cover it loosely with plastic wrap (try not to let it touch the surface!) and leave it to set for at least 4 hours. But like I said, overnight is my gold standard for the best Kinder Cheesecake texture. The waiting is the hardest part, I know!
- The Grand Finale: Decorate!Once it's beautifully firm and chilled, it's showtime! Run a thin knife (warming it under hot water helps!) around the inside edge of the pan. Carefully unclip the springform ring and lift it off. Look at that beauty! Now, let's make it gorgeous. I love piping some whipped cream swirls around the edge. Then, artfully arrange those Kinder Bueno bars and extra Kinder chocolate pieces on top. Have fun with it! A final sprinkle of chocolate shavings, and voila! You've made an absolutely stunning Kinder Cheesecake. Prepare for applause!
Notes
Nutrition Information:
Yield: 10Amount Per Serving:Calories: Approximately 400 calories per serving
There are no reviews yet. Be the first one to write one.