Okay, okay, let’s really talk about Viennese fingers. Forget the stuffy recipe cards for a minute. You know those moments when you bite into something so delicate, so buttery, it just dissolves on your tongue and makes you close your eyes? That’s what a good Viennese finger should do. They look like little piped clouds, all fancy and elegant in bakery windows, right? But honestly, trying to make them at home? I’ve been there – sometimes it feels like you need a magic wand, or at least way more patience than I usually have! So many recipes end up with cookies that are kinda tough, or spread into weird blobs… it can be frustrating!
Which is EXACTLY why I practically guard this particular recipe for Viennese fingers. This isn’t just a recipe; it’s the recipe that finally clicked for me, the one that gives you that authentic, melt-in-your-mouth vibe without making you want to tear your hair out. It’s all about simple ingredients treated the right way. No weird stuff, just good old butter, sugar, flour… but done smartly. I swear, with this recipe for Viennese fingers, you’ll be churning out cookies that look like they came straight from a Viennese café. Ready to make some magic happen in your kitchen? Grab a cuppa, and let’s chat through it.
Alright, here’s what you’ll need to hunt down for this recipe for Viennese fingers:
Think classic shortbread, but lighter, somehow…
- Butter: The star! Use 250g of unsalted butter, and PLEASE, for the love of cookies, let it get properly soft at room temperature. Like, you can easily poke it. This is non-negotiable! Cold butter = piping nightmare.
- Powdered Sugar: 60g. Give it a quick sift – nobody wants sugar lumps crashing the party.
- Vanilla: Half a teaspoon of the good stuff (pure extract!). Or splurge on vanilla bean paste (a full teaspoon) if you want that extra oomph.
- Flour: Just 250g of regular all-purpose flour. Sifting this too makes a difference, trust me. Keeps things feathery light.
- Salt: A little pinch, 1/4 teaspoon, just to make the buttery sweetness pop.
- Egg Whites: From 2 large eggs. Just whisk them lightly with a fork ’til they’re a bit frothy. This is kind of the secret weapon for texture.
Wanna jazz ’em up later? (Optional but highly recommended!)
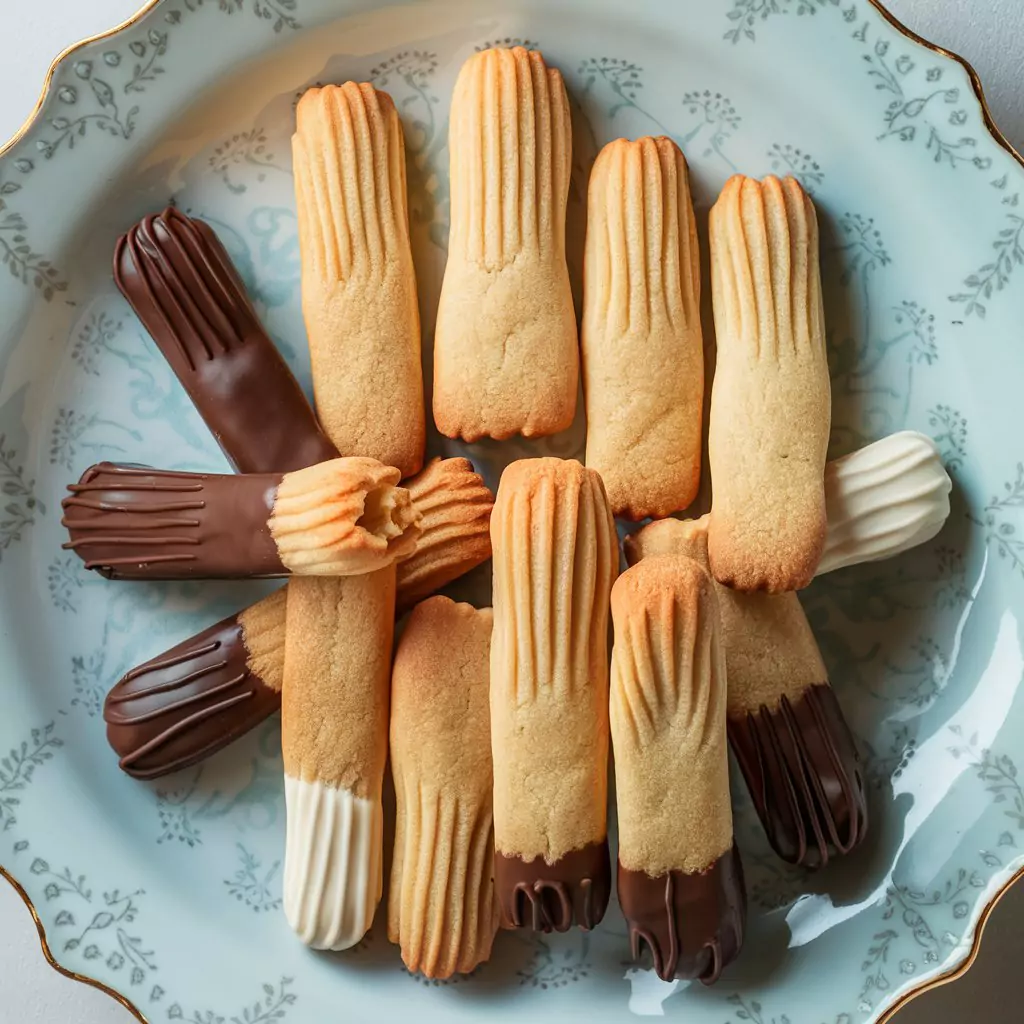
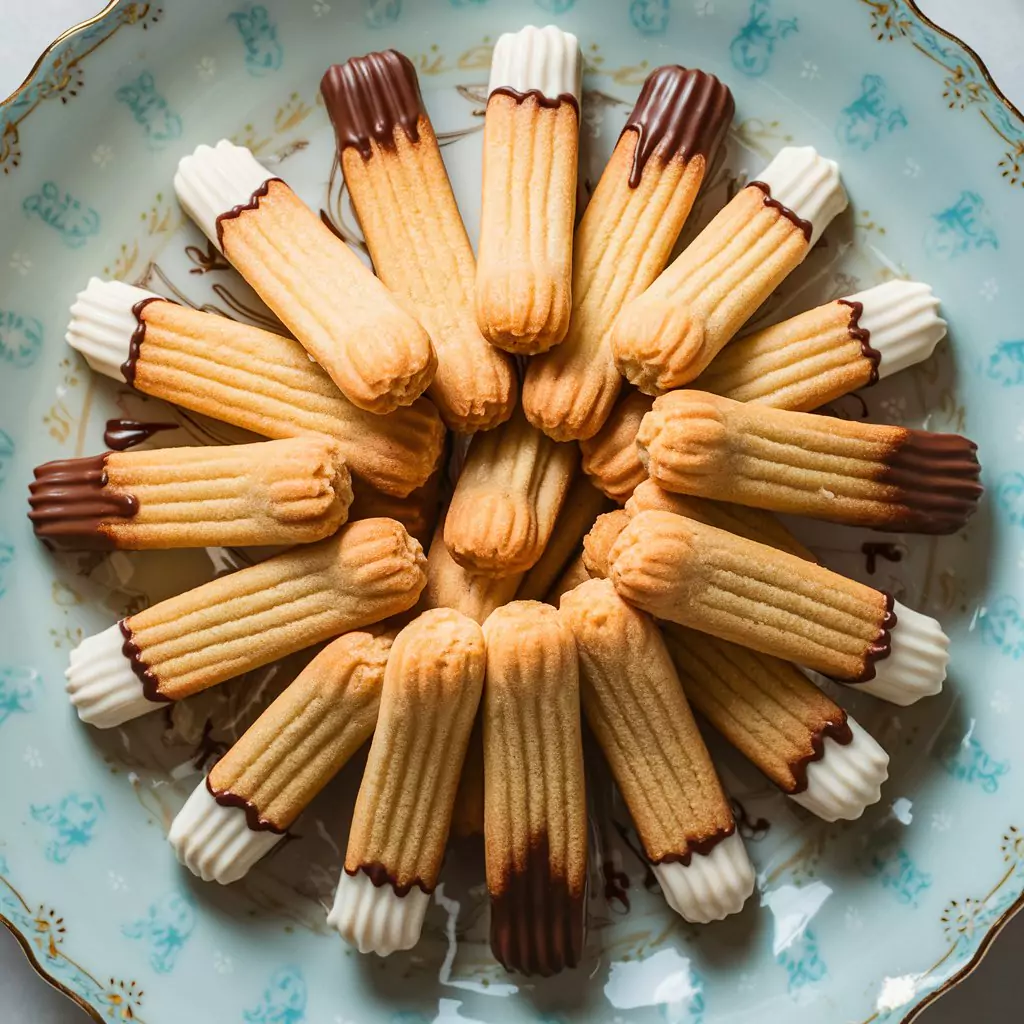
- Some nice dark chocolate (about 200g, maybe 70% cocoa?) for dipping the ends.
- A bit of white chocolate (50g?) for drizzling over the dark. Makes ’em look super pro.
Got dietary needs? Let’s chat swaps:
- Gluten-free? Totally doable. Use a good ‘measure-for-measure’ GF flour blend. Sometimes adding 1/4 tsp xanthan gum helps if your blend lacks it. This recipe for Viennese fingers is surprisingly adaptable.
- Vegan? A solid block-style plant-based butter usually works well. You’ll also need something like whisked aquafaba (the water from a can of chickpeas!) instead of the egg whites. Takes a little experimenting, but possible!
How long ’til cookie heaven?
It’s not an all-day affair, promise!
- Getting your ducks in a row: Maybe 25 mins, mostly waiting for that butter to chill out and soften.
- Quick dough rest: Just 30 mins in the fridge. So much better than recipes that make you wait hours!
- Baking: Super speedy – like 12-15 minutes a batch.
- Grand total: You’re looking at around 70 minutes, give or take, before you’re sighing happily over a cooling rack full of gorgeousness.
Let’s Bake These Beauties! (My Step-by-Step Brain Dump)
- Operation Soft Butter: First up for this amazing recipe for Viennese fingers: Make absolutely sure that butter is soft! Get your oven heating up to 350°F (175°C) and slap some parchment paper on a couple of baking sheets. Cheeky shortcut: If your house is freezing and the butter is being stubborn, warm your mixing bowl (fill it with hot water for a minute, then dry it really well) before you put the butter in. Helps nudge it along!
- Whip It Good: Okay, in your mixer (or use a hand mixer!), beat the genuinely soft butter and the sifted powdered sugar together. Don’t just mix – beat it. On medium speed for a good 3, maybe 4 minutes. You’re watching for it to turn pale, almost white, and get super fluffy. This pumps air into the dough, which is key for that melting texture. Don’t skimp here!
- Flavor Bomb: Add the vanilla and salt. Give it another quick whiz, just 30 seconds is fine, until it’s all mixed through. And hey – scrape down the bowl! Annoying step, but worth it to make sure everything is playing nicely together.
- Flour Power (Gently!): Now for the flour. Tip it in and mix on the absolute lowest speed. Stop the second you can’t see dry flour anymore. I mean it! Over-mixing now is the #1 way to get tough cookies instead of tender ones. We want melt-in-your-mouth, remember?
- Bag It Up: Time to get the dough into a piping bag fitted with a big-ish star tip (like half-an-inch). It might seem a bit thick. If it feels like you’ll need Herculean strength to pipe it, just hold the filled bag in your warm hands for a minute or two. It’ll ease up. My sanity-saving tip: Using two piping bags, one inside the other, gives you more control and feels less likely to explode dough everywhere (yes, it happens!).
- Piping Magic: Okay, deep breath, pipe little fingers or squiggles, maybe 3-4 inches long, onto your prepared sheets. Give them breathing room – about 1.5 inches apart. Try to pipe with steady, even pressure. It helps them bake evenly. If your hands get hot and the dough starts feeling floppy and sad, don’t fight it! Just stick the whole piping bag in the fridge for 10 minutes to chill out.
- The Golden Touch: Get a small brush and lightly paint the tops of your piped dough fingers with a bit of the beaten egg white. Just a whisper! It gives them that beautiful, subtle shine and golden hue after baking. Too much makes them spread weirdly.
- Oven Time! Into the hot oven they go! Set a timer for 12 minutes, but start watching them closely after 10. You want the very edges to be just starting to turn a pale, delicate gold. The centres should still look quite pale. Do NOT let them get properly brown all over – they bake fast! Good move: Spin the trays around halfway through for even baking. And remember, they crisp up more as they cool.
- Handle With Care: Let them sit on the hot baking tray for 5 minutes when they come out. They’re ridiculously fragile right now! Then, using a thin spatula (a fish slice works great!), gently, gently move them to a wire rack to cool completely. Seriously, breathe on them wrong and they might crumble! (Okay, maybe not that fragile, but be gentle!).
- Dress Up Time (Optional): Once they are 100% cool – no cheating! – melt your dark chocolate. Dip the ends in, let the excess drip back into the bowl (give it a little shake), and lay them back on parchment paper. If you’re doing the white chocolate drizzle, melt that and artfully squiggle it over the dark chocolate bits. Pro patience tip: Let the chocolate harden at room temperature. It gives a much nicer finish than the fridge, which can sometimes make it look dull or streaky.
Just Wondering (Nutrition-ish):
Each little cookie (plain, pre-chocolate attack) is somewhere around 85 calories. The nice part about this recipe for Viennese fingers is they tend to feel less sugary-sweet than store-bought cookies, letting that lovely buttery flavour really shine.
Wanna Lighten Things Up?
You totally can tweak this recipe for Viennese fingers:
- Knock back the sugar a bit more if you like – maybe by 25%?
- Swap some (up to half) of the plain flour for almond flour – adds a lovely richness.
- Play with using solid coconut oil for some of the butter.
- Lemon zest! A teaspoon added with the vanilla adds a gorgeous brightness.

How to Show Off Your Baking Prowess:
These beauties basically sell themselves, but:
- They are divine with a simple cup of tea or coffee. Peak cozy moment.
- Sandwich two with a dab of raspberry jam? Oh my. Heaven.
- Serve alongside fresh berries and a cloud of whipped cream for an effortless dessert.
- Stack ’em up on a pretty plate – instant elegance!
- Tie a few together with ribbon – who wouldn’t want a gift like that?!
Things I’ve Definitely Done Wrong (So You Don’t Have To!):
Seriously, making this recipe for Viennese fingers is easy once you know the quirks. Watch out for:
- That Butter Temp: Really, it’s key. Not rock hard, not melty. Just perfectly soft.
- Beating the Flour: Just don’t do it! Mix gently, stop early. Tender is the goal!
- Wobbly Piping: Uneven cookies = uneven baking. Take your time.
- Overcrowding: Give ’em space on the tray, or they’ll get steamy and sad.
- Forgetting About Them: They go from pale to too brown fast. Stay near the oven towards the end!
Keeping Them Perfect:
- Once cool, stash them in an airtight container. Room temp is fine. They’ll stay lovely for days (if they last that long!). Up to a week, easily.
- Use parchment paper between layers if you stack ’em high, prevents sticking/breaking.
- Freeze ’em? Yep! The plain, baked cookies freeze brilliantly for up to 3 months. Thaw at room temp.
- You can even make the dough, wrap it well, and chill it for up to 3 days before piping/baking. Handy!
Okay, Deep Breath! You’ve Got This!
And that, my friend, is my tried-and-tested, absolutely favourite recipe for Viennese fingers. It might seem like a lot of little details, but honestly, once you do it once, it makes perfect sense. The reward is SO worth it – cookies that are impossibly light, incredibly buttery, and just feel special.
I really hope you give this recipe for Viennese fingers a whirl! Let yourself enjoy the process, the smells, the piping… it’s fun! And please, tell me how it goes! I genuinely love hearing about people trying recipes and falling in love with them too. Happy baking! You’re going to nail it.