Let’s just chat, you and me, about these insanely good Viennese biscuits. Seriously, have you ever had one? That moment where it just… poof… disappears in your mouth, leaving behind nothing but pure buttery bliss? That’s what we’re aiming for! Forget fancy baking shows; this Viennese biscuits recipe is all about bringing that little bit of European cafe magic right into your own kitchen, no stress involved. Whether you want to feel a bit posh for an afternoon tea or, let’s be real, you just need a decent biscuit with your cuppa (we’ve ALL been there!), this is the recipe you need. Let’s get into why these Austrian wonders are just so darn good.
The Quick Facts (So You Know What You’re In For):
- Faff Time: Maybe 15 mins of mixing and piping? Super quick.
- Oven Time: 12-15 mins – basically, just enough time to make a brew.
- Total Time: Like, half an hour until you’re in biscuit heaven.
- Scary Scale: 1 out of 10. Dead easy.
- How Many? You’ll get about 20 biscuits, unless you make massive ones (no judgment!).
What You Gotta Grab (The Shopping List, Basically):
Alright, let’s talk about what you need for this champion Viennese biscuits recipe. It’s probably less than you think:
- Unsalted Butter (230g): The absolute heart and soul. This gives them that flaky richness. Please, please make sure it’s properly soft – not melted, just soft enough to easily squish. Leave it out on the counter for an hour or so!
- Powdered Sugar (60g): You know, the super fine stuff, icing sugar. It blends in like a dream, keeping things smooth. Don’t try using regular sugar; it’s not the same vibe.
- All-Purpose Flour (160g): Standard stuff. The backbone of the biscuit.
- Cornstarch (30g): Okay, this is the secret handshake! It’s what makes them unbelievably tender and gives them that signature melt. Don’t skip it! I tried once. Big mistake. Huge.
- Vanilla Extract (1 tsp): For that lovely, warm background flavour. A teaspoon of the good stuff if you have it.
- Salt (A Tiny Pinch): Yep, salt in sweet things! It just makes everything else taste better. Balances the sweetness, makes the butter sing… trust me on this.
Little Tweaks & Fun Ideas:
- Gluten-Dodger? No problem! Grab a good ‘cup-for-cup’ or ‘1:1’ gluten-free flour blend and just swap it in for the regular flour. Easy peasy.
- Vegan Friend? Use a good quality vegan butter block (the stick kind usually behaves best in baking) instead of the dairy butter. Boom, vegan Viennese!
- Zest it Up! A little bit of lemon zest mixed in is amazing. Or try almond extract instead of vanilla for a different vibe. Orange blossom water? Ooh, fancy!
- Feeling Spicy? Especially around Christmas or autumn, a little pinch of cinnamon or nutmeg in with the flour adds a lovely warmth.
Let’s Get Our Bake On! The How-To Bit:
Ready to actually make these beauties using this awesome Viennese biscuits recipe? Let’s go!
- Cream the Butter and Sugar
In a large bowl, beat the softened butter and powdered sugar until light and fluffy. It should look pale and creamy. Make sure the butter is really soft before starting. - Add the Dry Ingredients
Sift in the flour, cornstarch, and a pinch of salt. Gently fold everything together with a spatula until no dry flour remains. Don’t overmix—stop once it’s combined to keep the biscuits tender. - Pipe the Dough
Spoon the dough into a piping bag fitted with a large star tip (like Wilton 1M). Line your baking sheets with parchment paper, then pipe out swirls, rosettes, or straight lines. If the dough is too firm, let it rest for 5–10 minutes to soften. - Bake
Preheat your oven to 350°F (175°C) or 160°C fan. Bake for 12–15 minutes until the edges just start turning golden. The tops should stay light. Let them sit on the tray for 5 minutes before transferring to a wire rack to cool completely. - Decorate or Serve
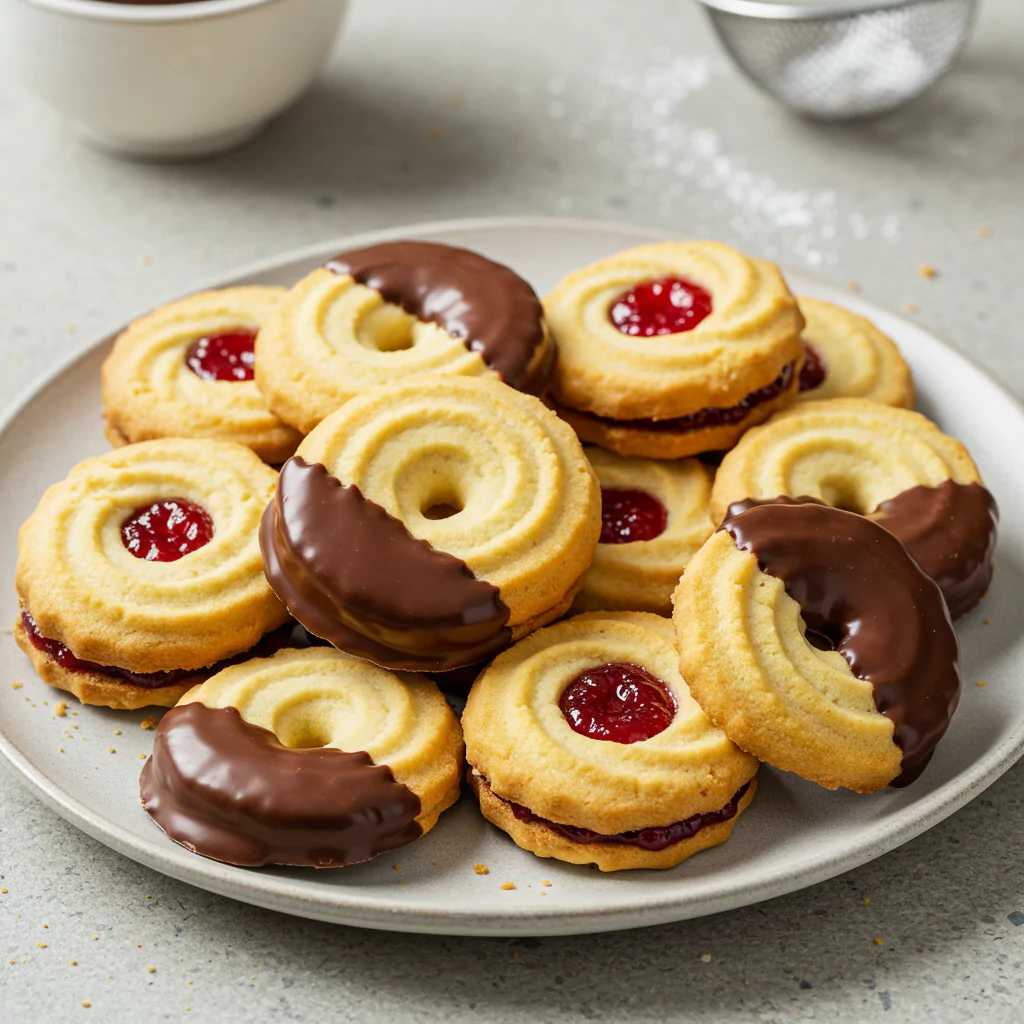
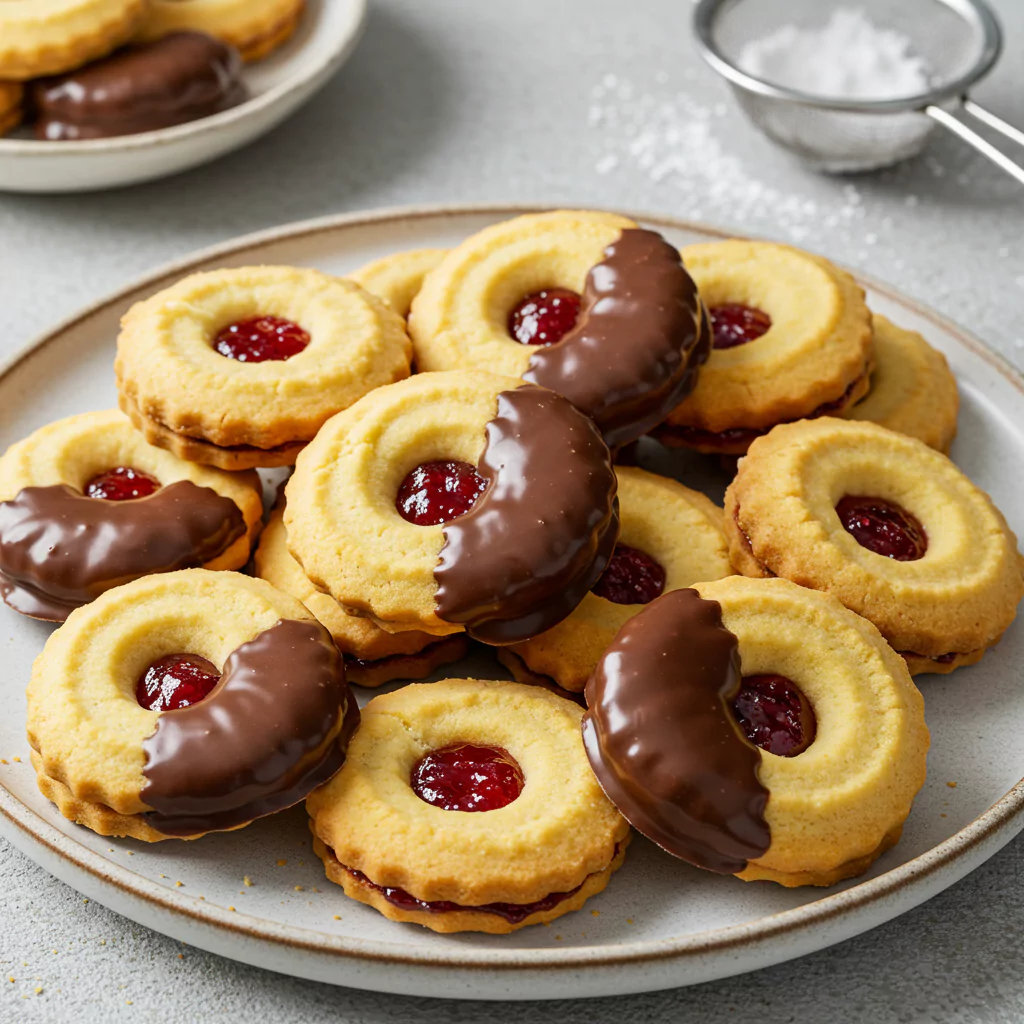
Once cool, dip or drizzle with melted chocolate, sandwich with jam, or enjoy plain. Serve with a cup of tea or coffee and enjoy your buttery homemade Viennese biscuits.
Showing Off Your Handiwork:
Want them to look Insta-ready?
- A little dusting of powdered sugar just before serving is like fairy dust – instant fancy!
- Don’t just pile them up; arrange them nicely on a plate. It makes a difference!
- If you did the chocolate thing, maybe sprinkle some chopped nuts (pistachios look great!) or even edible glitter on before it sets? Ooh la la.
Keeping Them Yummy (If They Somehow Survive):
Okay, hypothetically, if you don’t eat them all at once:
- Countertop Crew: Once cool, stash them in an airtight container. They’ll be good for up to a week (but I bet they won’t last that long!). The old ‘slice of bread in the container’ trick can help keep them from getting too dry if you live somewhere dry.
- Freeze ‘Em Raw: Best way to make ahead! Pipe the dough onto a lined tray, freeze solid, then chuck the frozen dough shapes into a freezer bag. Bake straight from frozen when you need a fix – just add maybe 2-3 extra minutes to the baking time. Genius!
- Revival Time: If they get a bit soft after a few days, a quick 3-5 minutes in a low oven (like 300°F/150°C) will bring back some crispness. Let them cool again though!
Let’s Get Crazy (Recipe Riffs):
Think of this Viennese biscuits recipe as your delicious starting point!
- Double Chocolate Dip: Dip one end in dark, the other in white. Why choose?
- Nutty Professor: Fold finely chopped toasted almonds or hazelnuts right into the dough. Yum!
- Coffee Break: Add a teaspoon of instant espresso powder dissolved in the vanilla extract for a mocha vibe. Dip in dark chocolate, obviously.
- Holiday Cheer: A bit of peppermint extract in the dough, dip in white chocolate, sprinkle with crushed candy canes. So festive!
See? Endless possibilities!
The Final Word…
Honestly, biting into a truly good, homemade Viennese biscuit is one of life’s simple pleasures. They’re light, they’re buttery, they’re just… good. And knowing you made them yourself with this super easy Viennese biscuits recipe? Even better. So go on, grab that butter, preheat that oven, and prepare for some serious deliciousness. You’ve totally got this! Happy baking, friend!
Recipes You May Like
viennese biscuits recipe

Easy Viennese biscuits recipe for buttery, melt-in-mouth swirls! Learn how to bake these classic Austrian treats. Perfect for beginners. Get baking today!
Ingredients
- 230g unsalted butter (softened – leave it out for an hour so it’s squishy!)
- 60g powdered sugar (that fine, dreamy icing sugar)
- 160g all-purpose flour (the regular kind you’ve got in the pantry)
- 30g cornstarch (the secret to that tender melt – don’t skip it!)
- 1 tsp vanilla extract (for that cozy, warm flavor)
- A tiny pinch of salt (just a little to make everything pop)
Instructions
- In a large bowl, beat the softened butter and powdered sugar until very light and fluffy.
- Sift together the flour, cornstarch, and salt over the butter mixture.
- Gently fold with a spatula until no dry flour remains; stop as soon as combined.
- Transfer dough to a piping bag fitted with a large star tip. Line baking sheets with parchment.
- Pipe swirls, rosettes, or lines, leaving space between each. If dough is firm, rest 5–10 minutes.
- Preheat oven to 350°F (175°C) or 160°C fan. Bake 12–15 minutes until edges are just pale golden.
- Let biscuits sit on the tray 5 minutes, then transfer to a wire rack to cool completely.
- Once cool, dip or drizzle with melted chocolate, sandwich with jam, or serve plain
Notes
- Use very soft (not melted) butter for best texture.
• Swap a 1:1 gluten-free flour blend for a GF version; use vegan butter for a dairy-free option.
• Lemon zest or a pinch of warm spice (cinnamon/nutmeg) are nice variations.
Nutrition Information:
Yield:
20 servingsAmount Per Serving:Calories: 120 calories per biscuit